
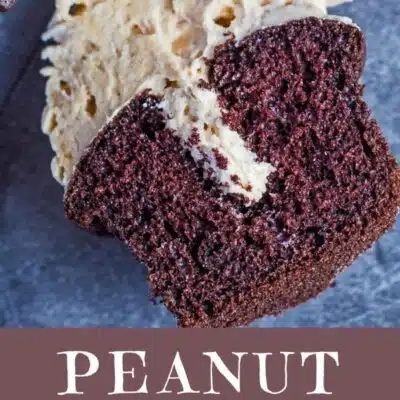
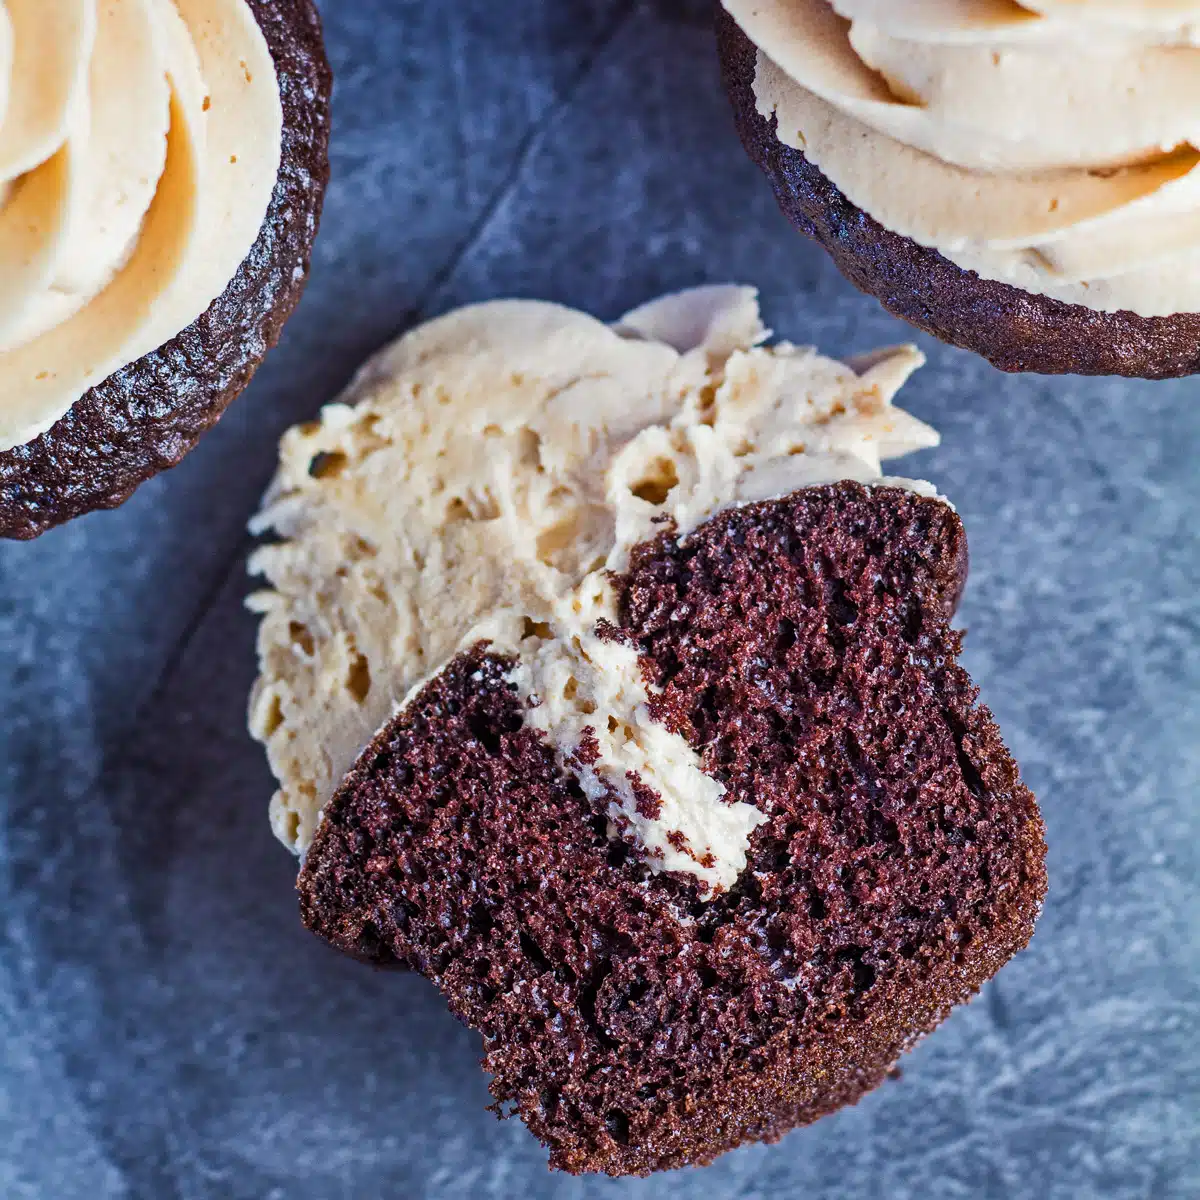
Peanut butter filled cupcakes are a wonderfully moist treat to bake up for any occasion, or just because you are craving some peanut butter! The soft chocolate cake base and rich peanut butter buttercream frosting are sure to please all the chocolate and peanut butter lovers in your life! With the delightful surprise of creamy peanut butter in every bite, these cupcakes always come highly requested!
Easy Peanut Butter Filled Cupcakes
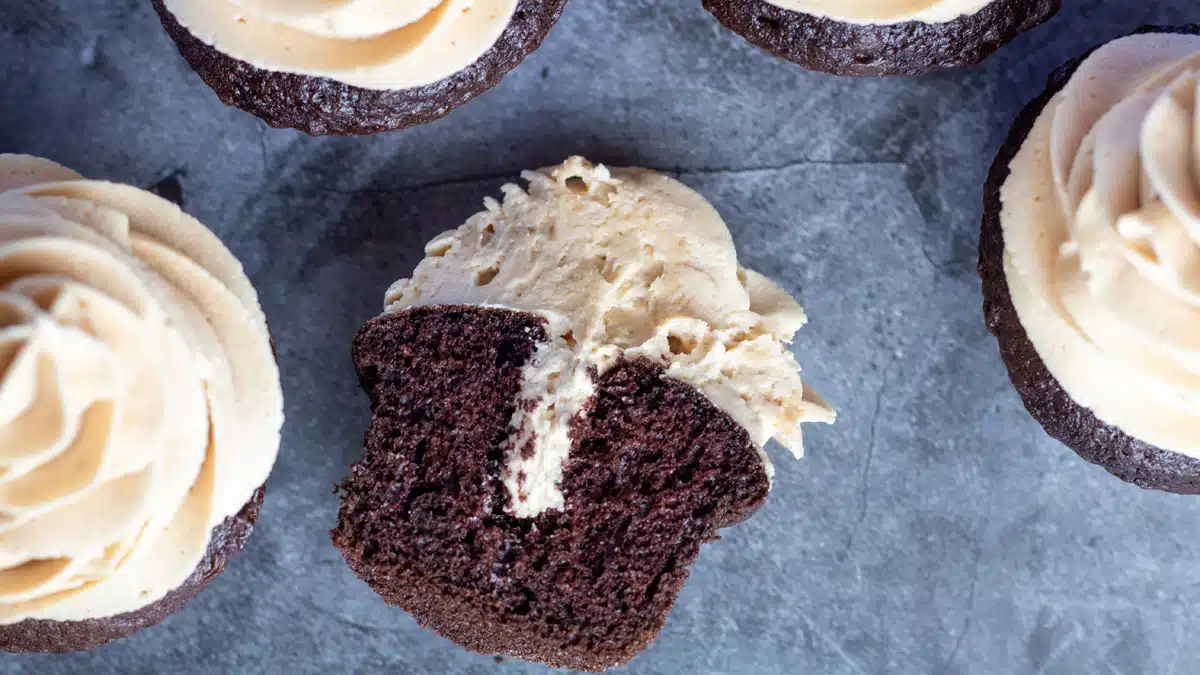
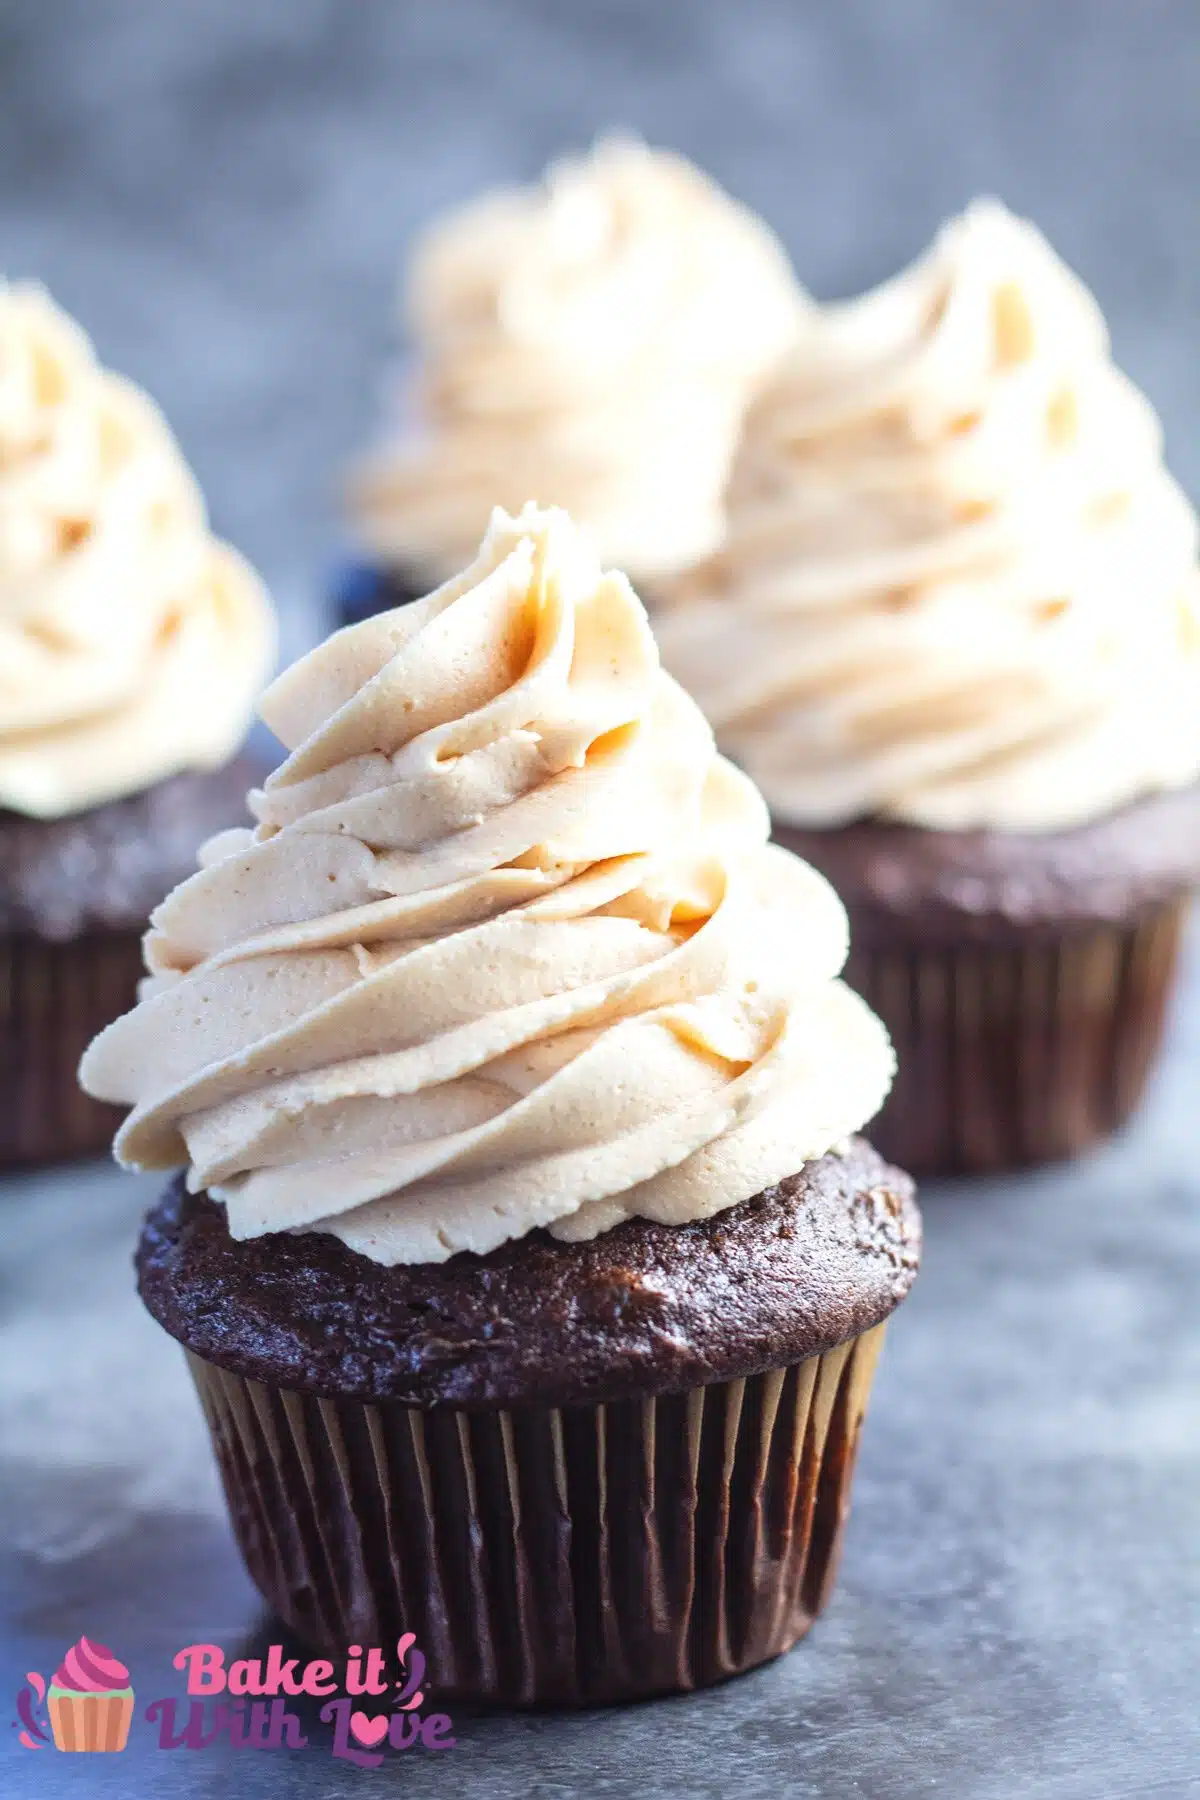
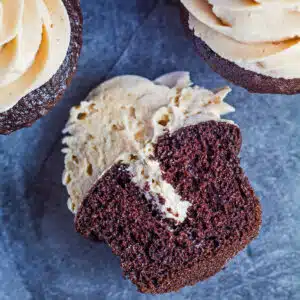
These peanut butter-filled cupcakes are moist, fluffy, and made with the classic combination of chocolate and peanut butter! They're perfect for bringing to any gathering, party, or special occasion.
The creamy peanut butter buttercream frosting on the inside of each cupcake is always a delightful surprise when someone takes a bite. These cupcakes are sure to make your go-to list of easy desserts once you see how much everyone enjoys them!
Jump to:
🥘 Peanut Butter Filled Cupcakes Ingredients
It may seem like a long list of ingredients required to make this delicious recipe. However, if you love to bake, you may already have most of these basic baking items already!
Chocolate Cupcakes
- All-Purpose Flour - 2 cups of all-purpose flour (spooned and leveled).
- Sugar - 2 cups of sugar.
- Cocoa Powder - ¾ cup of unsweetened cocoa powder.
- Baking Powder - 2 teaspoons of baking powder.
- Baking Soda - 1 ½ teaspoon of baking soda.
- Salt - 1 teaspoon of salt.
- Espresso Powder (optional) - ½ tablespoons of espresso powder. I highly recommend it to enhance the rich flavor of the chocolate.
- Milk - 1 cup of milk (warmed to room temperature).
- Coconut Oil - ½ cup of coconut oil (or your preferred vegetable oil, or melted butter).
- Eggs - 2 large eggs (beaten, at room temperature).
- Vanilla Extract - 3 teaspoons of vanilla extract. Use 100% pure vanilla for the best flavor.
- Water - 1 cup water (boiling).
Peanut Butter Buttercream Frosting
- Butter - 1 cup of butter (softened, at room temperature).
- Creamy Peanut Butter - 1 cup of creamy peanut butter.
- Vanilla Extract - 1 teaspoon of vanilla extract. Pure vanilla yields the best flavor.
- Salt (optional) - 1 pinch of salt. Optional, to balance the sweetness.
- Confectioners Sugar - 3 cups of confectioners, aka powdered, sugar.
- Milk - 2 tablespoons of milk.
*Be sure to see the free printable recipe card below for ingredients, exact amounts & instructions with tips!*
🔪 How To Make Peanut Butter Filled Cupcakes
In only 15 of active prep and cooking time, these peanut butter cupcakes are beginner-friendly! To get started, take out a stand mixer (or electric mixer), a muffin tin, a silicone whisk, measuring cups, and mixing bowls.
This peanut butter cupcake recipe yields 20 servings. If you are making these for a large gathering, it's easy to double up on the ingredients!
Prepare The Cupcakes
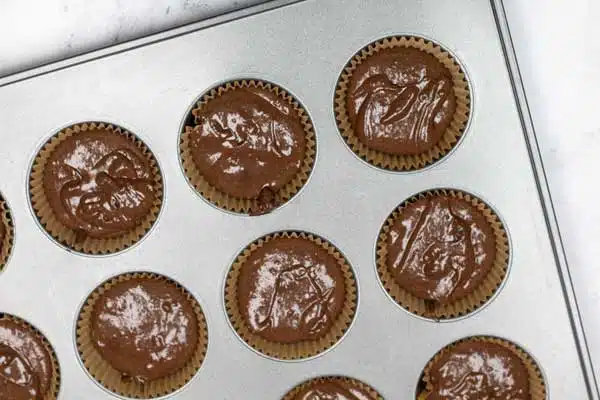
- Prep. Preheat your oven to 350°F (175°C) then lightly grease the divots or cavities of your muffin tin or line them with cupcake liners.
- Mix dry ingredients. Combine your dry ingredients until well combined (I used a whisk to mix, or you can sift the cocoa powder after you measure). Include the optional ½ tablespoons of espresso powder or swap your ¾ cup unsweetened cocoa powder for Dutch process cocoa to achieve the best possible chocolate flavor.
- Add wet ingredients. Create a well in the center of the dry ingredients and pour the liquid ingredients into it: 2 large beaten eggs, 1 cup of milk, ½ cup of coconut or vegetable oil, and 3 teaspoons of vanilla extract. Mix well.
- Add boiling water. After mixing your batter, add 1 cup of boiling water.
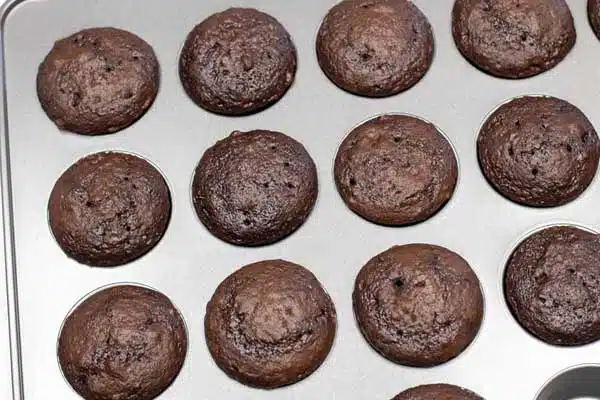
- Bake. In your preheated oven, bake at 350°F (175°C) for 15-20 minutes or until an inserted toothpick comes out clean. *The toothpick, knife, or cake tester may still have crumbs on it but should not be wet or gummy.
- Cool. Remove from the oven and allow the cupcakes to cool in the pan for a few minutes before popping them out of the pan and cooling them completely on a wire rack.
Make the Peanut Butter Buttercream
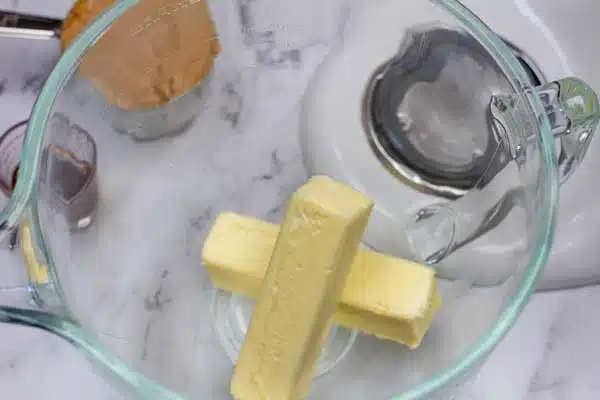
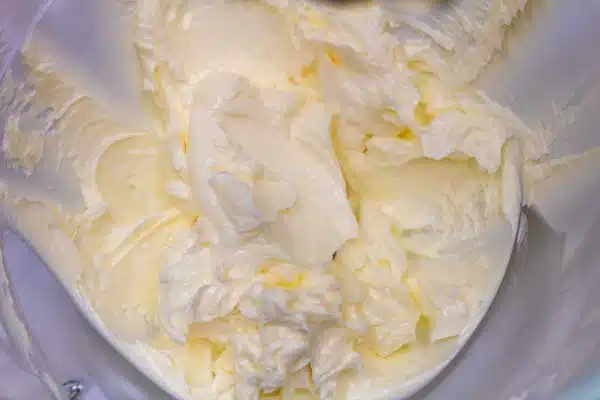
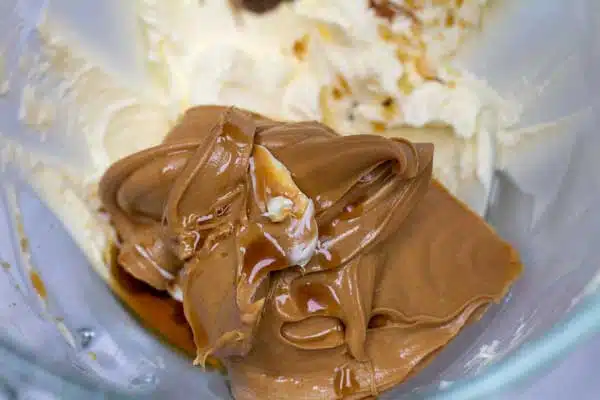
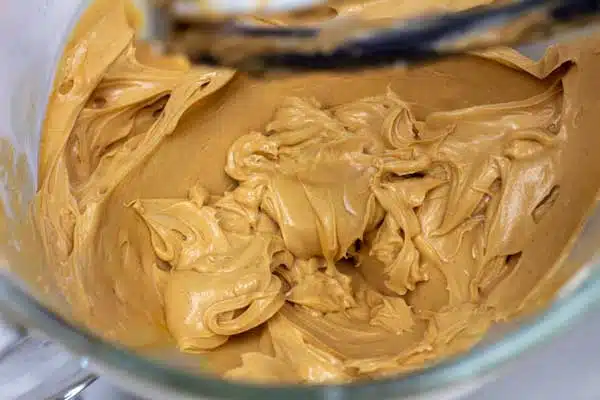
- Beat butter. In a large mixing bowl or the bowl of a stand mixer, whip the 1 cup of butter for 2 full minutes until you get a smooth consistency. Then, add the 1 cup of creamy peanut butter and beat for an additional minute or two.
- Add ingredients. Add in the 1 teaspoon of vanilla extract and a pinch of salt and beat until smooth again.
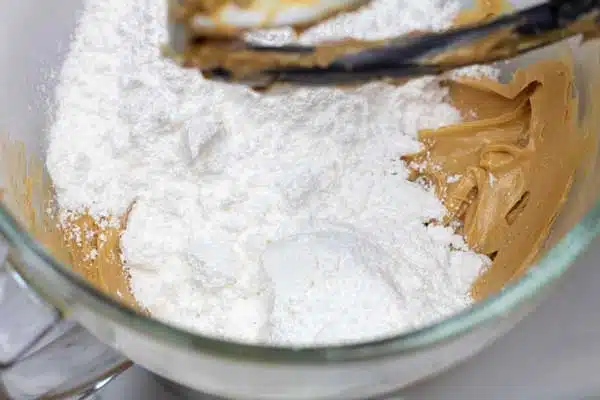
- Add sugar. Add the 3 cups of confectioners' sugar in 1-cup portions gradually while mixing at medium speed.
- Add milk. Drizzle 2 tablespoons of milk into the frosting as needed to get a smooth consistency. Make sure to scrape down the sides and bottom of the bowl while you mix in order to include all of the powdered sugar.
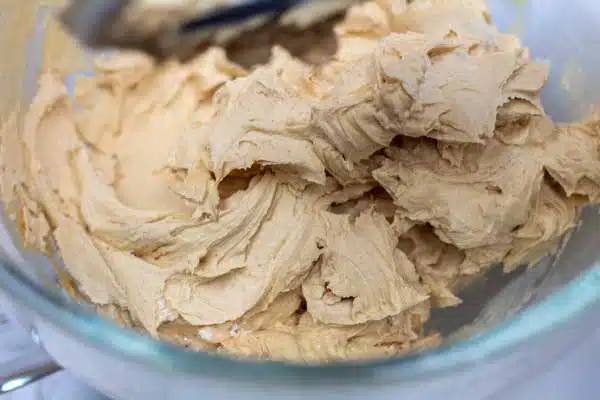
- Whip frosting. Increase the speed of the mixer to high and allow it to whip the frosting for 1-2 minutes, or until it reaches a creamy and smooth texture.
Assemble the Peanut Butter Filled Cupcakes
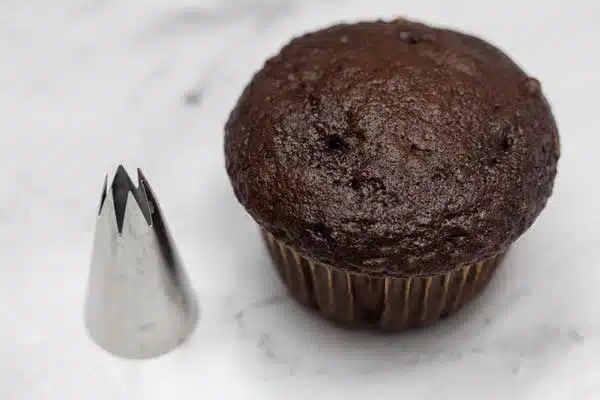
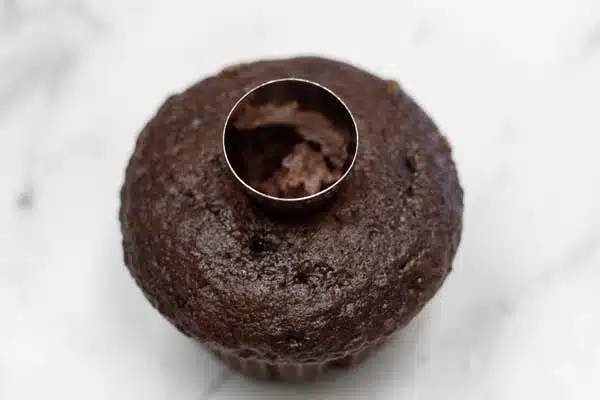
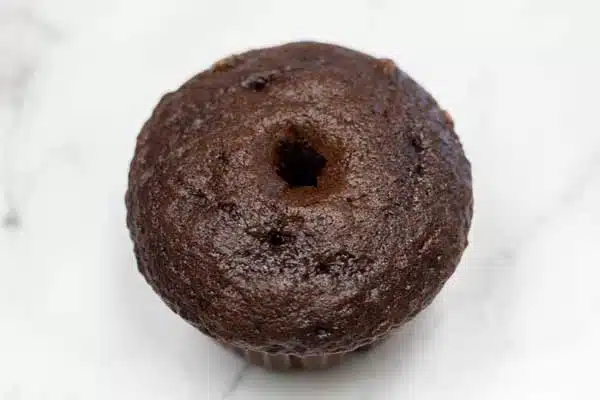
- Make a hole. Once the cupcakes have cooled completely, use a large piping tip, an apple corer, or a knife to make a hole in the center of each chocolate cupcake.
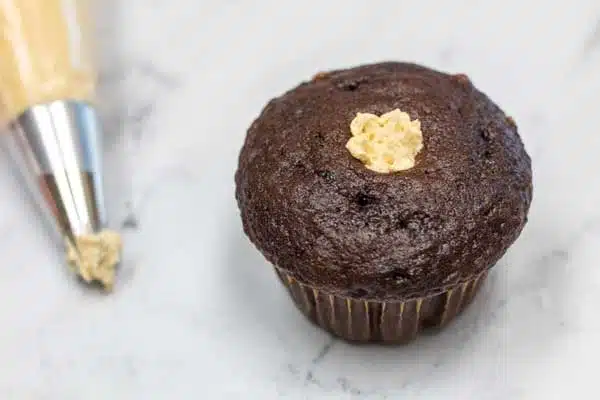
- Frost cupcakes. Transfer your peanut butter frosting into a piping bag or a plastic storage bag, then snip the tip for piping into the cupcakes. Fill each cupcake and frost the tops.
If you are not a fan of peanut butter or have an allergy, you can easily make a different flavor of frosting! Vanilla bean buttercream frosting, chocolate buttercream frosting, and vanilla buttercream frosting are equally delectable and easy to make. Enjoy!
💭 Angela's Tips & Recipe Notes
- Make sure to allow your cupcakes to completely cool before frosting. This will take at least 2 hours. I prefer to refrigerate the cupcakes once they have cooled before adding the crumb coat.
- You can also use a spoon to core your cupcakes, or simply fill the cupcakes with a narrow piping tip (without coring them).
- If using a knife or spoon to core your cupcakes, don't try to be a perfectionist! The small cored hole will end up getting larger and then the cupcakes will crumble.
🥡 Storing
Place your peanut butter cupcakes in an airtight container at room temperature for up to 24 hours, or in the fridge for up to 3 days.
Before frosting, tightly wrap your cupcakes in plastic wrap, and freeze them for no more than three months. Allow the cupcakes to thaw overnight in the fridge before frosting and serving.
❓ Recipe FAQs
Technically yes, but I would advise against it in this recipe. If you are wanting to fill a cupcake before baking, you need a filling that won't dissolve or deteriorate while cooking. Chocolates or cream cheese-based fillings work best.
No! If you don't have any piping bags handy to use for this recipe, that's totally fine! Although it helps with precision, you could totally just cut open the corner of a plastic storage bag to pipe the cupcakes!
Absolutely! These cupcakes will keep in the freezer for up to 3 months. I strongly advise that if you are going to freeze the cupcakes, make sure that you don't frost them. You can simply dethaw the cupcakes in the fridge overnight and frost them the next day!
>>>>See all of my recipes here<<<<
🧁 More Tasty Cupcake Recipes
- Vanilla Bean Cupcakes - These cupcakes are full of classic vanilla flavor that everyone loves!
- Mary Berry Chocolate Cupcakes - The perfect cupcake recipe for all of the chocoholics out there!
- Easter Basket Cupcakes - Fun and cute Easter cupcakes that are fun to make with little helpers!
- Orange Crush Soda Cupcakes - A unique citrus cupcake topped with a soda-infused buttercream frosting!
- Root Beer Cupcakes - Soft, moist cupcakes full of root beer and cream soda flavors!
- Vanilla Funfetti Cupcakes - Tasty red, white, and blue cupcakes are perfect for the 4th of July or any day of the week!
Do you love a recipe you tried? Please leave a 5-star 🌟rating in the recipe card below and/or a review in the comments section further down the page.
Stay in touch with me through social media @ Pinterest, Facebook, Instagram, or Twitter! Subscribe to the newsletter today (no spam, I promise)! Don't forget to tag me when you try one of my recipes!
📖 Recipe Card
Peanut Butter Filled Cupcakes
Ingredients
Chocolate Cupcakes
- 2 cups all-purpose flour (spoon and leveled)
- 2 cups sugar
- ¾ cup unsweetened cocoa powder
- 2 teaspoon baking powder
- 1 ½ teaspoon baking soda
- 1 teaspoon salt
- ½ tablespoon espresso powder (optional)
- 1 cup milk (warmed to room temperature)
- ½ cup coconut oil (or your preferred vegetable oil, or melted butter)
- 2 large eggs (beaten, at room temperature)
- 3 teaspoon vanilla extract
- 1 cup water (boiling)
Peanut Butter Buttercream Frosting
- 1 cup butter (softened, at room temperature)
- 1 cup creamy peanut butter
- 1 teaspoon vanilla extract
- 1 pinch salt (optional)
- 3 cups confectioners sugar
- 2 tablespoon milk
(Note: 2x or 3x only changes the ingredient list)
Instructions
Prepare the Cupcakes
- Preheat your oven to 350°F (175°C) then lightly grease the divots or cavities of your muffin tin or line them with cupcake liners.
- Combine your dry ingredients until well combined (I used a whisk to mix, or you can sift the cocoa powder after you measure). Include the optional espresso powder or swap your unsweetened cocoa powder for Dutch process cocoa to achieve the best possible chocolate flavor.
- Create a well in the center of the dry ingredients and pour the liquid ingredients into it: beaten eggs, milk, coconut or vegetable oil, and vanilla extract. Mix well.
- After mixing your batter, add 1 cup of boiling water.
- In your preheated oven, bake at 350°F (175°C) for 15-20 minutes or until an inserted toothpick comes out clean. *The toothpick, knife, or cake tester may still have crumbs on it but should not be wet or gummy.
- Remove from the oven and allow the cupcakes to cool in the pan for a few minutes before popping them out of the pan and cooling them completely on a wire rack.
Make the Peanut Butter Buttercream
- In a large mixing bowl or the bowl of a stand mixer, whip the butter for 2 full minutes until you get a smooth consistency. Then, add the creamy peanut butter and beat for an additional minute or two.
- Add in the vanilla extract and pinch of salt and beat until smooth again.
- Add the confectioners' sugar in 1-cup portions gradually while mixing at medium speed.
- Drizzle milk into the frosting as needed to get a smooth consistency. Make sure to scrape down the sides and bottom of the bowl while you mix in order to include all of the powdered sugar.
- Increase the speed of the mixer to high and allow it to whip the frosting for 1-2 minutes, or until it reaches a creamy and smooth texture.
Assemble the Peanut Butter Filled Cupcakes
- Once the cupcakes have cooled completely, use a large piping tip, an apple corer, or a knife to make a hole in the center of each chocolate cupcake.
- Transfer your peanut butter frosting into a piping bag or a plastic storage bag, then snip the tip for piping into the cupcakes. Fill each cupcake and frost the tops.
Notes
- Make sure to allow your cupcakes to completely cool before frosting. This will take at least 2 hours. I prefer to refrigerate the cupcakes once they have cooled before adding the crumb coat.
- You can also use a spoon to core your cupcakes, or simply fill the cupcakes with a narrow piping tip (without coring them).
- If using a knife or spoon to core your cupcakes, don't try to be a perfectionist! The small cored hole will end up getting larger and then the cupcakes will crumble.
- To store: Place your peanut butter cupcakes in an airtight container at room temperature for up to 24 hours, or in the fridge for up to 3 days.
- To freeze: Before frosting, tightly wrap your cupcakes in plastic wrap, and freeze them for no more than three months. Allow the cupcakes to thaw overnight in the fridge before frosting and serving.
Darcy says
Can you make the frosting in advance and how would you store it?
Angela @ BakeItWithLove.com says
Yes, you can make the frosting and place it in an airtight storage container to store in the fridge. It can last for up to a week, but keep in mind that if you will potentially be storing cake leftovers you probably shouldn't keep it in the refrigerator for more than 2-3 days. (you can also cover your bowl with cling film as long as there isn't anything putting off odors that could affect the flavor of your frosting)