

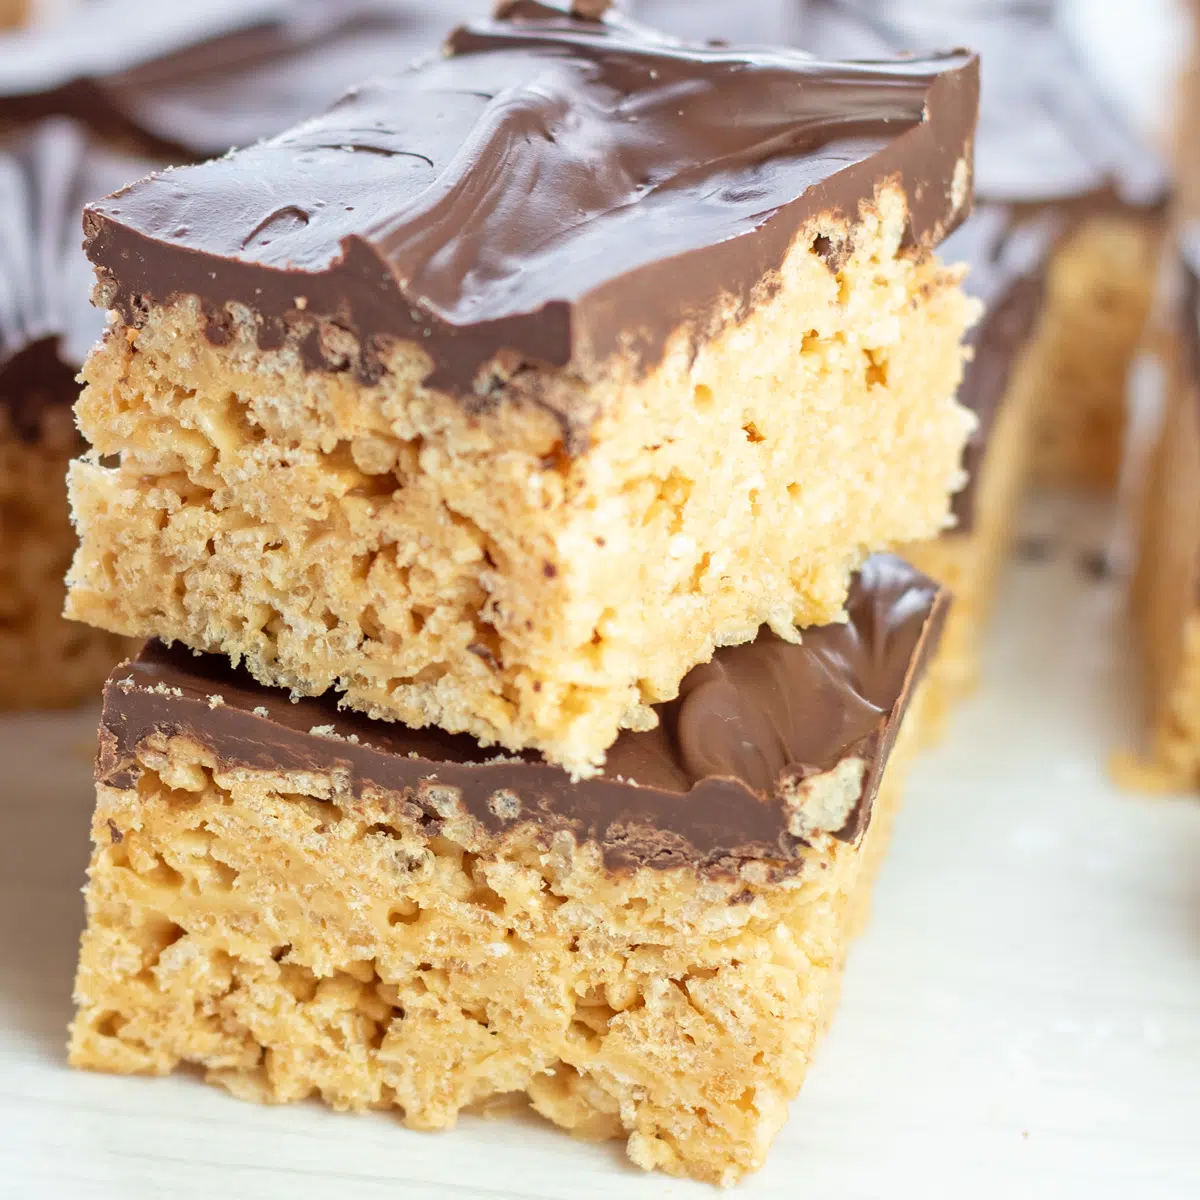
These chocolate peanut butter Rice Krispies treats are an easy-to-make dessert that satisfies adults and kids alike! Buttery Rice Krispies cereal is flavored with creamy peanut butter and coated with decadent chocolate. You won’t be able to keep your hands off these yummy cereal treats!
Peanut Butter Rice Krispies Treats with Chocolate Recipe
I’ve always been a sucker for Rice Krispies treats! The sweet, crispy cereal coated in melted marshmallows and butter is always delicious. They’re even better when you make them at home so that you can put your own spin on them!
I take these no-bake treats up a notch by adding one of my favorite flavor combos: peanut butter and chocolate! The creamy peanut butter gets folded in with the marshmallows and butter, then melted chocolate is spread all over the top. It doesn’t get more indulgent than that!
Jump to:
- Peanut Butter Rice Krispies Treats with Chocolate Recipe
- ❤️ Why I Love This Recipe
- 🥘 Chocolate Peanut Butter Rice Krispies Treats Ingredients, Notes, & Substitutions
- 📖 Variations
- 🔪 How To Make Chocolate Peanut Butter Rice Krispies Treats
- 🍴 What To Serve With Rice Krispies Treats
- 💭 Tips & Notes
- 🥄 Make Ahead Options
- 🥡 Storing
- ❓ FAQ
- 😋 More Cereal Treats!
- 📖 Recipe Card
- 💬 Reviews
Of course, this is one of the most kid-friendly desserts ever! Kids love the chewy, crispy treats. It’s a great way to let them help in the kitchen, too!
❤️ Why I Love This Recipe
A Dessert Classic! Rice Krispies treats have been around forever, they are always a flavor in my house!
Perfect Flavor Combo! Chocolate peanut butter lovers, this one’s for you. These treats are packed full of that delightful flavor combination!
Super Easy Recipe! It only takes about 10 minutes to prepare these no-bake treats. The best part is you can make it all in the microwave!
🥘 Chocolate Peanut Butter Rice Krispies Treats Ingredients, Notes, & Substitutions
Rice Krispies treats are such a quick and easy dessert to make! It uses simple ingredients, like Rice Krispies, that you can easily find in your local grocery store!
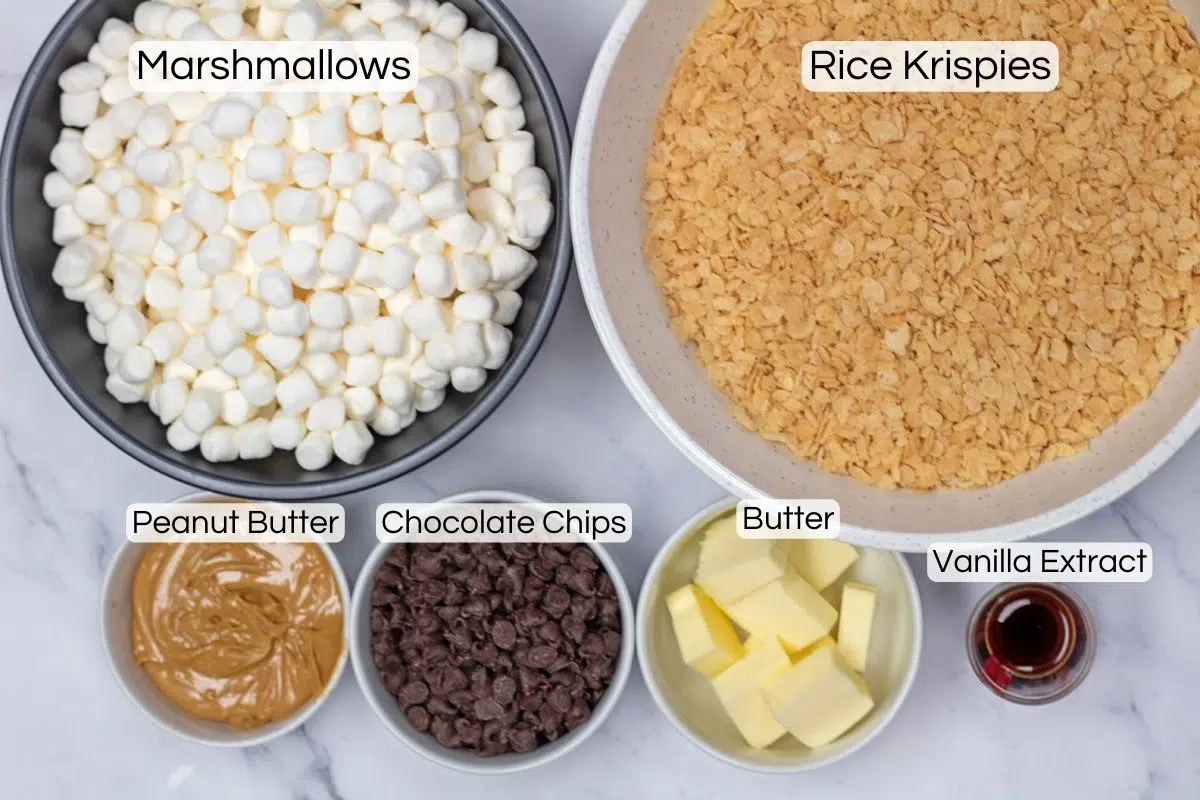
- Butter – ½ cup of butter equals 1 stick of butter. I prefer to use salted butter for the Rice Krispies treats.
- Mini Marshmallows – 15 ounces of mini marshmallows. This is equivalent to about 1½ 10-ounce bags of mini marshmallows. You can reserve 1 cup of the mini marshmallows to mix in later if desired.
- Vanilla Extract – Use ½ tablespoon of vanilla extract. 100% percent pure vanilla extract if you can! It’ll give the best flavor to our Rice Krispies treats.
- Peanut Butter – ½ cup of peanut butter. I prefer to use creamy peanut butter for these treats. It blends more easily into the cereal and marshmallows.
- Rice Krispies Cereal – 9 cups of Rice Krispies or any puffed rice cereal! 9 Cups equals about one 12-ounce box of Rice Krispies cereal.
- Semi-Sweet Chocolate Chips – 3 cups of chocolate chips. You can also use 1 10 to 12-ounce bag of chocolate chip morsels.
*Be sure to see the free printable recipe card below for ingredients, exact amounts & instructions with tips!*
📖 Variations
There are so many variations on Rice Krispies treats that you can make! Here are some of my favorites:
Double Chocolate – Use Cocoa Pebbles or another chocolate puffed rice cereal instead of traditional Rice Krispies for an extra chocolatey twist!
White Chocolate – Skip the peanut butter and substitute white chocolate chips for the semi-sweet chocolate chips. The white chocolate topping complements the Rice Krispies so well!
Mix-Ins – If desired, you can fold in candy like M&Ms, Reese’s Pieces, Oreos, or any of your favorites! Just make sure the mixture isn’t too hot before adding it so that it doesn’t melt the candy.
Different Cereals – You can make cereal treats with almost any breakfast cereal! Rice-based cereals like Rice Krispies, Fruity Pebbles, or Cocoa Pebbles work the best. Corn Pops, Trix, Fruit Loops, Cheerios, and Lucky Charms are also tasty!
🔪 How To Make Chocolate Peanut Butter Rice Krispies Treats
One of my favorite things about Rice Krispies treats is how you can make most of the recipe right in the microwave! There isn’t any fancy equipment needed, just a mixing bowl, silicone spatula, and a 9x13 dish.
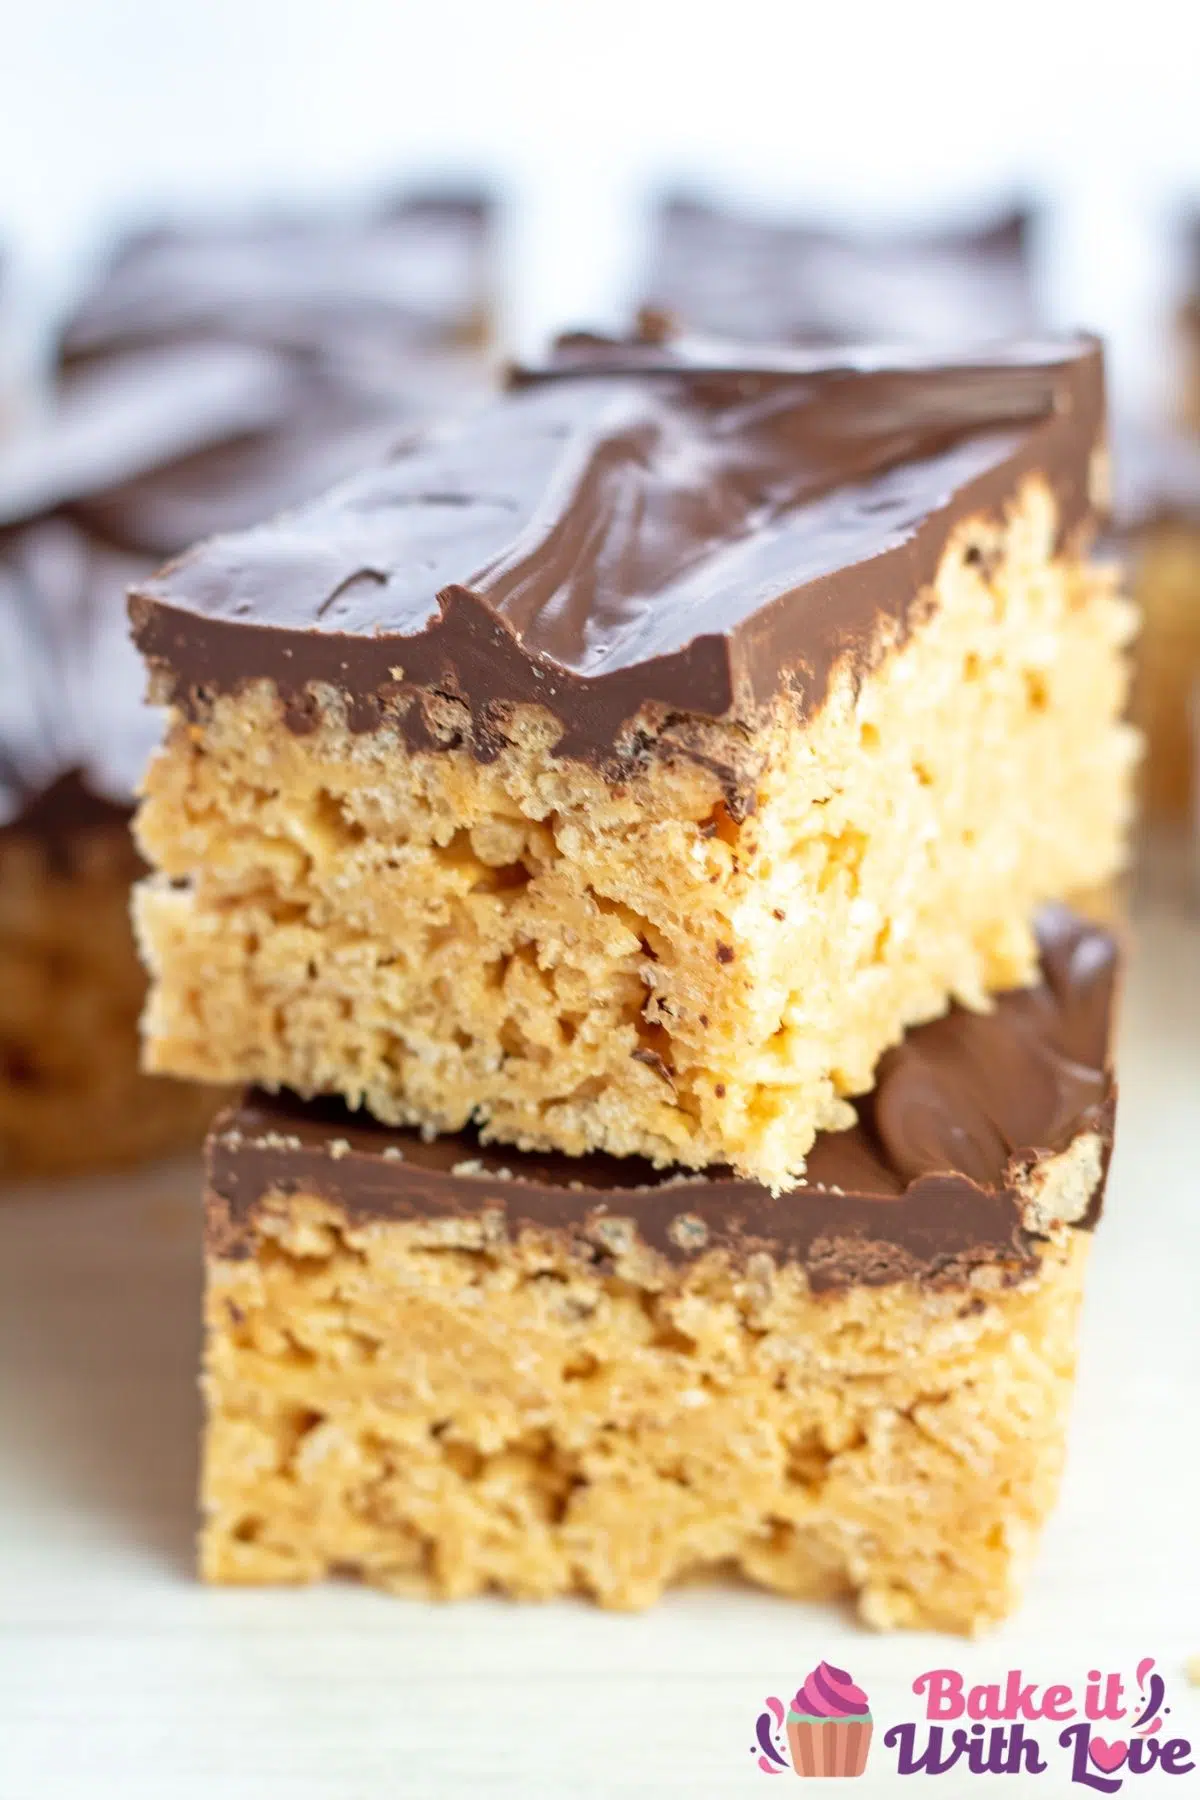
You can slice your bars into 24 servings or make them bigger for 12-16 bars!
- Prepare. Start by buttering a 9x13 baking pan, or line it with parchment paper for easy removal of your Rice Krispies treats.
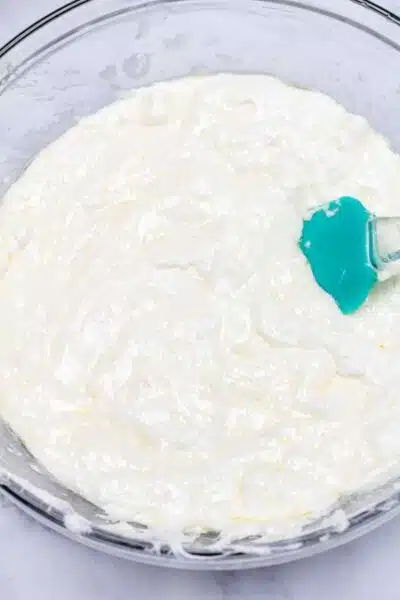
- Stovetop Instructions: Heat a large saucepan to medium to melt the ½ cup (1 stick/113 grams) of salted butter. Once the butter is melted, add 15 ounces (425 grams) of mini marshmallows and stir to coat them in the melted butter. Then continue stirring until the marshmallows have all melted and remove from heat.
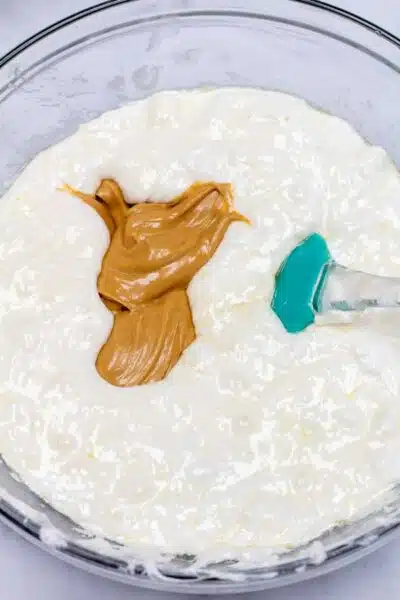
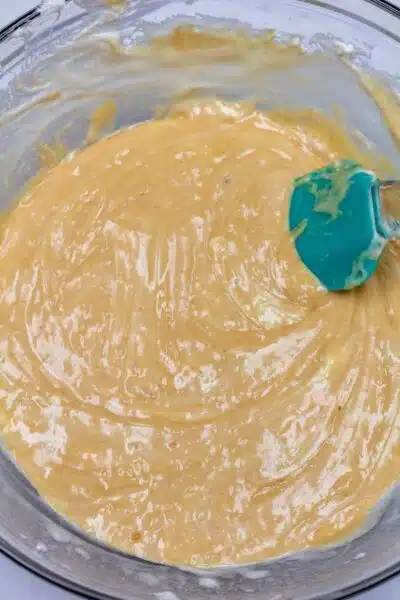
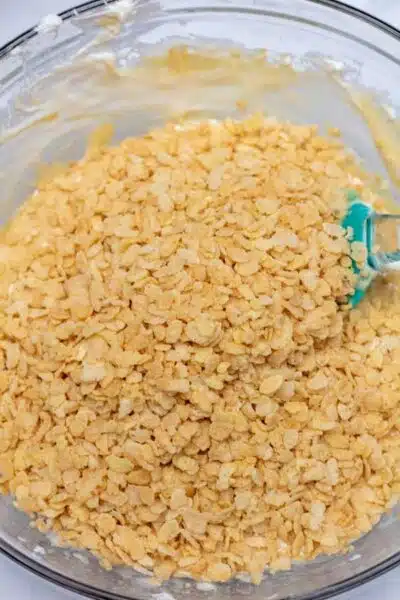
Microwave instructions: Combine 15 ounces (425 grams) of mini marshmallows and ½ cup (1 stick/113 grams) of butter in a large microwave-safe mixing bowl. Then, heat for 1 minute on high power, stir, then continue heating in 30-second increments until the marshmallows are melted. - Add remaining ingredients. Add ½ tablespoon (7 milliliters) of vanilla extract and ½ cup (129 grams) of creamy peanut butter to the melted marshmallow and butter mixture. Stir until the mixture is creamy and completely smooth. Next, gently fold in 9 cups (252 grams) of Rice Krispies and the remaining 1 cup of mini marshmallows (if desired) until well-coated.
Transfer, Melt Chocolate & Set

- Press into pan. Once thoroughly coated, transfer the mixture into your prepared pan. Then, using a buttered spatula, a sheet of wax paper, or your fingers (buttered or dampened with water) gently press the Rice Krispies into an even layer. Do not pack the cereal firmly, as this will create hard Rice Krispies treats.
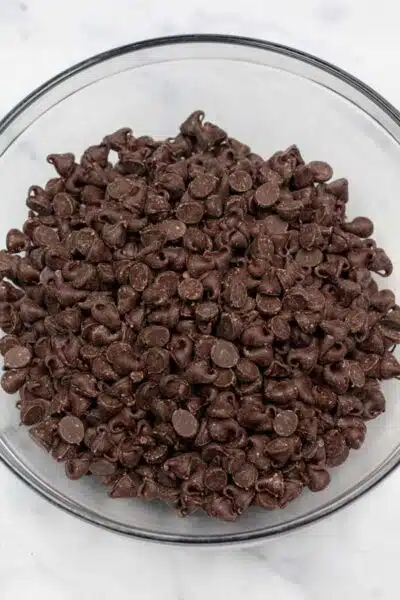
- Make chocolate topping. To make the chocolate topping, place 3 cups (540 grams) of semi-sweet chocolate chips into a microwave-safe bowl. Then, heat for 1 minute on high heat, stirring, then continuing to heat in 30-second increments. Be sure to stir in between each heating until the chocolate morsels are almost completely melted.
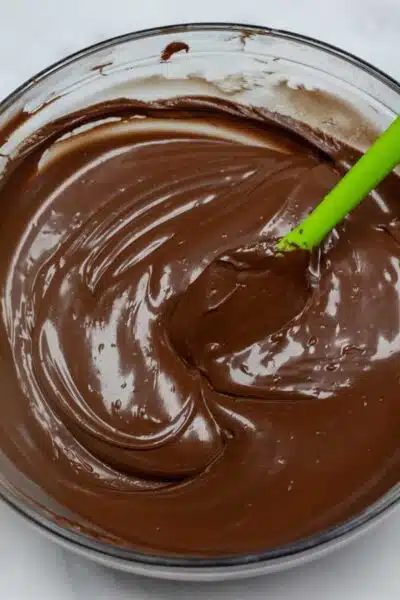
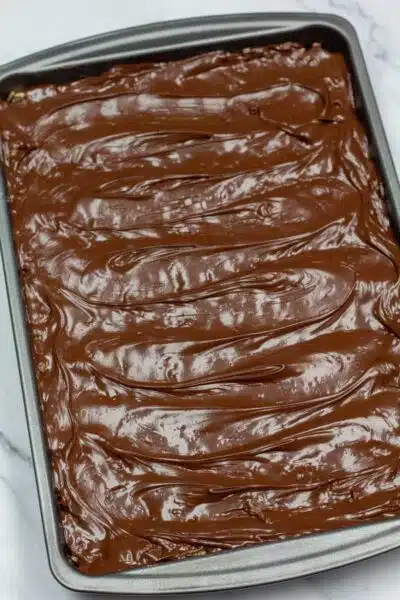
- Coat the treats. Once almost fully melted, take the chocolate from the microwave and stir the mixture until smooth and shiny. Then, pour the melted chocolate over your 9x13 pan of peanut butter Rice Krispies treats. Use a knife or spatula to spread the melted chocolate over the top of the treats.
- Cool. Set the treats aside and allow them to cool and set up for 1 to 2 hours before slicing and serving.
🍴 What To Serve With Rice Krispies Treats
Chocolate peanut butter Rice Krispies Treats are the perfect dessert or snack! Serve them just as, or with a tall glass of milk for a satisfying sweet treat!
I like to serve these at parties and other festivities, along with some other easy party desserts and party appetizers! Enjoy!
💭 Tips & Notes
- Don’t pack down the treats too firmly! Otherwise, your treats will be packed too densely and become hard instead of chewy.
- 3 cups of chocolate make for the perfect layer! I like this amount because it’s substantial enough, but the thick and chewy Rice Krispies treats still shine.
- Use parchment when storing for best results. I recommend putting sheets of parchment or wax paper between layers of Rice Krispies treats when you’re preparing to store.
🥄 Make Ahead Options
If desired, you can make these treats in advance and store them in the freezer for up to 3 months. Wrap them tightly with plastic wrap (individually) and place them in an airtight container or bag. (Note: This will yield a harder Rice Krispies treat, so I recommend making them fresh).
Defrost treats on your counter for 15 minutes before serving (or longer, to let them soften up some more).
🥡 Storing
I recommend storing these Rice Krispies treats at room temperature, as keeping them in the fridge will make them hard. The treats are freshest within 4 days, but they’ll keep for up to a week!
Keep your Chocolate Peanut Butter Rice Krispies Treats in a sealed, airtight container for maximum freshness!
>>>>See all of my recipes here<<<<
❓ FAQ
Typically, if your treats are falling apart, there is too much marshmallow in your mixture. You need just enough cereal so that the squares stay together perfectly. I recommend following the instructions and not deviating to ensure the perfect result!
I highly recommend using salted butter for this recipe! Not only does it provide extra flavor to the treats, but the salt in the butter also helps to preserve them for longer than unsalted butter.
If your cereal bars are too hard, you might have packed them into the 9x13 dish too much. It's important that you don't pack them down too tightly. On the other hand, you may have used stale/old marshmallows or cereal.
😋 More Cereal Treats!
- Lucky Charms Marshmallow Treats - These tasty treats are made with Lucky Charms cereal (and marshmallows) instead of puffed rice cereal.
- Fruity Pebbles Treats - Imagine classic Rice Krispies treats, but made with colorful and fun fruity pebbles!
- Rainbow Rice Krispies Treats - Make your cereal bars more fun and festive by layering them with rainbow colors.
- Candy Corn Rice Krispies Treats - These Rice Krispies treats have candy corn mixed in for a perfect fall-time treat!
- Peanut Butter Rice Krispies Treats - Skip the chocolate and enjoy your peanut butter-packed bars!
Do you love a recipe you tried? Please leave a 5-star 🌟rating in the recipe card below and/or a review in the comments section further down the page.
Stay in touch with me through social media @ Pinterest, Facebook, Instagram, or Twitter! Subscribe to the newsletter today (no spam, I promise)! Don't forget to tag me when you try one of my recipes!
📖 Recipe Card

Chocolate Peanut Butter Rice Krispies Treats
Ingredients
- ½ cup butter (salted, 1 stick or 8 tablespoons)
- 15 oz mini marshmallows (1 ½ 10 ounce bags, reserve 1 cup of marshmallows to mix in later if desired)
- ½ tablespoon vanilla extract
- ½ cup peanut butter
- 9 cups Rice Krispies cereal
- 3 cups semi-sweet chocolate chips (or use a 10 to 12-ounce bag of morsels)
Instructions
- Butter a 9x13 baking pan or line it with parchment paper for easy removal of your cereal treats.
- Stovetop Instructions: Heat a large sauce pan to medium and melt the ½ cup of butter. Add the 15 ounces of marshmallows once the butter is melted and stir to coat them in the melted butter. Continue stirring until the marshmallows have melted then remove from heat.Microwave Instructions: Combine the marshmallows and butter in a large microwave-safe mixing bowl. Heat for 1 minute on high power, stir, then continue heating in 30-second increments until the marshmallows are melted.
- Add ½ tablespoon of vanilla extract and ½ cup of creamy peanut butter then stir until creamy and smooth. Gently fold in the 9 cups of Rice Krispies and the remaining 1 cup of marshmallows and until well coated.
- Transfer the mixture into your prepared pan, then use a buttered spatula, a square of waxed paper, or your fingers (buttered or dampened with water) to gently press the Rice Krispies mixture into an even layer in the pan. *Do not pack the cereal in firmly, as this will create hard Rice Krispies cereal treats.
- Melt the 3 cups by placing them into a microwave-safe bowl and heating for 1 minute on high heat, stirring, then continuing to heat in 30-second increments. Stir between each heating until the morsels are almost completely melted.
- Remove from the microwave and stir until smooth, then pour over your 9x13 pan of peanut butter Rice Krispies treats. Use a knife or spatula to spread the melted chocolate over the top of the treats.
- Set the treats aside and allow them to cool and set up for 1-2 hours before slicing and serving.
Notes
- Do not press down too firmly when evening out in the pan, this prevents your treats from being packed too densely (which will make them hard).
- I prefer to use 3 cups of semi-sweet chocolate chips for a topping layer that is substantial enough in comparison to my thick and chewy treats.
- Store in an air tight container at room temperature.
- Refrigerating any Rice Krispies treat will turn your treats hard quickly.
- Room temperature chocolate peanut butter Rice Krispies treats will last up to 4 days for best freshness, but edible if they're still on the counter days 5,6, or 7. 🙂


Comments
No Comments