

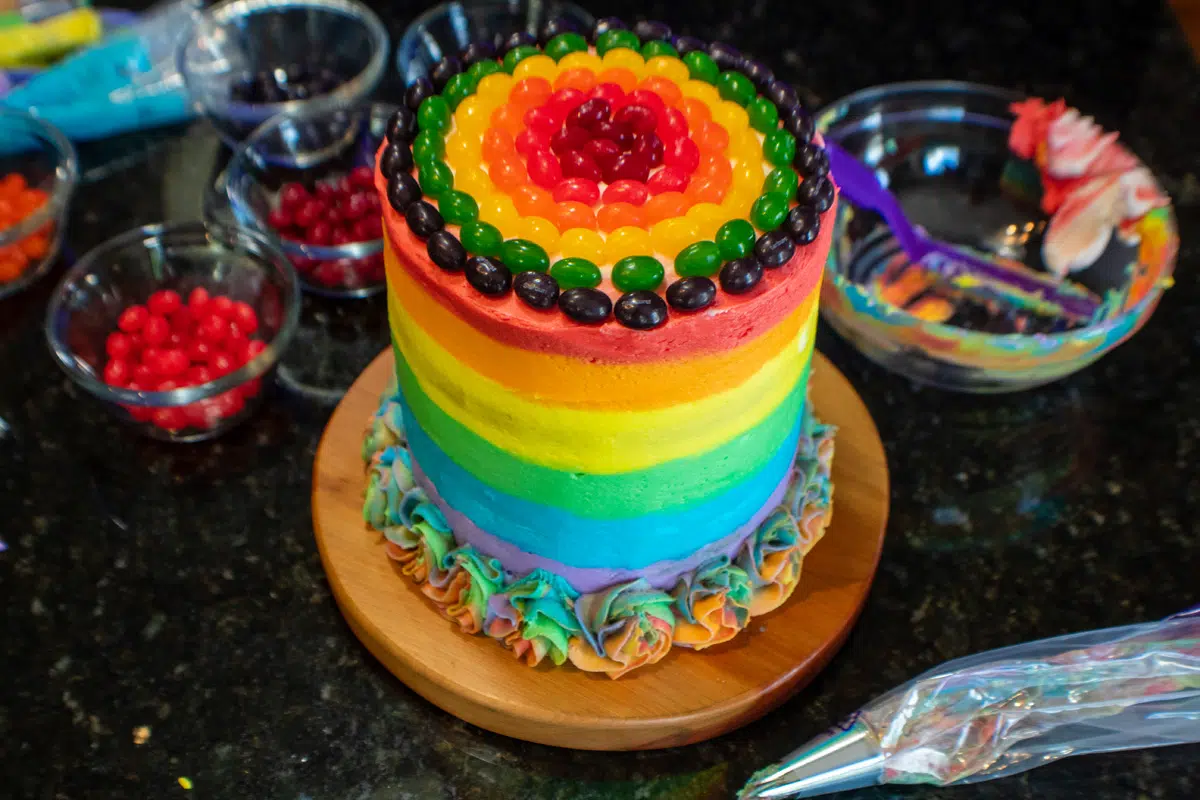
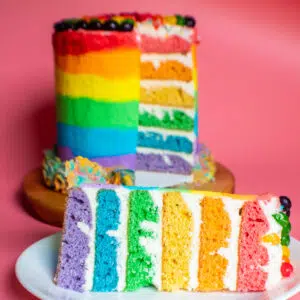
This delightful rainbow layer cake is a wonderful dessert for birthdays, holidays, or any celebration because it's lots of fun (to make and eat)! This 6-layer, 6-inch cake with rainbow ombre frosting and jelly bean topping is guaranteed to put a smile on everyone's face!
For similar desserts, see my rainbow drip cake, my easy rainbow swirl cake and even these rainbow Rice Krispies treats.

If you've been a long-time follower here at Bake It With Love, then you know I love making fun and festive rainbow desserts! There's just something about them that brings a smile to my face!
This easy cake recipe looks harder than it is, so even a novice baker can whip up a beautiful, brightly colored cake that looks like it came from the bakery!
Jump to:
🥘 Ingredients
You'll find that all of the ingredients are pretty standard cake ingredients. You could always purchase some buttercream frosting, but my recipe is super easy and better than the store-bought stuff!
- All-Purpose Flour - 2 ¼ cups of flour.
- Sugar - 1 ⅓ cups of granulated sugar.
- Baking Powder - 3 teaspoons of baking powder (not baking soda).
- Salt - ½ a teaspoon.
- Milk- 1 cup of milk at room temperature.
- Butter - ½ a cup of butter melted and cooled.
- Eggs - 2 large room-temperature eggs.
- Vanilla Extract - 2 teaspoons of vanilla.
- Gel Food Coloring - 5-6 colors of your choice.
- Vanilla Buttercream Frosting - 1 ½ batches of my recipe.
- Rainbow Colored Mini Jelly Beans - Just grab a bag and sprinkle as few or as many as you like.
*Be sure to see the recipe card below for ingredients, amounts & instructions!*
🔪 How To Make A Rainbow Layered Cake
Yes, there are a lot of steps, but they are all very simple! You will need 6-inch baking pans, a mixing bowl, a stand or hand mixer, and a silicone spatula.
This recipe will yield about 12 cake servings.
- Prep. Preheat your oven to 350°F (175°C) and lightly grease and flour your baking pans, or spray with non-stick baking spray.
- Mix. In a large mixing bowl or the bowl of your stand mixer, measure out 2 ¼ cups all-purpose flour, 1 ⅓ cups sugar, 3 teaspoons of baking powder, and ½ a teaspoon of salt. Whisk or mix to distribute the flour evenly, then form a well in the center of the mixture.
- Add liquid ingredients. Pour 1 cup of milk, ½ a cup of butter, 2 large eggs, and 2 teaspoons of vanilla extract directly into the well in the center of the dry ingredients and mix at medium speed for 2 minutes or until smooth.
- Divide the batter. Separate the batter into 5 or 6 equal portions in small bowls and add gel food coloring to each one to create your desired colors.
- Bake. Place the cakes on the middle of your oven's center rack and bake at 350°F (175°C) for 18-20 minutes or until an inserted toothpick, knife, or cake tester comes out clean.
- Cool. Remove from the oven when done, and allow the cakes to cool in the pans for 5 minutes before transferring to a wire cooling rack to cool completely.
Assembling The Rainbow Cake (5 or 6 Layer)
- Layer. After the cakes are fully cooled, mix 1 ½ batches of vanilla buttercream frosting and level each of the cakes. Spread a thin spot of buttercream at the center of the base of your cake plate or cake board and start layering the cakes.
- Apply crumb coat. Pipe frosting between each layer of cake and stack them 5-6 high. Then, apply your crumb coat approximately ¼-inch thick on the top and sides of the assembled cake. Chill in the refrigerator to set the crumb coat.
- Color the frosting. Portion the frosting into 5 or 6 equal amounts (equivalent to how many layers you have). Color the frosting to match the corresponding layer.
- Frost. Pipe or spread the colored frosting with the appropriate cake layer, and then in concentric circles starting in the center of the top of the cake. Smooth and blend the colors together. If desired, pipe a bottom border. (see my post on how to frost a cake for more detailed instructions)
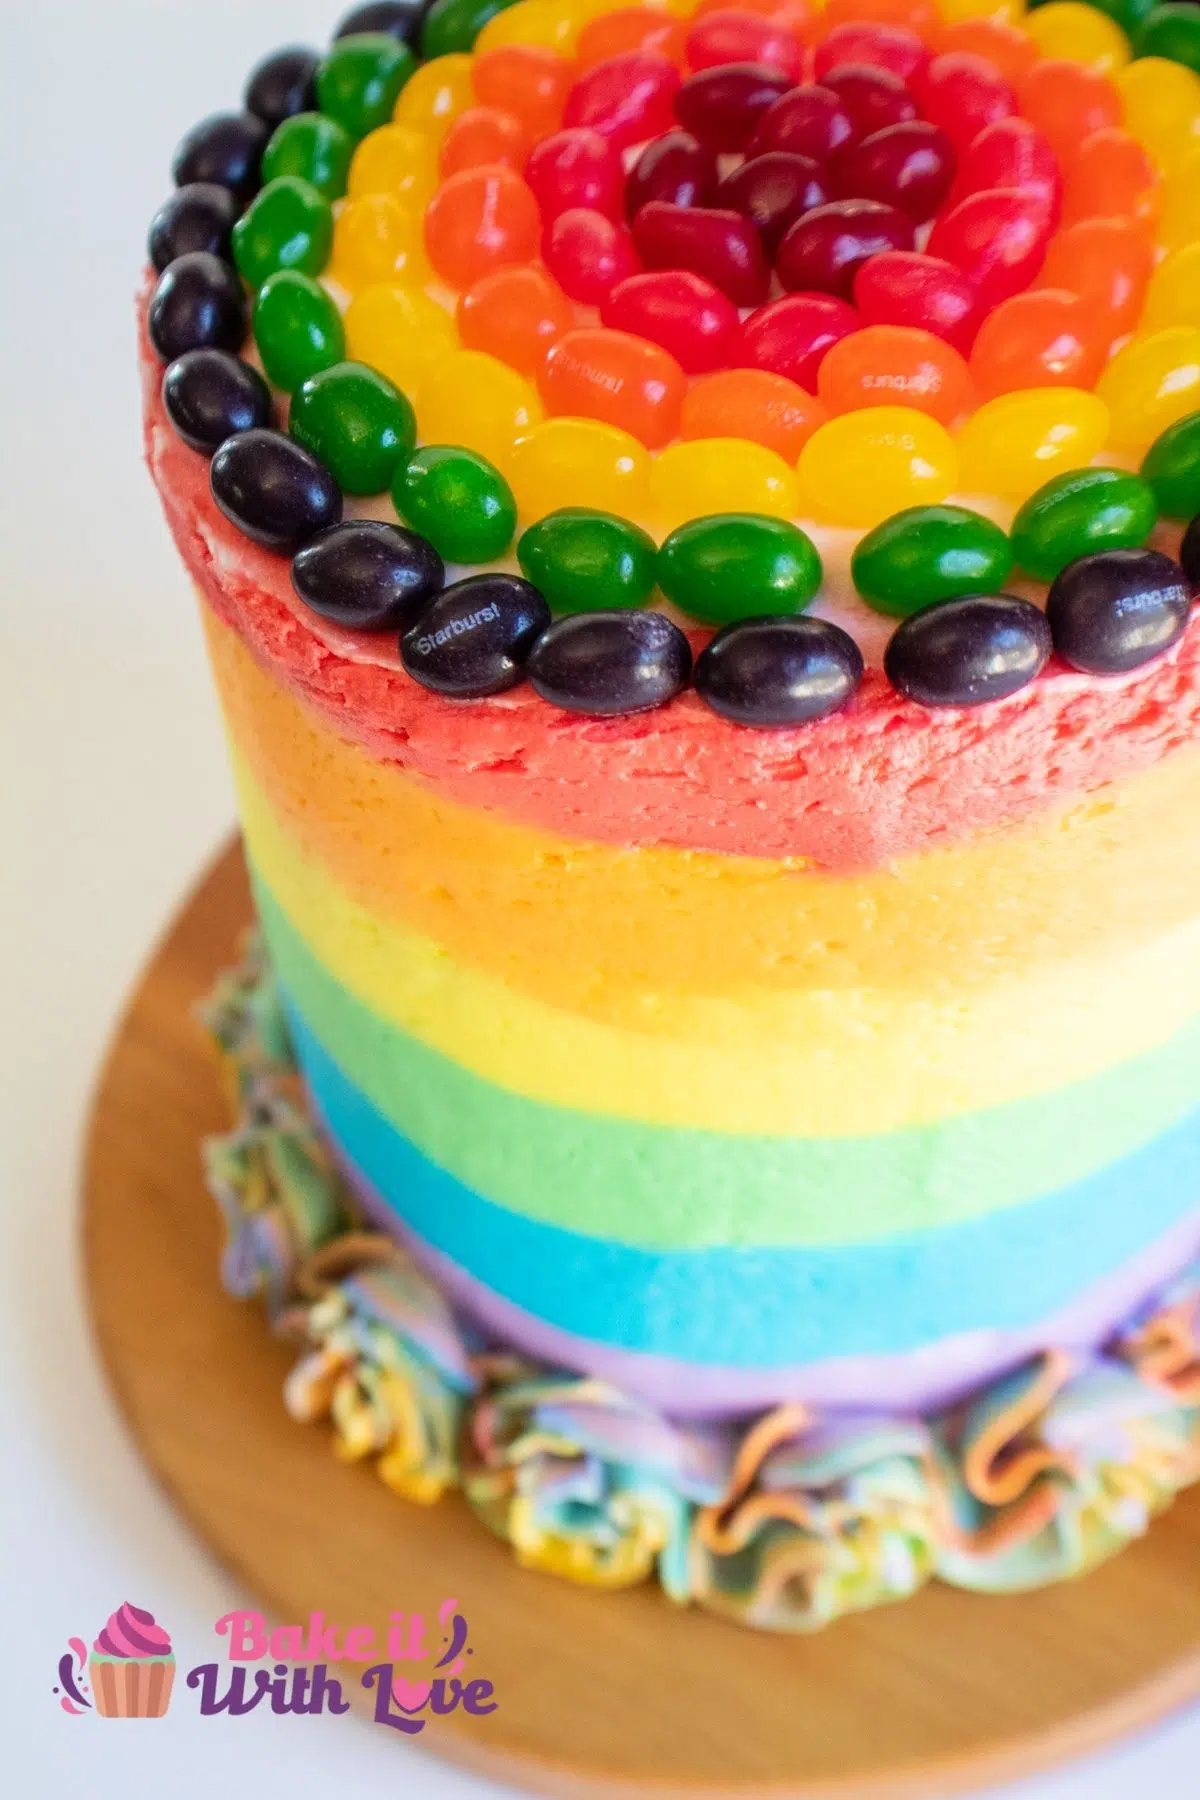
- Add topping. Add matching mini jelly beans to the top of the cake, arranged to mimic the colors of the frosting. Store for later, or slice and serve.
This candy-covered rainbow cake is as fun to look at as it is to eat! It's perfect for birthday parties, graduation parties, baby showers, you name it. Enjoy!
💭 Tips & Notes
- Color Customization: Get creative with your cake's color scheme. You can create stripes using two different colors or an ombre effect with varying shades of the same color. Choose colors that match your theme or occasion for a personalized touch.
- Frosting Quantity: It's better to have extra frosting than not enough. Typically, only half a batch or less of frosting is needed for the crumb coat. Prepare a full batch of frosting for decorating to avoid the hassle of mixing and color-matching a new batch mid-decorating.
- Storing the Cake: Store your rainbow cake at room temperature for up to 4 days. Keep it in a cake box or an airtight container to maintain its freshness and prevent it from drying out.
🍰 More Tasty Cakes
- Mandarin Orange Cake
- Pineapple Upside Down Bundt Cake
- Jamaican Rum Cake
- Irish Apple Cake with Vanilla Custard
- Homemade White Cake
- Banana Pudding Poke Cake
Do you love a recipe you tried? Please leave a 5-star 🌟rating in the recipe card below and/or a review in the comments section further down the page.
Stay in touch with me through social media @ Pinterest, Facebook, Instagram, or Twitter! Subscribe to the newsletter today (no spam, I promise)! Don't forget to tag me when you try one of my recipes!
📖 Recipe Card
Rainbow Layer Cake
Ingredients
- 2 ¼ cups all-purpose flour
- 1 ⅓ cups sugar
- 3 teaspoon baking powder
- ½ teaspoon salt
- 1 cup milk (at room temperature)
- ½ cup butter (melted, cooled)
- 2 large eggs (at room temperature)
- 2 teaspoon vanilla extract
- gel food coloring (5-6 colors of your choice)
- 1 ½ recipe vanilla buttercream frosting
- rainbow color mini jelly beans
Instructions
- Preheat your oven to 350°F (175°C) and lightly grease and flour your baking pans, or spray with non-stick baking spray.
- In a large bowl or the bowl of your stand mixer measure out the dry ingredients (all-purpose flour, sugar, baking powder, and salt). Whisk or mix to distribute the flour. Form a well in the center of your dry mixture.
- Pour the milk, melted and cooled butter, eggs, and vanilla extract into the center of the dry ingredients then mix at medium speed for 2 minutes until smooth.
- Divide the batter into either 5-6 equal portions in small bowls and add gel food coloring to create your desired colors. Transfer the batter into your prepared baking pans.
- Bake on the middle of your oven's center rack at 350°F (175°C) for 18-20 minutes or until an inserted toothpick, knife, or cake tester comes out clean.
- Remove from the oven when done and allow the cakes to cool in the pans for 5 minutes before transferring to a wire cooling rack to cool completely.
Assembling The Rainbow Cake (5 or 6 Layer)
- Once the cakes are cooled, mix your buttercream frosting and level each of the cooled cakes. Spread a thin spot of buttercream on the base of your cake plate or your cake board and start layering the cakes.
- Pipe frosting between each color cake layer as you stack them 5-6 high then apply your crumb coat to the top and sides of the layered cake. The crumb coat should be approximately ¼-inch thick. Chill in the refrigerator to set the crumb coat.
- Portion out 5-6 equal amounts of your frosting, depending on how many cake layers you have. Color the frosting to match your cake layers.
- Pipe or spread the colored frosting on the matching cake layers and then in concentric circles starting in the center of the top of the cake. Smooth and blend the frosting colors together. Pipe a bottom border if desired.
- Top the cake with matching mini jelly bean colors that are arranged on the top of the cake in circles, to match the frosting.
Notes
- I typically use a half batch or less of the frosting for the crumb coat, but I like to have plenty of my frosting ready for decorating. Since having to mix a new set of frosting and color it to match (if you run out) as best as possible is frustrating, I mix 1 full recipe just for the decorating.
- Your rainbow cake can be stored at room temperature for up to 4 days.
Comments
No Comments