

Bright, fun, and festive snow cone cake pops are easy to mix up, roll, and decorate for all of your favorite summertime parties. Go with the red white and blue Fourth of July theme, or pick your birthday kid's favorite colors. Whatever you pick, these snocone-style treats are going to get rave reviews.
For more red, white, and blue treats, check out my 4th of July dessert recipes, such as my vanilla funfetti cupcakes or cherry chip cake batter cookies.

Jump to:
How fun are these cake pops?! They are perfect for summertime in general but also make an exciting treat for the 4th of July.
What's even better is that they can be completely customized with your favorite cake flavors, without altering their appearance. They are a hit every single time I serve them!
🥘 Ingredients

- Cake - One standard-sized cake (9x13, two 8-inch rounds, etc). Go ahead and bake it as directed, and then let it cool.
- Frosting - Use your preferred variety and flavor of frosting. It can be storebought, homemade buttercream, or cream cheese frosting.
- Almond Bark - Almond bark melts really nicely with no additional ingredients. If using melting wafers or candy melts, you may need to thin out the chocolate with a small amount of coconut oil. You could also use white chocolate.
- Sanding Sugar - You will need red, white, and blue sanding sugar. Of course, you can make these in any color you like.
- Paper Souffle Cups - Half-ounce paper souffle cups are the perfect size for this treat. If you use larger ones, they won't look the same. I ordered mine online because I couldn't find this size in stores.
- Treat Sticks - You can find lollipop or treat sticks in the cake decorating aisle of most grocery stores.
Be sure to see the free printable recipe card below for ingredients, exact amounts & instructions with tips!
🔪 How To Make Snow Cone Cake Pops
These photo-worthy cake pops are shockingly easy to make. You will need a stand mixer (or your hands), a kitchen scale, and a cup or bowl for melting chocolate.
This recipe will make 28 cake pops.
Make the Cake Pop Dough
Make your cake. Prepare your cake according to the boxed directions or make a cake from scratch. Bake like normal and let it cool completely before getting started.
Break up the cake. Once cooled, break up your 1 cake and place the pieces into the bowl of your stand mixer. *You can also do this process by hand, but it takes longer.
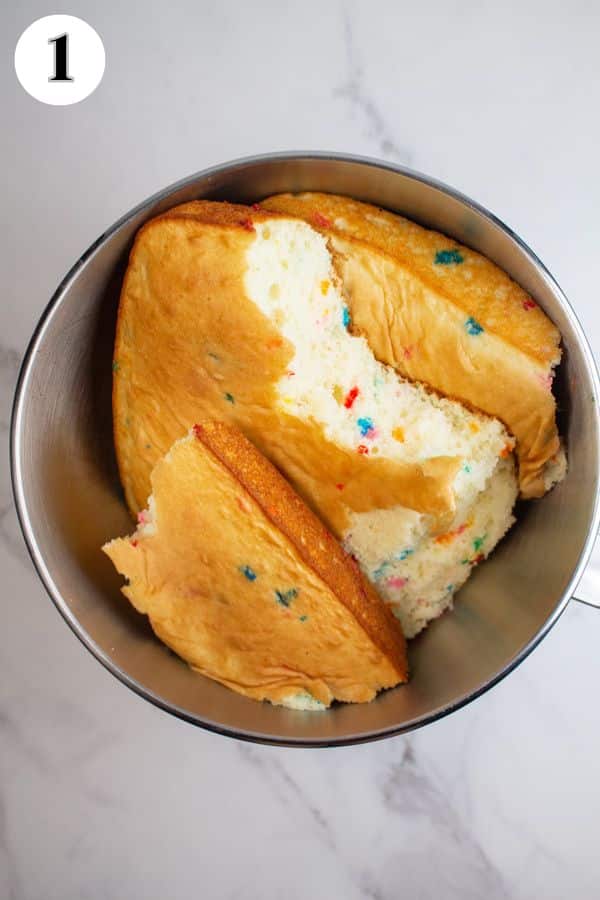

Crumble. Using the paddle attachment, turn the mixer on low speed. Let the cake mix until it is crumbled into small pieces.
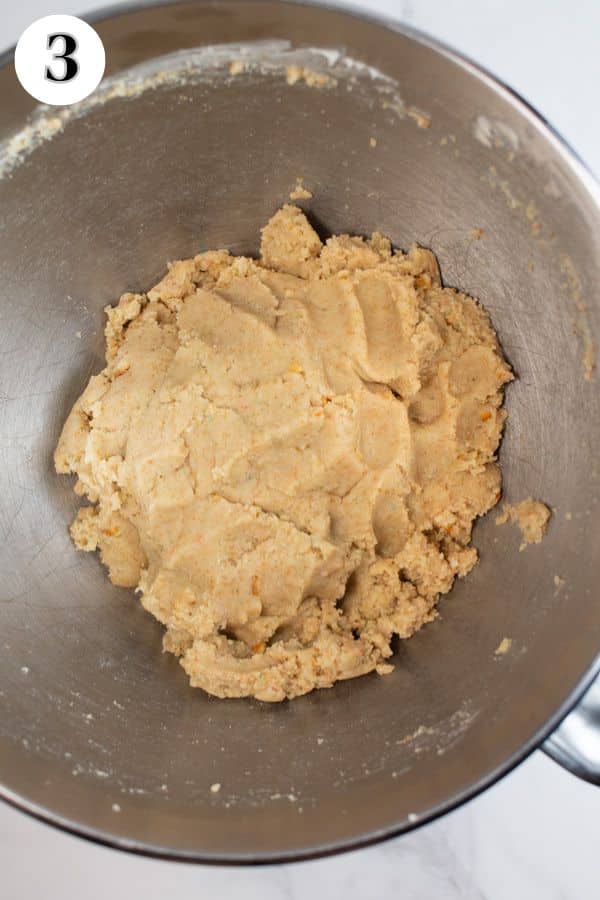
Mix in the frosting. Add ⅓ cup (75 grams) of frosting and continue mixing on low to medium-low speed until thoroughly combined. The consistency should be similar to Play-Doh. If it is too dry and crumbly, add more frosting.
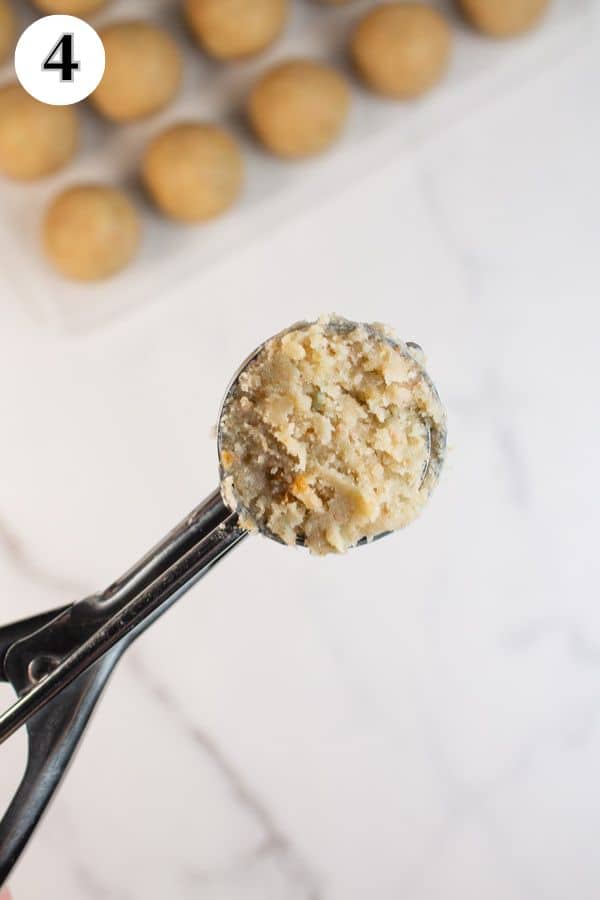
Portion. Use a cookie scoop, meatball maker, or kitchen scale to portion the cake pop dough into equal servings (a standard cake pop is 1 ounce each).
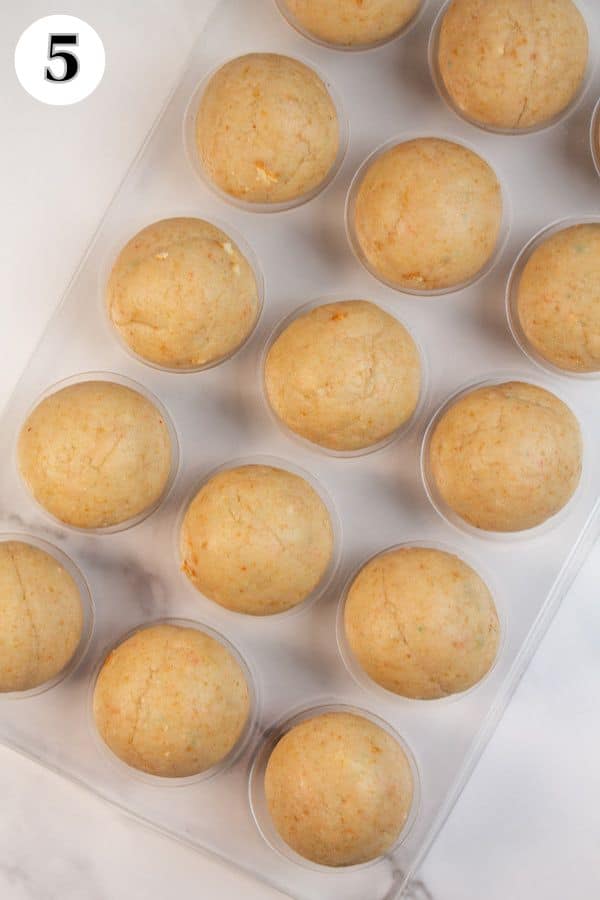
Roll into balls. Roll the portion dough around in your hand to form a smooth ball that's roughly the size and shape of a chocolate truffle. Repeat with all of the cake pop dough.
❗ Top Tip: Rolling Perfect Cake Pops
The balls are easier to round out into smooth, better-shaped cake pops if you chill them after combining and portioning. So roll the cake mixture out and pop them all in the fridge after they're shaped.
Chill for at least an hour before rolling them again to smooth out any misshapen edges.
Dip the Cake Pops
Put a hole in the souffle cups. Prepare your 28 ½-ounce paper souffle cups by using scissors or a knife to carefully cut a hole in the bottom. Set aside.
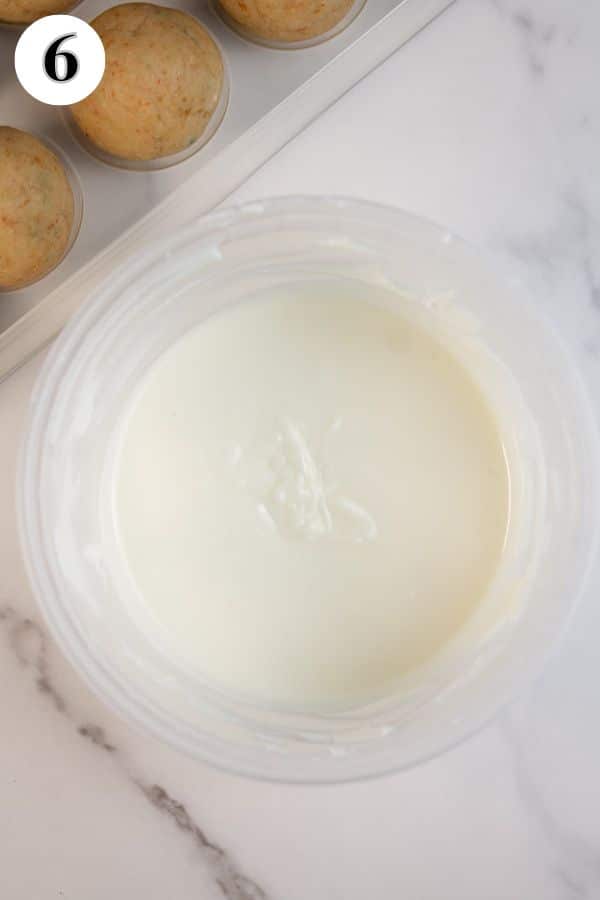
Melt. Melt 1 pound (454 grams) of white almond bark in the microwave in 30-second intervals, stirring well in between each one until melted and smooth.


Add the sticks. Take one of your 28 treat sticks and dip one end into the melted chocolate. Then, press the chocolate-covered end of the stick into one of the dough balls.
Repeat. Repeat this process until all of the balls have a stick, then let them set for 2-3 minutes so that the chocolate hardens.
Dip. Take one cake pop and dip it into the melted almond bark. Then, tap off any excess chocolate, twirl it around to the other side, and tap it again.
Decorate


Add sanding sugar. Immediately, while the chocolate is still wet, carefully pour your red sanding sugar onto one far side of the cake pop, covering about ⅓ of the ball. Repeat with the blue sanding sugar on the opposite side, and then the white sanding sugar in the center.


Slide onto the cup. Slide the stick through the hole on the souffle cups and gently press the cake pop on top of the cup so that it sticks together.
Let harden. Place your decorated cake pops into a cake pop stand (or cardboard box with holes cut into it) and let them sit for about 5 minutes so that the chocolate hardens.
Serve. Serve immediately or store for later.

>>>See All Of My Tasty Recipes Here!<<<
💭 Angela's Pro Tips & Recipe Notes
- Use your favorite cake. You can make cake pops using any of your favorite cakes! Have fun experimenting with different flavors (like red velvet, funfetti, vanilla, strawberry, or chocolate).
- You only need a standard-sized cake. This is the amount that you would get from a box of cake mix or a regular cake recipe. It can be a 9x13, two 8-inch or 9-inch rounds, or even a bundt cake.
- Omit the oil. If using a boxed cake mix, I recommend leaving the oil out altogether and then preparing the cake as directed. Sometimes the added oil can make it hard for the cake pops to stay on the stick.
- Don't use a warm cake. Ideally, you want a cake that has cooled fully to room temperature. I usually bake mine the night before.
- Use your favorite frosting. You can use storebought frosting or homemade buttercream. Choose a flavor that pairs well with the flavor of cake you are using.
- Make the dough by hand. If you don't have a stand mixer, you can make your cake pop dough by smashing everything together with your hands.
- Not too hot, and not too cold. You want your skewered cake pops to be at room temperature when dipping to keep the chocolate from cracking. Heat and cold can both cause this issue.
- Tap off excess chocolate. After dipping your cake pops, tap the stick against the side of the container to shake off any excess chocolate. Turn the cake pop around and tap it a couple more times to smooth everything out.
- Use a stand. If you don't have a cake pop stand, you can either make one by poking holes in an upside-down cardboard box, into a styrofoam block, or you can place your cake pops onto parchment paper with the stick pointing upwards. They are still cute and delicious!
- Be prepared. You'll want to work quickly once you begin dipping the cake, as you need to do all of the decorating before the chocolate hardens. Make sure you have all of your sanding sugar and souffle cups ready to go!
- Reduce the mess. To help with the mess, place a plate or bowl in your work area to catch all of the sanding sugar that falls while sprinkling it onto the cake pops. I like to use three separate bowls for each color so that I can dump them back into the sprinkles container when I'm done.
- Homemade makes cake pops better. Homemade cake pops can't be beat by anything you can get in a drive-thru. The flavor combinations are customizable, and there are tons of cake and frosting recipes here on BIWL you can use.
📍🍡🎂 Top Tips to Master Cake Pops
See my top tips for the best cake pops to master cake pops in no time. There are 13+ great tips and tricks to help you skip my early mistakes 🤪.
With these tips, your first attempt at cake pops will look better-than-store-bought!
🥡 Storing
The undipped cake pop dough can be stored in the refrigerator for 4-5 days or in the freezer for 3-6 months.
Once dipped, your cake pops can be kept at room temperature for 4 days or in the fridge for 7-10 days.

Freezing
You can freeze cake pops, even when they are decorated like these are. First, spread the cake pops on a baking sheet with space between them and freeze them for a few hours.
Then, transfer the frozen cake pops to a freezer container with parchment paper between the layers to prevent sticking. Let them thaw overnight in the fridge before serving, and enjoy within 6 weeks.
- Thanksgiving Turkey Cake Pops
- Top Tips For the Best Cake Pops
- Starbucks Cookies & Cream Cake Pops
- Halloween Cake Pops
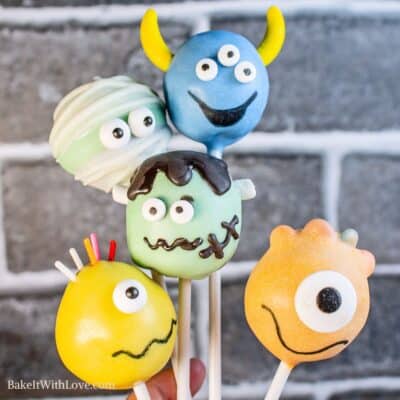
- Monster Cake Pops
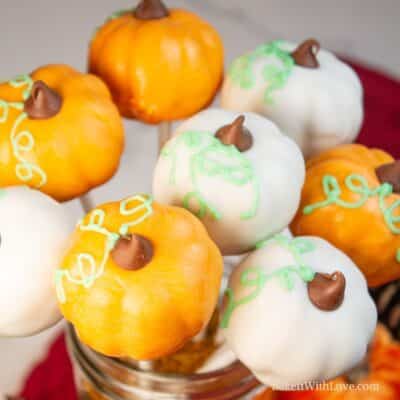
- Pumpkin Cake Pops
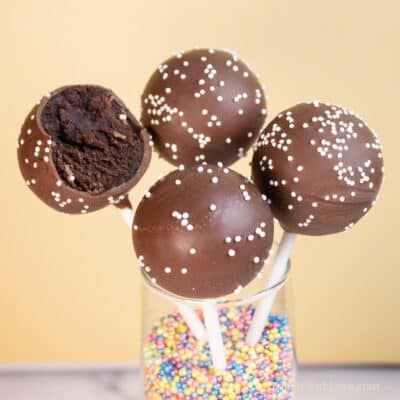
- Starbucks Chocolate Cake Pops
- Starbucks Birthday Cake Pops

Do you love a recipe you tried? Please leave a 5-star 🌟rating in the recipe card below and/or a review in the comments section further down the page.
Stay in touch with me through social media @ Pinterest, Facebook, Instagram, or Twitter! Subscribe to the newsletter today (no spam, I promise)! Don't forget to tag me when you try one of my recipes!
📖 Recipe Card

Snow Cone Cake Pops
Ingredients
- 1 cake (baked and cooled, any flavor - standard sized (9x13))
- ⅓ cup frosting (or more, if needed)
- 1 lb white almond bark (or candy melting wafers)
- sanding sugar (red, white, and blue)
- 28 ½-ounce paper souffle cups
- 28 treat sticks
(Note: 2x or 3x only changes the ingredient list)
Instructions
Make the Cake Pop Dough
- Prepare your cake according to the boxed directions or make a cake from scratch. Bake like normal and let it cool completely before getting started.
- Once cooled, break up your 1 cake and place the pieces into the bowl of your stand mixer. *You can also do this by hand, but it takes longer.
- Using the paddle attachment, turn the mixer on low speed. Let the cake mix until it is crumbled into small pieces.
- Add ⅓ cup frosting and continue mixing on low to medium-low speed until thoroughly combined. The consistency should be similar to playdoh. If it is too dry and crumbly, add more frosting.
- Use a cookie scoop, meatballer, or kitchen scale to portion the cake pop dough into equal servings (a standard cake pop is 1 ounce each).
- Roll the portion dough around in your hand to form a smooth ball. Repeat with all of the cake pop dough.
Dip the Cake Pops
- Prepare your 28 ½-ounce paper souffle cups by using scissors or a knife to carefully cut a hole in the bottom. Set aside.
- Melt your 1 lb white almond bark in the microwave in 30-second intervals, stirring well in between each one until melted and smooth.
- Take one of your 28 treat sticks and dip one end into the melted chocolate. Then, press the chocolate-covered end of the stick into one of the dough balls.
- Repeat this process until all of the balls have a stick, then let them set for 2-3 minutes so that the chocolate hardens.
- Take one cake pop and dip it into the melted almond bark. Then, tap off any excess chocolate, twirl it around to the other side, and tap it again.
Decorate
- Immediately, while the chocolate is still wet, carefully pour your red sanding sugar onto one far side of the cake pop, covering about ⅓ of the ball. Repeat with the blue sanding sugar on the opposite side, and then the white sanding sugar in the center.
- Slide the stick through the hole on the souffle cups and gently press the cake pop on top of the cup so that it sticks together.
- Place your decorated cake pops into a cake pop stand (or cardboard box with holes cut into it) and let them sit for about 5 minutes so that the chocolate hardens.
- Serve immediately or store for later.
Notes
- You can make cake pops using any of your favorite cakes! Have fun experimenting with different flavors (like red velvet, funfetti, vanilla, strawberry, or chocolate).
- You only need a standard-sized cake. This is the amount that you would get from a box of cake mix or a regular cake recipe. It can be a 9x13, two 8-inch or 9-inch rounds, or even a bundt cake.
- If using a boxed cake mix, I recommend leaving the oil out altogether and then preparing the cake as directed. Sometimes the added oil can make it hard for the cake pops to stay on the stick.
- You can use storebought frosting or homemade buttercream. Choose a flavor that pairs well with the flavor of cake you are using.
- If you don't have a stand mixer, you can make your cake pop dough by smashing everything together with your hands.
- After dipping your cake pops, tap the stick against the side of the container to shake off any excess chocolate. Turn the cake pop around and tap it a couple more times to smooth everything out.
- If you don't have a cake pop stand, you can either make one by poking holes in an upside-down cardboard box or you can place your cake pops onto parchment paper with the stick pointing upwards. They are still cute and delicious!
- Almond bark melts really nicely with no additional ingredients. If using melting wafers or candy melts, you may need to thin out the chocolate with a small amount of coconut oil.
- You'll want to work quickly once you begin dipping the cake, as you need to do all of the decorating before the chocolate hardens. Make sure you have all of your sanding sugar and souffle cups ready to go!
- To help with the mess, place a plate or bowl in your work area to catch all of the sanding sugar that falls while sprinkling it onto the cake pops. I like to use three separate bowls for each color so that I can dump them back into the sprinkles container when I'm done.
- Half-ounce paper souffle cups are the perfect size for this treat. If you use ones that are larger, they won't look the same. I ordered mine online because I couldn't find this size in stores.
- The undipped cake pop dough can be stored in the refrigerator for 4-5 days or in the freezer for 3-6 months.
- Once dipped, your cake pops can be kept at room temperature for 4 days or in the fridge for 7-10 days.
Charlsa says
So cute and tasty!!
Angela @ BakeItWithLove.com says
These cake pops are the best homemade treat to make in the summertime. Use store bought cake to spare heating up the kitchen and make short work of the prep time. I love 'em!