

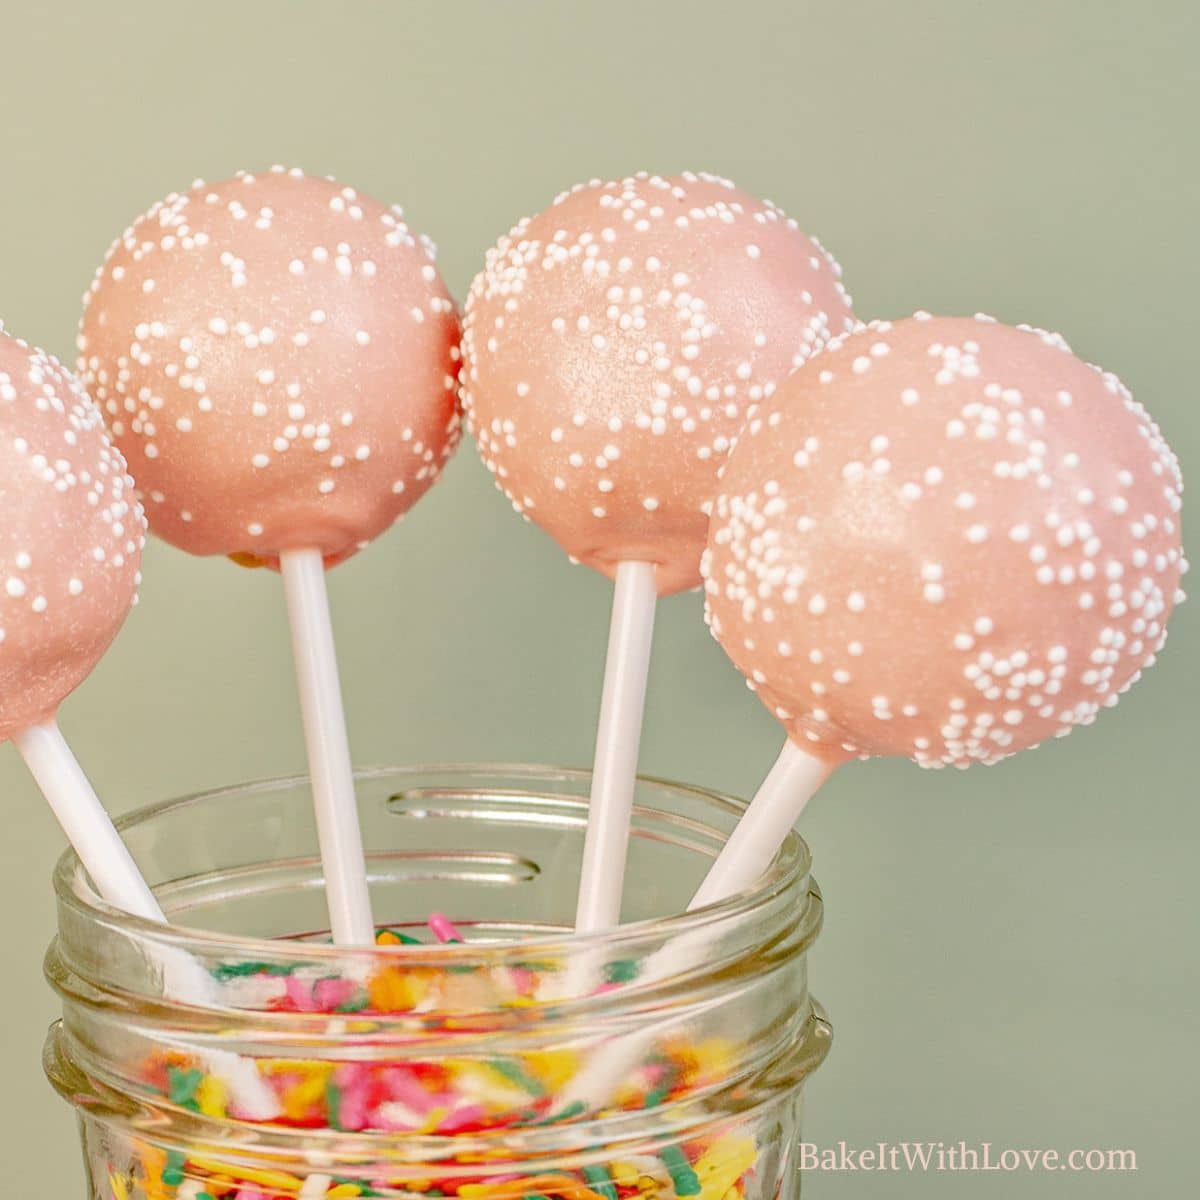
My homemade Starbucks birthday cake pops look just like the real deal with their pink candy coating and white sprinkles but taste so much better. You're sure to love this DIY dessert so much more than the store-bought treat as it's super convenient and cheap to make. Grab some sprinkles and treat sticks and keep them on hand, you'll be hooked on these cake pops right away.
Try my Starbucks cinnamon dulce latte, Starbucks caffe mocha, chocolate revel bars (like the Starbucks fudgy oat bars), and the seasonal favorite, iced pumpkin spice latte.
Jump to:
There's something about grabbing a cake pop alongside your coffee when running into a Starbucks. They make you feel extra special.
However, they cost $2-3 dollars each, and you can easily make a couple dozen of them at home for just a few bucks more. These taste even better than the store-bought version and are perfect for any occasion.
🥘 Ingredients

- Vanilla Cake Mix - My preferred store-bought brand of cake mix is the Betty Crocker Delight's boxes that have the added pudding in the mix. Of course, you could make a vanilla white cake from scratch instead.
- Eggs - Bring your eggs out of the fridge and let them warm to room temperature to ensure even baking.
- Water - Some water for moisture.
- Oil - You can use coconut oil or your preferred neutral-flavored cooking oil. Normally, I omit the oil so your cake pops hold together better. However, I don't believe that Starbucks makes its cake pops this way. Pick your method.
- Vanilla Frosting - You can use store-bought or homemade vanilla buttercream frosting.
- Pink Candy Melts - If you don't want to use candy melts, you can use almond bark or white chocolate and color it with an oil-based food coloring.
- White Nonpareils - These white, round sprinkles add some fun decoration.
- Treat Sticks - You can't have a cake pop without some type of treat stick, lollipop stick, or paper straw.
Be sure to see the free printable recipe card below for ingredients, exact amounts & instructions with tips!
🔪 How To Make Starbucks Birthday Cake Pops
To keep the true Starbucks experience, decorate these pops as instructed. Of course, you could use the vanilla cake pop dough and then decorate it however you like, too.
You will need your measuring utensils, a mixing bowl, a hand mixer, a 9x13 baking dish, your stand mixer, and a cake pop stand or styrofoam block. I like using a cake pop maker (baller), too.
This recipe will make about 28 cake pops, depending on how large you make them.
Prep & Prepare the Cake
Preheat. Preheat the oven to 325°F (175°C/Gas Mark 4) and spray a 9x13 baking dish with nonstick cooking spray.


Add. Into a large mixing bowl, add 1 box of vanilla cake mix, 3 large eggs, 1 cup (237 milliliters) of water, and ⅓ cup (79 milliliters) of coconut or cooking oil.
Mix. Use a hand mixer to mix the ingredients until fully combined.
Pour and bake. Pour the batter into the prepared baking dish and then bake it in the oven for 23-28 minutes, or until a toothpick inserted into the center of the cake comes out clean.


Let it cool. Remove the cake from the oven and let it cool completely. *Note: I prefer to use my cake once it has cooled overnight to ensure perfect coating.
Make the Cake Pop Dough
Break up the cake. Break your cake into chunks so that you can fit it into the bowl of your stand mixer.


Crumble the cake. Using the paddle attachment, mix the cake at low speed until it is fully crumbled.
Add frosting. Add 3 tablespoons of vanilla frosting and continue mixing on low speed, gradually increasing to medium-low, until you have a dough with the consistency of Play-Doh.
Portion the dough. Use a kitchen scale, cookie scoop, or meatballer or meatball maker (cake pop makers can also be found on Amazon, they look like meatballers) to portion your cake dough into equal-sized pieces (a standard cake pop is 1 ounce).


Roll into balls. Roll the dough between your hands until a smooth ball is formed.
❗ Top Tip: Rolling Perfect Cake Pops
The balls are easier to round out into smooth, better-shaped cake pops if you chill them after combining and portioning. So roll the cake mixture out and pop them all in the fridge after they're shaped.
Chill for at least an hour before rolling them again to smooth out any misshapen edges.
Dip & Decorate
Melt the chocolate. Place 12 ounces (340 grams) of pink candy melts into a microwave-safe container and melt it by heating it in 30-second increments and stirring well in between each session.


Add the sticks. Dip the end of each of your 28 treat sticks into the pink chocolate and then poke it into your cake balls. Let them set for a few minutes.
Dip in chocolate. Pick up each cake pop and dip it into the melted chocolate, making sure it gets fully covered. Remove it from the chocolate and tap the stick on the side of the container so that all of the excess chocolate runs off. Twirl it around and tap a few more times to smooth everything out.


Add sprinkles. Immediately, while the chocolate is still wet, sprinkle some white nonpareils on top of the cake pops.
Let harden. Place the decorated pops into a cake pop stand or piece of styrofoam and let them harden for about 5 minutes before serving or storing for later.

>>>See All Of My Tasty Recipes Here!<<<
💭 Angela's Pro Tips & Recipe Notes
- Cool your cake quickly. To speed up the cooling time of your cake, flip it out of the baking dish onto a wire cooling rack.
- Use your favorite candy melts. I used Chocomaker candy melts for these cake pops, but you can use your preferred brands. Some that I recommend are Chocomaker, Merckens, and Michael's Sweet Tooth Fairy.
- Thin the chocolate. Depending on the brand of candy melts you are using, the chocolate might be too thick for dipping. If this is the case, all you need to do is stir in a little coconut oil, Crisco, or paramount crystals to thin it to your desired dipping consistency.
- Try using white chocolate. If you aren't a fan of candy melts, you could use white chocolate or vanilla almond bark and color it using an oil-based food coloring. Gel or liquid food coloring will cause the chocolate to seize.
📍🍡🎂 Top Tips to Master Cake Pops
See my top tips for the best cake pops to master cake pops in no time. There are 13+ great tips and tricks to help you skip my early mistakes 🤪.
With these tips, your first attempt at cake pops will look better-than-store-bought!
🥡 Storing
The cake pop dough itself can be kept in the fridge in a sealed container for 4-5 days or stored in the freezer for up to 6 months.
Once you have dipped your cake pops, keep them at room temperature for up to 4 days or in the fridge for 7-10 days.

Freezing
You can freeze fully assembled cake pops, but make sure to separate them with parchment paper to keep them from sticking together. They can be frozen for up to 6 weeks.
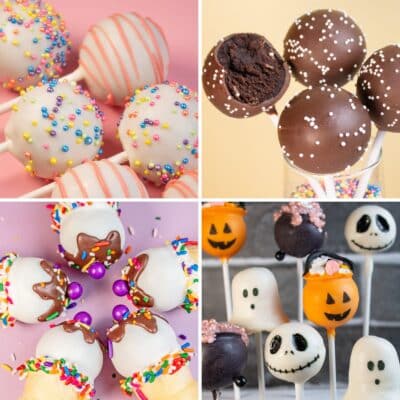
- Thanksgiving Turkey Cake Pops
- Top Tips For the Best Cake Pops
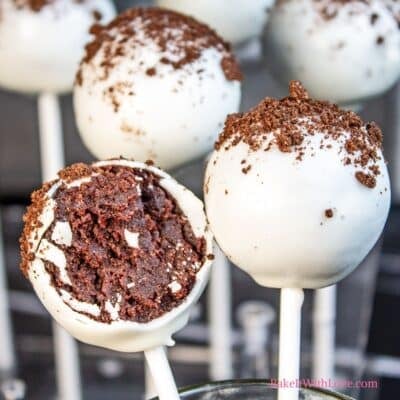
- Starbucks Cookies & Cream Cake Pops
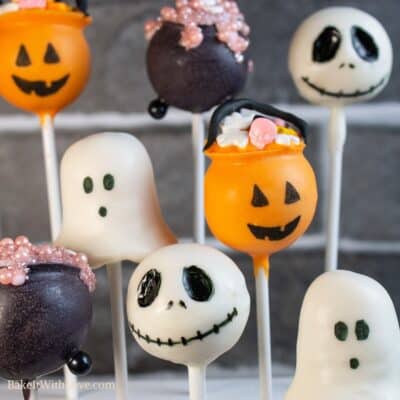
- Halloween Cake Pops

Do you love a recipe you tried? Please leave a 5-star 🌟rating in the recipe card below and/or a review in the comments section further down the page.
Stay in touch with me through social media @ Pinterest, Facebook, Instagram, or Twitter! Subscribe to the newsletter today (no spam, I promise)! Don't forget to tag me when you try one of my recipes!
📖 Recipe Card

Starbucks Birthday Cake Pops
Ingredients
- 1 box vanilla cake mix
- 3 large eggs
- 1 cup water
- ⅓ cup coconut oil (or other neutral cooking oil)
- 3 tablespoon vanilla frosting
- 12 oz pink candy melts
- white nonpareils sprinkles
- 28 lollipop or treat sticks
(Note: 2x or 3x only changes the ingredient list)
Instructions
- Preheat the oven to 325°F (175°C/Gas Mark 4) and spray a 9x13 baking dish with nonstick cooking spray.
Prepare the Cake
- Into a large mixing bowl, add 1 box vanilla cake mix, 3 large eggs, 1 cup water, and ⅓ cup coconut oil.
- Use a hand mixer to mix the ingredients until fully combined.
- Pour the batter into the prepared baking dish and then bake it in the oven for 23-28 minutes, or until a toothpick inserted into the center of the cake comes out clean.
- Remove the cake from the oven and let it cool completely.
Make the Cake Pop Dough
- Break your cake into chunks so that you can fit it into the bowl of your stand mixer.
- Using the paddle attachment, mix the cake on low speed until fully crumbled.
- Add 3 tablespoon vanilla frosting and continue mixing on low speed, gradually increasing to medium-low, until you have a dough with the consistency of play-doh.
- Use a kitchen scale, cookie scoop, meatballer/meatball maker, or cake pop maker to portion your cake dough into equal-sized pieces (a standard cake pop is 1 ounce).
- Roll the dough between your hands until a smooth ball is formed.
Dip & Decorate
- Place 12 oz pink candy melts into a microwave-safe container and melt it by heating it in 30-second increments and stirring well in between each session.
- Dip the end of each of your 28 lollipop or treat sticks into the pink chocolate and then poke it into your cake balls. Let them set for a few minutes.
- Pick up each cake pop and dip it into the melted chocolate, making sure it gets fully covered. Remove it from the chocolate and tap the stick on the side of the container so that all of the excess chocolate runs off. Twirl it around and tap a few more times to smooth everything out.
- Immediately, while the chocolate is still wet, sprinkle some white nonpareils sprinkles on top of the cake pops.
- Place the decorated pops into a cake pop stand or piece of styrofoam and let them harden for about 5 minutes before serving or storing for later.
Notes
- To speed up the cooling time of your cake, flip it out of the baking dish onto a wire cooling rack. For best results, I prefer to bake my cake the night before making cake pops.
- The balls are easier to round out into smooth, better-shaped cake pops if you chill them after combining and portioning. So roll the cake mixture out and pop them all in the fridge after they're shaped. Chill for at least an hour before rolling them again to smooth out any misshapen edges.
- I used Chocomaker candy melts for these cake pops, but you can use your preferred brands. Some that I recommend are Chocomaker, Merckens, and Michael's Sweet Tooth Fairy.
- Depending on the brand of candy melts you are using, the chocolate might be too thick for dipping. If this is the case, all you need to do is stir in a little coconut oil, Crisco, or paramount crystals to thin it to your desired dipping consistency.
- If you aren't a fan of candy melts, you could use white chocolate or vanilla almond bark and color it using an oil-based food coloring. Gel or liquid food coloring will cause the chocolate to seize.
- The cake pop dough itself can be kept in the fridge in a sealed container for 4-5 days, or stored in the freezer for up to 6 months.
- Once you have dipped your cake pops, keep them at room temperature for up to 4 days or in the fridge for 7-10 days.
- You can freeze fully assembled cake pops, but make sure to separate them with parchment paper to keep them from sticking together. They can be frozen for up to 6 weeks.
Angela Latimer says
I love these pink birthday cake pops, they're perfect for a party but easy enough to be a treat anytime you feel like it. Yum! ~ Angela