


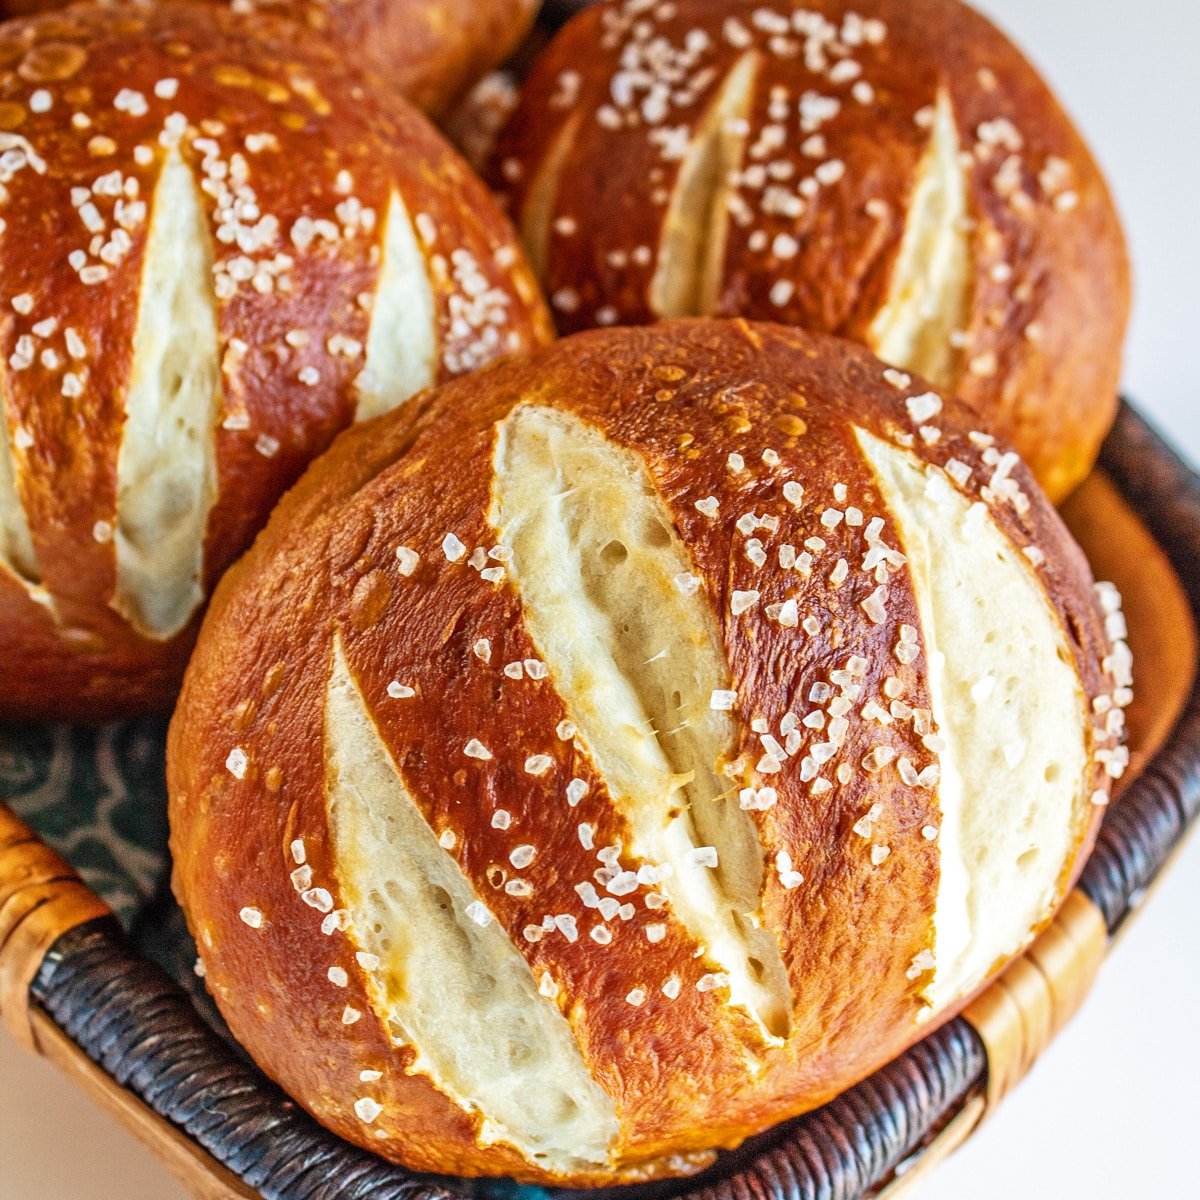
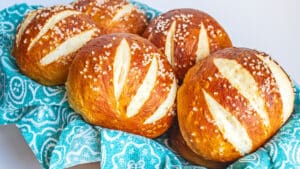
My pretzel buns are a scrumptious chewy bread roll to make for serving up your favorite burgers, sandwiches, and more. They're so amazingly tasty that you'll enjoy them with any of your favorite sandwiches.
These buns are perfect for blue cheese, bison, or elk burgers. Make some pulled pork sliders and coleslaw.
Jump to:
Whenever I know I'll be making some nice, juicy burgers hot off the grill (sometimes it's more spontaneous), hubby and I always debate about which buns to make.
My top two preferred buns for our burgers are these pretzel buns and my quick brioche buns.
He argues for my Kaiser rolls, which are fantastic, too! These amazing bun recipes also work fabulously with sandwiches the next day!
See the instructional video below for a detailed walkthrough.
🥘 Ingredients
- Baking Soda - ½ cup baking soda (recommended; see notes).
- Water - 1 ¼ cup water (lukewarm, 110°F/43°C).
- Yeast - 1 packet active dry yeast (or 2 ¼ teaspoons).
- Sugar - 1 teaspoon granulated white sugar.
- Flour - 3 ½ cups all-purpose flour. Start with 3 cups AP flour and add more as needed. You'll need more for your working surface, too.
- Salt - 2 teaspoons salt.
- Butter - 3 tablespoons melted and cooled butter.
- Oil - ½ tablespoon extra virgin olive oil (EVOO) to grease the bowl.
Be sure to see the free printable recipe card below for ingredients, exact amounts & instructions with tips!
🔪 How To Make Pretzel Buns
Baking The Baking Soda
- Bake the baking soda. For best results, spread your ½ cup (60 grams) baking soda over a parchment paper lined baking sheet and bake in the oven for 30 minutes to an hour at 350°F (175°C/Gas Mark 4).
- Set aside. The baked baking soda will be used in the boiling water (to make the baking soda bath) before baking the pretzel buns.
Mixing The Pretzel Dough
- Bloom yeast. In your measuring cup of 1 ¼ cup water (312.5 grams), add the packet of yeast (2 ¼ teaspoons/7 grams) and 1 teaspoon of sugar (4.93 grams). Allow the yeast to activate or 'bloom' for about 5 minutes or until foamy.
- Combine. In your stand mixer bowl, combine the flour (start with 3 cups (360 grams); add more if necessary) and salt. Add in the water with activated yeast and the 3 tablespoons (43 grams) of cooled, melted butter.
- Knead. Mix using the dough hook attachment on low speed for 2-3 minutes until the dough forms. It shouldn't be too wet or dry. Add more flour if needed or a few drops of water to get a nice elastic dough ball. Knead with your dough hook on medium speed for 5-6 minutes.
- Cover for the first rise. Remove the dough from the bowl (or transfer to an oiled bowl) long enough to oil the bowl with ½ tablespoon olive oil (7.39 grams). Roll the dough through the oil to coat all sides. Cover with greased plastic wrap.
- Rise. Allow the dough to rise for 1 hour or until doubled in size.
Rising Time & Portioning The Buns
- Knead and portion the dough. Punch the risen dough down about halfway, then remove it from the bowl and transfer it to your floured working surface. Knead the bread for 2 minutes, then divide into 10 equal portions.
- Shape buns. Make sure to dust your hands with some flour before rolling the portion balls of dough in your hands with the smooth, rounded side facing up and the bottom side cupped in one hand. Use your free hand to smooth the domed top portion of the dough ball, making the surface less likely to lose shape. Repeat with each bun.
- Rise until doubled in size. Cover your shaped buns with greased plastic wrap and allow them to rise for 20-30 minutes; they should almost double in size again.
Baking Soda Bath
- Preheat and prep. Set your oven to 425°F (218°C/Gas Mark 7) and line a baking sheet with parchment paper.
- Dissolve the baking soda. Bring a large stock pot with 6 cups of water (1.42 liters) and ½ cup of baked baking soda to a boil (watch closely to prevent bubbling over).
- Add pretzel buns in batches if needed. Lower the pretzel buns into the boiling water using a slotted spoon, and place as many into the boiling water as you can fit into your stock pot without crowding them as you do not want them touching. Also, note that you should have enough water in the stock pot to prevent the buns from touching the bottom as well.
- Boil on both sides. Boil each of the buns for about 1 minute, starting with the rounded side up and turning halfway through the minute (20-30 seconds on each side). Use your slotted spoon to remove the buns after a minute and place them onto the parchment paper-lined baking sheet.
Bake The Pretzel Buns
- Score. Use a sharp knife to score the tops of each bun. You can do the same three slits as I have or the usual pretzel cross that is common. Whatever shape or design you like. Score each bun as it comes out of the boiling water, then top with coarse sea salt.
- Bake until springy. Bake for 15 minutes or until golden brown. The buns are still soft on the crust, but they are not too soft (pretzels will need only 10-12 minutes). Your finger indent should spring back rather than leave a mark.
- Cool. Remove from the oven when done and transfer to a wire cooling rack to cool completely.
My perfect pretzel rolls can be formed into giant pretzels and then dipped into gooey cheese dip for pretzels. Enjoy!
🥪 What To Serve On Pretzel Buns


Pretzel buns (as-is) or a smaller slider version are perfect for standing up to your favorite burger or sandwiches. Serve sandwiches like sloppy joes, Philly cheesesteaks, ham and cheese, Reuben, Cubano, pulled pork, crack chicken, and more.
💭 Angela's Pro Tips & Recipe Notes
- Baking the Baking Soda: Wondering why you need to bake baking soda? Pretzel buns typically use lye for their shiny appearance and chewy exterior. Since lye is caustic, baking soda is a safer alternative. Baking transforms it into a strong alkali, mimicking the effect of lye.
- Avoiding Baking Soda Aftertaste: If you notice an aftertaste from the baking soda, simply rinse the boiled buns before baking them.
- Choosing Flour: While all-purpose flour works well, using high-quality bread flour can enhance your pretzel buns, making them chewier.
- Scaling the Recipe: This recipe is easily adjustable for larger gatherings. When doubling or tripling the recipe, ensure the buns aren't crowded on the baking sheets.
- Dough Refrigeration: For the first rise, the pretzel dough can be refrigerated overnight. This corresponds to step 4 in the 'Mixing The Pretzel Dough' section of the recipe.

>>>See All Of My Tasty Recipes Here!<<<
🥡 Storing
Avoid salting if you plan to keep leftovers. Store unsalted buns in an airtight container at room temperature for 1-2 days, up to 5 days. For salted buns, remove salt before storing to prevent sogginess. Alternatively, double-wrap in paper bags for extended freshness.
For freezing, individually wrap buns in cling film and foil, then place them in an airtight container or bag for up to 3 months.
To reheat, thaw for 2-3 hours. Moisten and salt the buns, then microwave for 10-20 seconds or oven-reheat at 350°F for 10-15 minutes.
❓ Recipe FAQs
Salt is the customary topping; however, sesame seeds, poppy seeds, garlic herb butter, caramelized onions, and even shredded cheese are all great alternatives. Yum!
Yes! It's as simple as switching out the flour for your favorite GF flour brand. I like Bob's Red Mill Gluten Free 1-to-1 Baking Flour best, but King Arthur Flour, Krusteaz, Vitacost, Good & Gather, and even Great Value have really good gluten-free flour to pick from.

🍞🥖🥐🥯🥨 More Bread Recipes
- Cheesecake Factory Brown Bread - A fantastic copycat recipe to make this rich, flavorful bread at home.
- Homemade Bread Bowls - My favorite way to serve up hearty soup, party dips, and more.
- Easy Air Fryer Pretzel Bites - Tasty, chewy pizza dough pretzel bites that are a party fave and snacking hit.
- Homemade Flat Bread - My super easy yeast flatbread recipe that fries up in no time at all.
- Sweet Potato Cornbread - A fall favorite that's equally delicious year round.
- Butter Swim Biscuits - Rich, buttery biscuits like no other that are just made to have jelly or honey slathered on them.
Do you love a recipe you tried? Please leave a 5-star 🌟rating in the recipe card below and/or a review in the comments section further down the page.
Stay in touch with me through social media @ Pinterest, Facebook, Instagram, or Twitter! Subscribe to the newsletter today (no spam, I promise)! Don't forget to tag me when you try one of my recipes!
📖 Recipe Card
Pretzel Buns (Homemade Pretzel Rolls)
Ingredients
- ½ cup baking soda (recommended)
- 1 ¼ cup water (lukewarm, 110°F/43°C - plus 6 cups for the baking soda bath)
- 1 packet active dry yeast (or 2 ¼ teaspoons)
- 1 teaspoon sugar
- 3 ½ cups all-purpose flour (start with 3 cups)
- 2 teaspoon salt
- 3 tablespoon butter (melted, cooled)
- ½ tablespoon olive oil (to grease the bowl)
(Note: 2x or 3x only changes the ingredient list)
Instructions
Baking The Baking Soda
- For best results, spread your ½ cup baking soda over a parchment paper lined baking sheet and bake in the oven for 30 minutes to an hour at 350℉ (175°C/Gas Mark 4). Set aside to use in the boiling water (baking soda bath) before baking the pretzel buns.
Mixing The Pretzel Dough
- In your measuring cup of lukewarm 1 ¼ cup water, add the 1 packet active dry yeast and 1 teaspoon sugar. Allow the yeast to activate or 'bloom' for about 5 minutes, or until foamy.
- In your stand mixer bowl, combine the 3 ½ cups all-purpose flour (start with 3 cups, add more if necessary) and 2 teaspoon salt. Add in the water with activated yeast and the cooled, melted 3 tablespoon butter.
- Mix using the dough hook attachment on low speed for 2-3 minutes until the dough forms. It shouldn't be too wet or dry. Add more flour if needed, or a few drops of water to get a nice elastic dough ball. Knead with your dough hook on medium speed for 5-6 minutes.
- Remove the dough from the bowl (or transfer to an oiled bowl) long enough to oil the bowl with ½ tablespoon olive oil. Roll the dough through the oil to coat all sides. Cover with a sheet of greased plastic wrap. Allow the dough to rise for 1 hour, or until doubled in size.
Rising Time & Portioning The Buns
- Punch the risen dough down about half way, then remove from the bowl and transfer to your floured working surface. Knead the bread for 2 minutes, then divide into 10 equal portions.
- Make sure to dust your hands with some flour before rolling the portion balls of dough in your hands with the smooth rounded side facing up and the bottom side cupped in one hand. Use your free hand to smooth the domed top portion of the dough ball, making the surface less likely to lose shape. Repeat with each bun.
- Cover your shaped buns with greased plastic wrap and allow them to rise for 20-30 minutes, they should almost double in size again.
Baking Soda Bath
- Preheat your oven to 425°F (218°C/Gas Mark 7) and line a baking sheet with parchment paper.
- Bring a large stock pot with 6 cups of water (1.42 liters) and the ½ cup of baked baking soda to a boil (watch closely to prevent bubbling over).
- Lower the pretzel buns into the boiling water using a slotted spoon, place as many into the boiling water as you can fit into your stock pot without crowding them as you do not want them touching. Also note that you should have enough water in the stock pot to prevent the buns from touching the bottom as well.
- Boil each of the buns for 1 minute, starting with the rounded side up and turning halfway through the minute (30 seconds each side). Use your slotted spoon to remove the buns after a minute and place them onto the parchment paper lined baking sheet.
Bake The Pretzel Buns
- Score the tops of each bun using a sharp knife. You can do the same three slits as I have, or the usual pretzel cross that is common. Whatever shape or design you like. Score each bun as it comes out of the boiling water, then top with coarse sea salt.
- Bake for 15 minutes or until golden brown and the buns are still soft on the crust, but they are not too soft (pretzels will need only 10-12 minutes). Your finger indent should spring back, rather than leaving a mark.
- Remove from the oven when done and transfer to a wire cooling rack to cool completely.
Notes
- The number #1 question you likely have is why on earth you're baking the baking soda, right? Pretzel buns are usually cooked with lye which gives them their trademark shiny appearance and that chewy outside that we love so much. However, lye is caustic and can be dangerous to work with so a baking soda bath is a great way to mimic the lye effect. Baking soda is a weak alkali, but baking it makes it a super strong alkali similar to lye. Thus, the extra baking step shared here.
- If you find that the baking soda leaves an aftertaste, rinse the boiled buns off before baking.
- A great quality bread flour is a wonderful upgrade in this recipe. I kept it simple with AP flour, but the bread flour yields a chewier pretzel, pretzel bun, or pretzel bites.
- This recipe is super easy to scale up for feeding a crowd. If you are doubling or tripling this recipe, be sure to avoid crowing the buns on your baking sheet(s).
- The pretzel dough can be refrigerated overnight for the first rise, or step 4 of 'Mixing The Pretzel Dough' in the directions.
- Consider before storing or freezing: I refrigerate and/or freeze my excess pretzel buns for later use and they store beautifully. I do recommend, however, not to salt your pretzel buns if you will need to store leftovers. If you have salted the buns, I suggest knocking the salt off for your best storage results (including freezing). Otherwise, the buns will be more prone to getting soggy during storage.
- To store: Store unused homemade pretzel buns in an airtight container at room temperature, preferably in a dark, cool pantry or cabinet. They are best used within the first 1-2 days but are good for up to 3-5 days. *Alternatively, you can try what French bakers recommend for keeping daily baked bread fresh. Double wrap the baked and cooled pretzel buns in paper bags then store at room temperature.
- To freeze: Wrap fully cooled pretzel buns individually in plastic cling film, then a sheet of heavy-duty aluminum foil. Transfer the wrapped buns into an airtight freezer storage container or freezer storage bag. Store for up to 3 months.
- To reheat and serve: Thaw the frozen pretzel buns for 2-3 hours before serving. Frozen pretzels are best reheated by wetting them down, salting, and reheating for 10-20 seconds on high power in the microwave. Pretzel rolls can also be reheated in the oven at 350°F (175°C/Gas Mark 4) for about 10-15 minutes.
Megan says
Followed this recipe tonight just as printed and it was AMAZING! I was a little nervous as it was my first time attempting homemade pretzel rolls. The recipe was easy to follow and the rolls were fabulous!
Anonymous says
I'm thinking you mean 4 quarts of water, not cups...??
Angela @ BakeItWithLove.com says
No, I do mean cups. I recommend using 6 cups of water to 1/2 cup of baking soda. You can double if you want to, but when I boil the buns, I work in batches (as shown in the video). Enjoy!
Ashley says
I was wondering how you keep them a nice shape, and are able to score them? After picking them up to put them in the water they would loose the cute dime shape. I also have a really sharp set of Henkels knives and I still couldn't score them without squishing them. This was my first try, so I'm sure practice helps!
Becca says
Your written instructions and your video instructions aren't the same.
6 cups water to 1/2 cup baking soda
Vs 4 cups water to 1/2 cup baking soda
Low speed vs high speed for kneading time frame is different.
Angela @ BakeItWithLove.com says
The recipe posted here on the site is always the most currently updated recipe. I usually make these recipes many times after their original publish date and add notes to existing recipes. Thanks for asking!
Becky says
These were amazing! The hubby loved them. We will definitely make again.
Taz says
These were pretty good. Although it seems to be alot of baking soda all over my kitchen now. Flavor was good. Everyone liked them.
Cate says
Hi…I love these but my only concern is they come out a little doughy. I even baked them 18 minutes and still the same. The outside is crusty and springs back as you say when I touch them. Any thoughts?
Angela @ BakeItWithLove.com says
What size are the buns? I would try and make them a hair smaller to see if you can get the inside to match the outside. This, of course, is only a thought. Please feel free to share more with me to help me troubleshoot. Thanks!
Georgina Walker says
If I don’t have a stand mixer can that part be done by hand?
Angela @ BakeItWithLove.com says
Yes, definitely! It takes a bit longer to mix and knead but it works just wonderfully!
Nancy says
Can you tell me the reason for baking the baking the baking soda ??
Angela @ BakeItWithLove.com says
Baking your baking soda makes for softer pretzels that are delicious, beautifully colored, chewy on the outside, and incredibly tender and chewy inside. The baking can be skipped, but it adds alot of great texture.
Grant says
In baking the Baking Soda there is a chemical reaction that happens which raises the PH level of the soda up by quite a bit. Traditionally the water bath part uses water with food grade Lye in it. The baking soda trick is a bit easier/safer to do. Any left over baked soda can be added to some water to make a awesome kitchen cleaner
Ryan says
Hey, mine stuck to the parchment paper. Any suggestions?
Angela @ BakeItWithLove.com says
Oh no! Sorry to hear that your pretzel buns were stuck. Try using a light coating of cooking oil or non-stick spray on the parchment paper. Hope that helps!
Heidi Coffey says
Mine stuck horribly as well, it may have to do with the quality of my parchment or just how wet the buns were coming out of the baking soda bath, I peeled them off and turned them upside down and baked another 5 minutes to somewhat brown the bottoms as they were a little gooey. The tops are beautiful and they will taste amazing. Next time I will oil the parchment and pat the bottoms dry with a paper towel before baking, hopefully that takes care of the sticking issue.
Angela @ BakeItWithLove.com says
Thank you for adding your experience here Heidi!
Sarah says
I made these for dinner tonight and they were hit with the family. Now my kids have asked me to make about 4 different sized rolls and buns so they always have these on hand for sliders, salad rolls and mini hotdogs 😀
Kristy says
Have you tried to make these in a bread machine?
Angela @ BakeItWithLove.com says
I have not, although I definitely would give it a try. The only thing special is still boiling the buns after mixing, kneading, and rising. Let me know if you give it a try and thanks for asking!!
Shayna says
Hi,
Would these work being made with bread flour as opposed to regular flour?
Can’t wait to make them!
Thanks
Angela @ BakeItWithLove.com says
Hello Shayna, I haven't made them with bread flour personally but think you should be just fine. Watch the rise time and wait for the dough to reach the size as directed rather than by timing. Let me know how it goes! Thanks for asking!
Vone says
Can you make the dough ahead of time? I want to make buns for brunch with smoked salmon but don’t have that much time in the morning to make the dough.
Angela @ BakeItWithLove.com says
You can make the dough through the first rise, shape the dough balls and then refrigerate. Allow the dough to warm to room temperature, then continue with the second rise time until they have doubled in size (this may take longer as they return to a warm temp). Boil and bake as instructed. Hope that helps, and please feel free to follow up with any additional questions!
Ashrita says
Hi can I btt try ush then with butter or oil instead of egg?! I don’t eat egg !! ?
Anonymous says
I meant can use butter or oil to brush the top?!
Angela @ BakeItWithLove.com says
I would try butter, a light coating. The egg gives it the nice shiny appearance but your butter will still help it be a beautiful golden color too. Let me know how it goes!
Michelle says
I followed the recipe, however there is an after taste, I think maybe from the baking soda bc it was foaming and I tried to wait until the suds would go away but it didn’t so I boiled the dough as instructed tried to wipe it down. But still there is an after taste. Does that happen to your baking soda as well?
Angela @ BakeItWithLove.com says
Hello Michelle, I just went and double checked the video to see if mine had foamed up much as I didn't recall much foam ever when making these. I see some but not in a quantity that would need to be cleaned away or skimmed from the pan. Did you bake the baking soda? That has always yielded the best results for me when making this recipe.
Let me know, as I have never had an aftertaste and am curious as to why this cropped up. Thank you!!
PS. how long did you boil them? If you are getting an after taste, you might want to try boiling them for a shorter time or skip putting the baking soda in your water.
Terri says
I made them and I have a very strong baking soda aftertaste as well. Otherwise, they turned out good. I wonder if I should have added more water in the pot for boiling. Maybe that would have toned it down.
Angela @ BakeItWithLove.com says
How much water did you add? I'd love to know so that I can adjust the minimum water needed if necessary. Thanks!!
It says to use at least 4 cups, but definitely use more water as needed to fill your pot or reduce the baking soda so that you don't end up with the aftertaste (did you bake the baking soda?). Let me know! ~ Angela
Phoenix Layne says
I have an in home bakery, "HEARTS DESIRE" Psalms 37:4 & Psalms 34:8.
My specialty IS breads & cakes, nothing fancy. In the 53 years of my baking, I have NEVER made home made Pretzels. I LOVE pretzels, & wanted to make he buns as I have never tried them. My husband & myself devoured the buns. I WILL most definitely be making these again. I didnt use the salt, but I traded it for sesame seeds. I think next time, just for fun I will try the "Anything Bagel" spice. With that, I make my own to limit the sodium in the store bought. THANK YOU SO VERY MUCH for this simple & tasty recipe.
Lori says
We noticed the strong baking soda after taste too. Would it work to boil them without the baking soda?
Angela @ BakeItWithLove.com says
Boiling the pretzel buns (or any pretzel) in baking soda water is what gives them their trademark pretzel texture. This alkaline solution will change the pH of the dough and also gelatinizes the outer surface of the pretzel buns. The surface will not 'spring' or rise as much as normal bread dough when baked, thus creating the delightfully chewy texture of pretzels. Try reducing the baking soda incrementally to see where you get the best texture and a flavor that pleases you best.
Andy W says
One thing I learned a long time ago is to NEVER use an aluminum pan (even a non-stick one) to boil things in baking soda. I always use a stainless pan with baking soda. If you don't believe me take just a teaspoon and heat it up in an aluminum pan with a little water then taste it -- Its terrible. I had someone wanting to sell me expensive pans a long time ago use this as a demo. I didn't believe it would taste through the non-stick coating, but it does. then try the same thing with a stainless pan -- no taste. I suspect that most of the people having trouble with the baking soda are using aluminum pans, but some other metals might taste. Good stainless won't give you a metallic taste
Franki says
The baking soda bath can do this if you left your buns in the water for too long. No more than 30 seconds will take care of that metallic after taste.
Michele says
I followed the instructions and baked the baking soda however the pretzels have a strong aftertaste to them and a couple of them stuck to the parchment paper.
Angela @ BakeItWithLove.com says
I have commented and am updating to use 6 cups of water to the baking soda bath. If you have issues with sticking, use a light coating of non-stick spray on the parchment paper. Enjoy!
H. Miller says
I have now made these twice! Excellent! So good as burger buns but also foe caprese sandwiches. I have recommended this recipe to anyone who will listen!
Angela @ BakeItWithLove.com says
Hello and thank you for the wonderful feedback on your results! I'm pretty hooked on these amazing pretzel rolls too!
Cerise says
These were delicious! I made them for brisket sandwiches for tomorrow, but I ate an entire one with butter tonight! Crispy on the outside and chewy on the inside.
Angela @ BakeItWithLove.com says
They make awesome pretzels and pretzel bites too! Glad you enjoyed your buttered pretzel bun!!
Gay D says
Made these last night and everyone loved them. Will definitely make them again.
Angela @ BakeItWithLove.com says
We love hearing that Gay! So glad they were enjoyed!
Donna says
I made this recipe last night. It was very easy and boy, was it delish! I have been looking for a good pretzel dough recipe for a very long time. I tried many and they were terrible, too dry or too hard. I think the big difference between the other recipes that I've tried and this one is the boiling in baking soda step. I had a pretzel bun at Red Robin once but they haven't had them again so I decided to try this recipe. I'm glad I did. However, I would definitely not divide the dough into 10 pieces unless you're making sliders. I divided into 8 and the buns were still very small. I will definitely make them again but I will divide into 6 if I'm making buns. I only had 5 burgers to cook so out of the 8 pieces, I only needed 5. With the 3 extra, I rolled them into ropes and twisted them into pretzels. I boiled them for 1 minute just like the buns. I baked them for 12 minutes. I dunked them in melted butter and coated both sides with cinnamon sugar. They tasted better than Auntie Anne's. My husband and sons raved over them. I will be making pretzels again this weekend but this time I'm going to add a pinch of cinnamon and some raisins to the dough and glaze them. Thank you for this recipe. My search is over.