

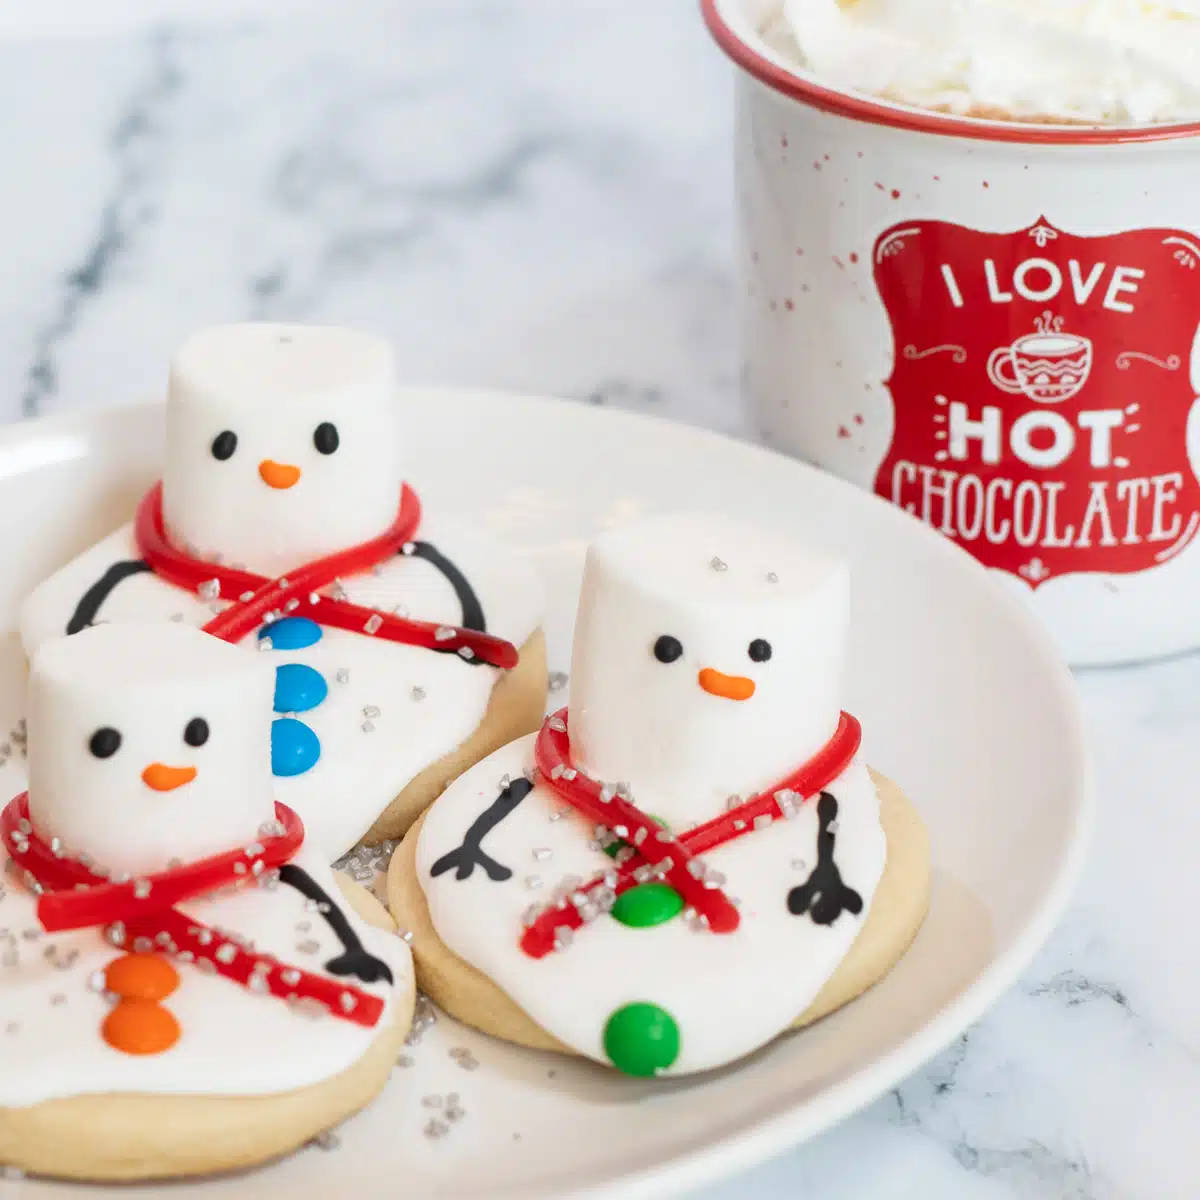
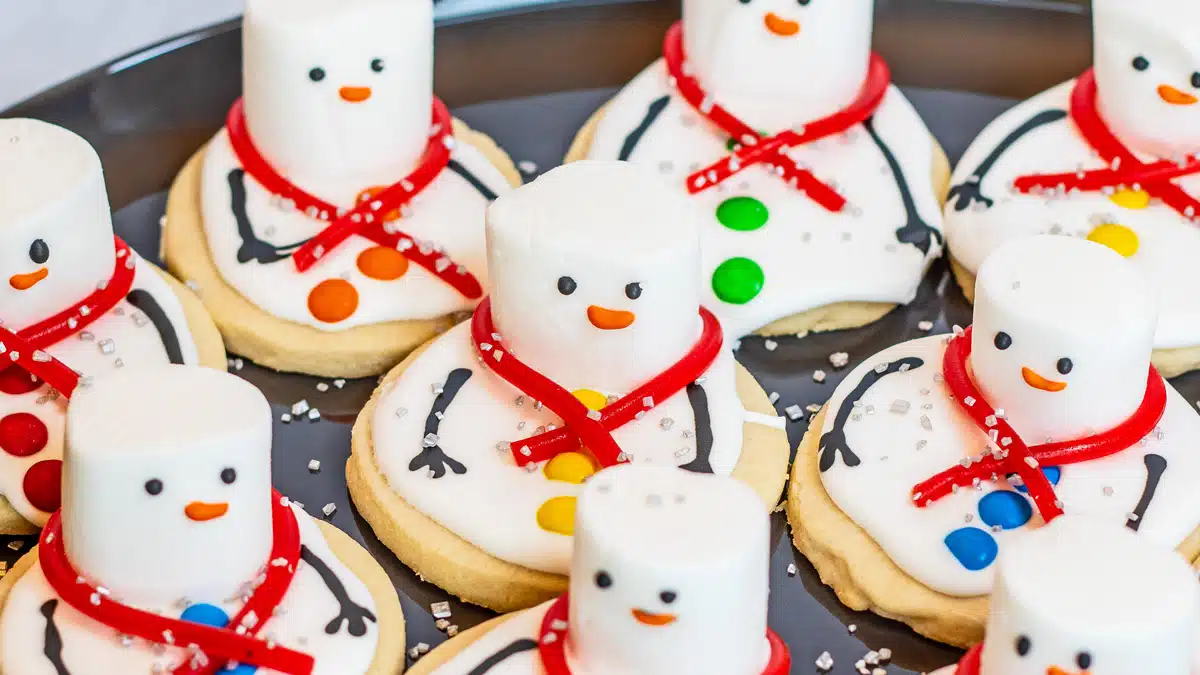
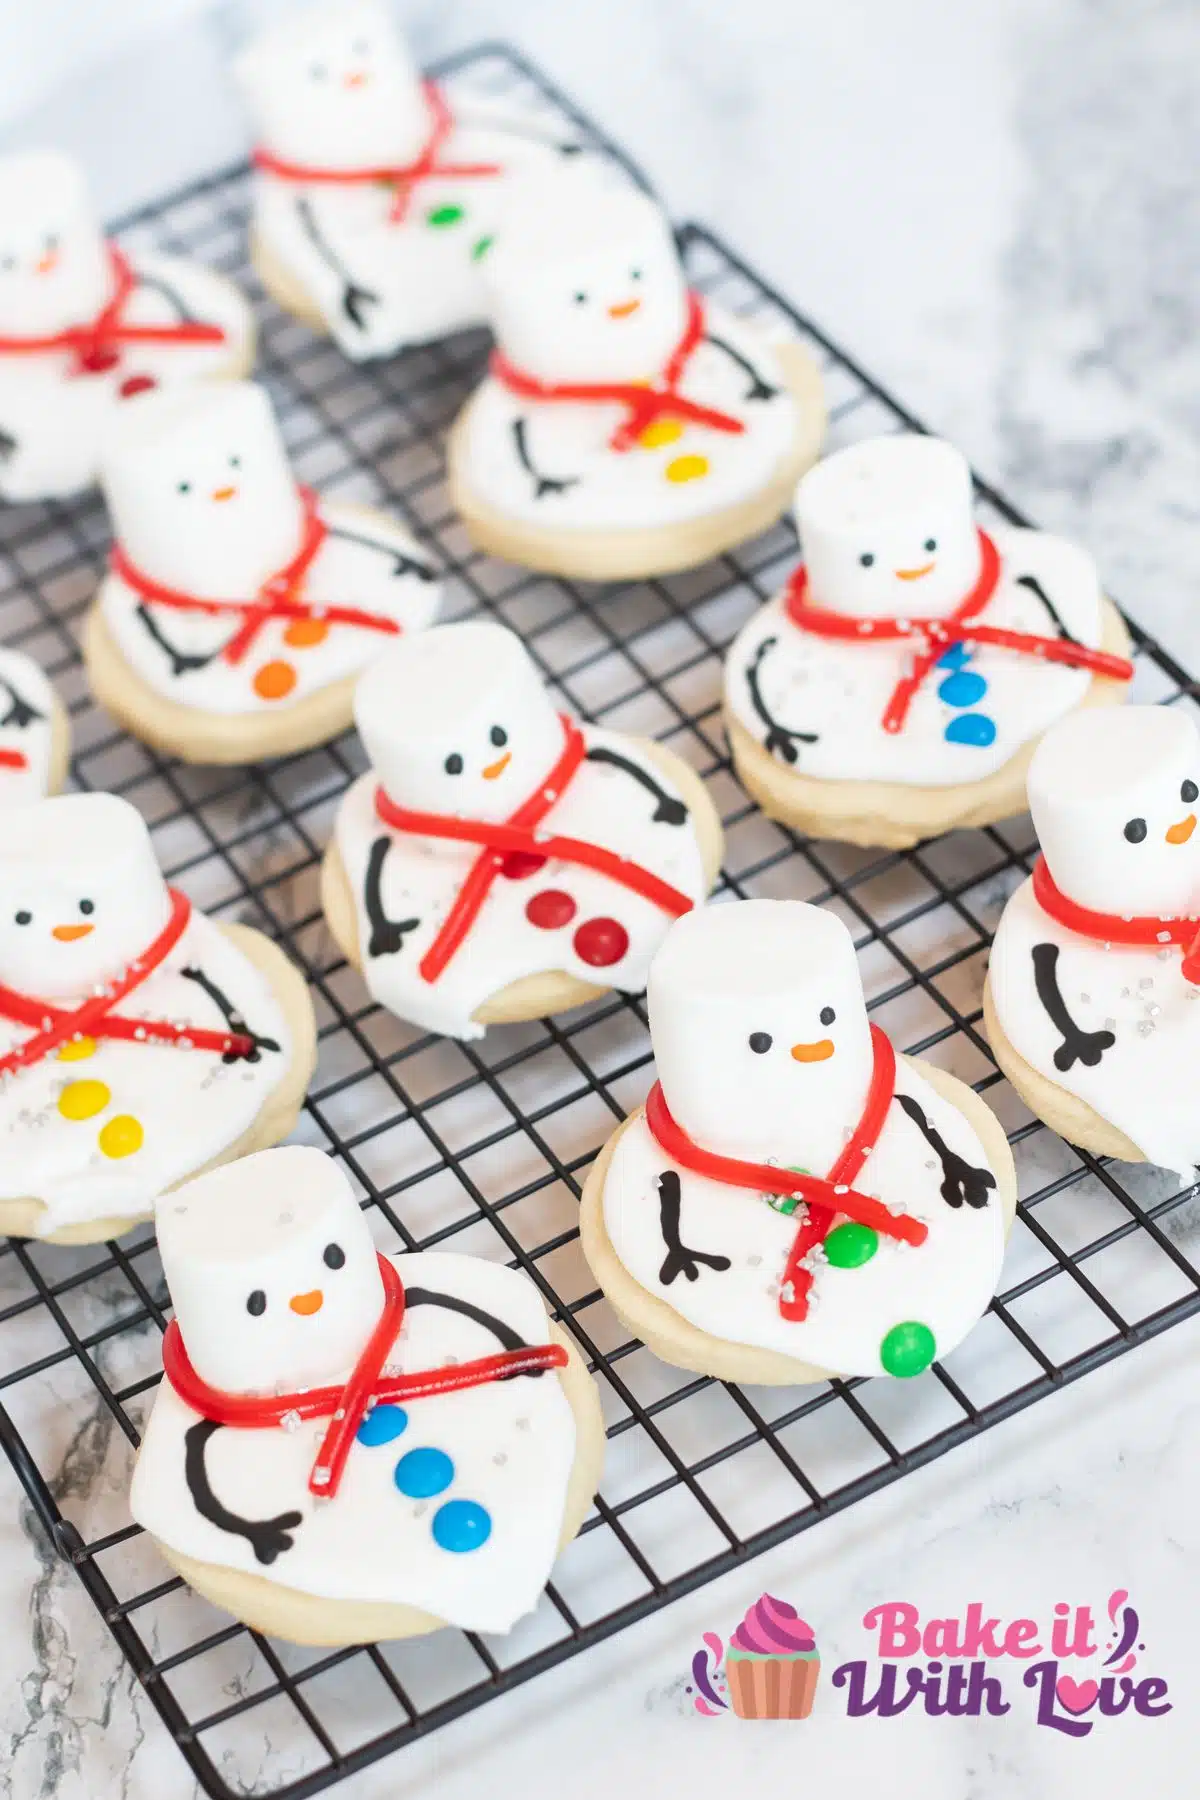
These melting snowman sugar cookies are a fun holiday project to make by layering icing and marshmallows onto cookies! This tasty winter treat is perfect for baking with the kids and letting them decorate to make snowman faces! Your finished melting snowman cookies are a hit at holiday parties!
Have Fun Decorating Christmas Cookies
I always have so much fun making cookies with my kids, especially when trapped inside on an extra-cold snow day! We were hooked the very first time I made these snowman cookies for a school Christmas party!
They quickly made their way into a yearly to-make list every single winter. Sometimes, I make the sugar cookies from scratch, and sometimes, I opt for a simpler version using store-bought, refrigerated cookie dough.
Jump to:
Check out my Top 100 Christmas cookies or my countdowns - 12 days of Christmas Cookies, 24 days, and 25 days for more baking ideas! You can also see all of my Christmas cookies and desserts here!
Whether you're a pro at hosting Christmas dinner and holiday parties or giving it a try for the first time this year, you're sure to find my ultimate guide to planning Christmas a help! Don't forget to safely thaw your holiday prime rib early, too!
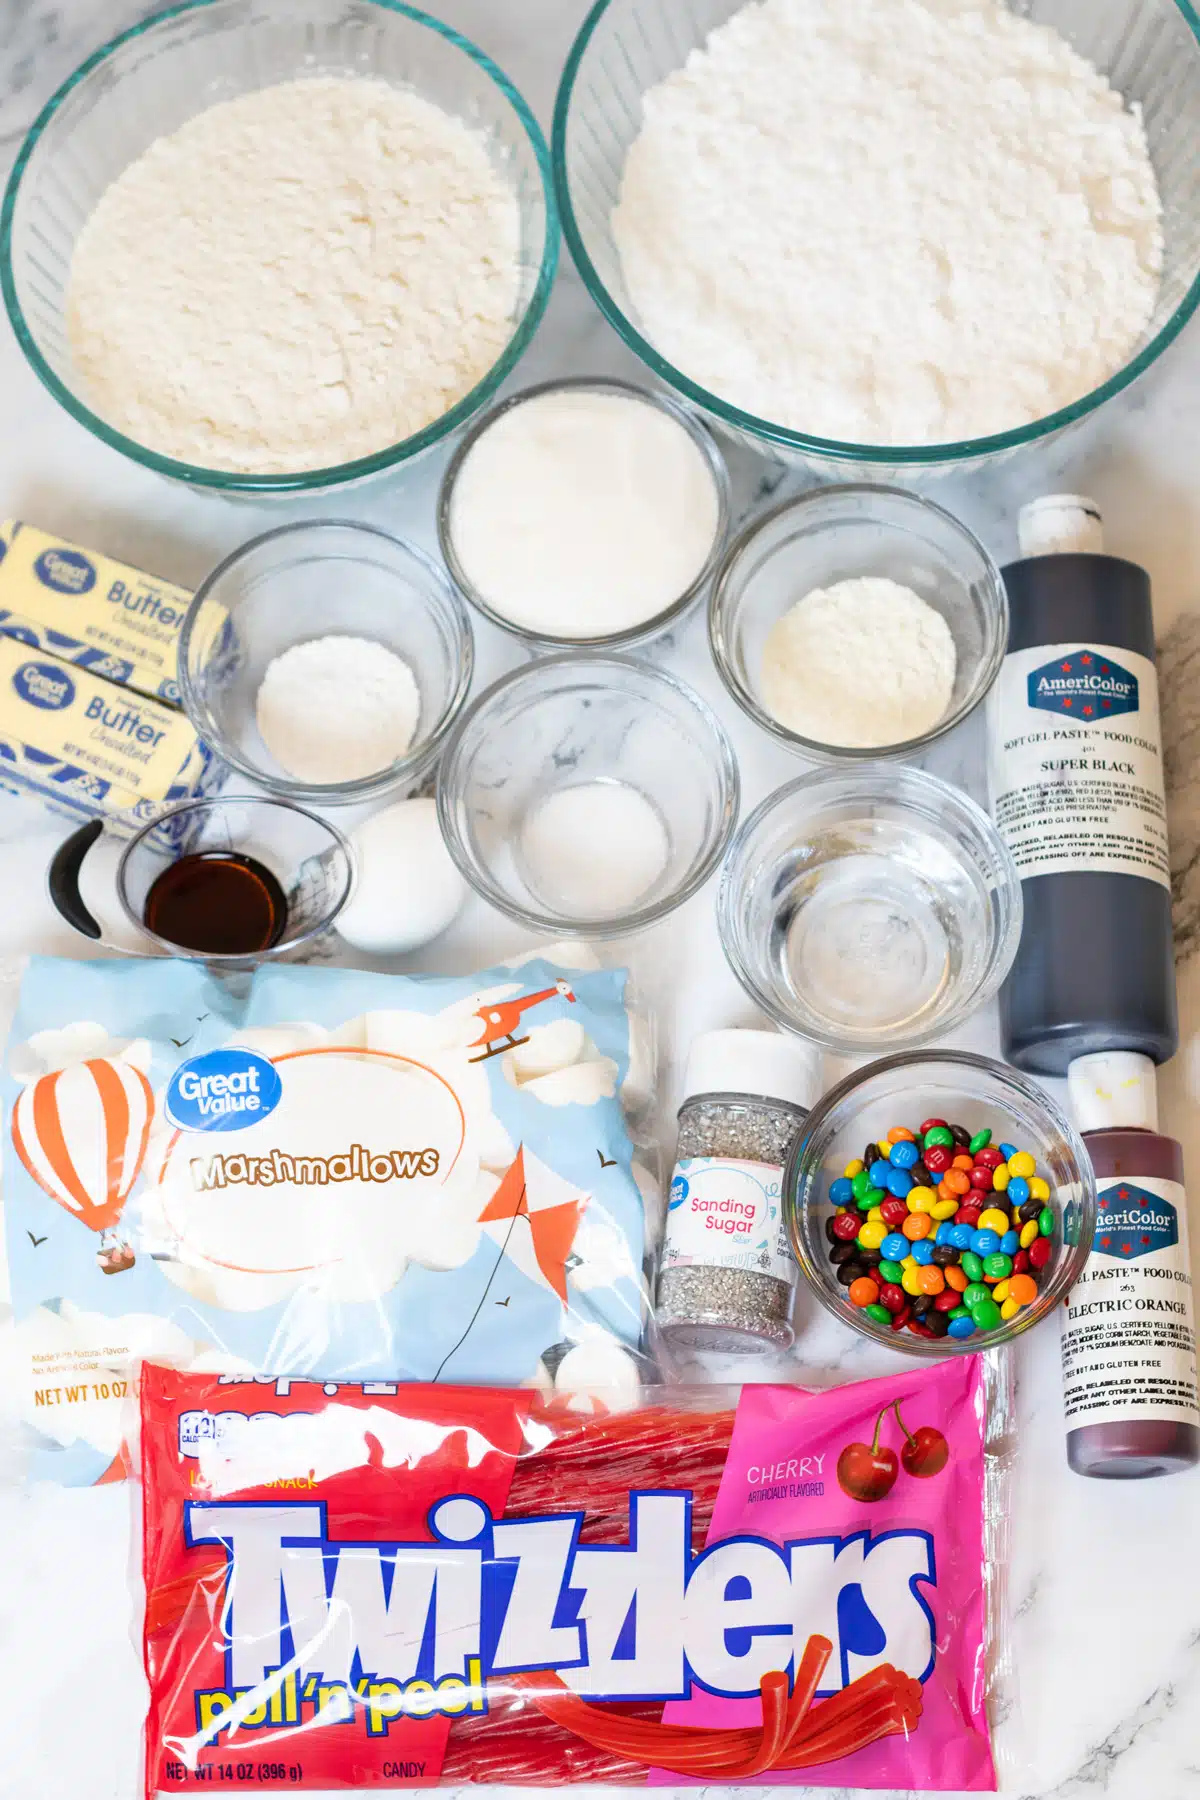
🥘 Ingredients
Sugar Cookies
- Butter - 1 cup, or 2 sticks, of butter that is softened at room temperature.
- Sugar - 1 cup of white granulated sugar.
- Vanilla - 2 teaspoons of pure vanilla extract.
- Egg - 1 large, room temperature egg.
- Baking Powder - 2 teaspoons of baking powder to help the cookies rise.
- Flour - 3 cups of all-purpose flour, spooned and leveled.
- Salt (optional) - A pinch of salt. If using unsalted butter, you can increase this amount to ½ teaspoon.
Royal Icing
- Powdered Sugar - 4 cups of confectioner's sugar (learn how to make your own here!)
- Meringue Powder - 3 tablespoons of meringue powder.
- Water - 5 tablespoons of warm water, plus more as needed to thin out the icing.
For Decorating
- Marshmallows - 30 regular-sized marshmallows, or 1 per cookie.
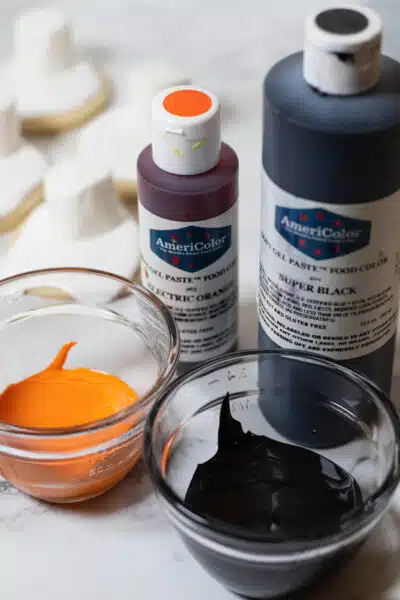
- Food Coloring - Black and orange gel food coloring to make the arms, eyes, and nose.
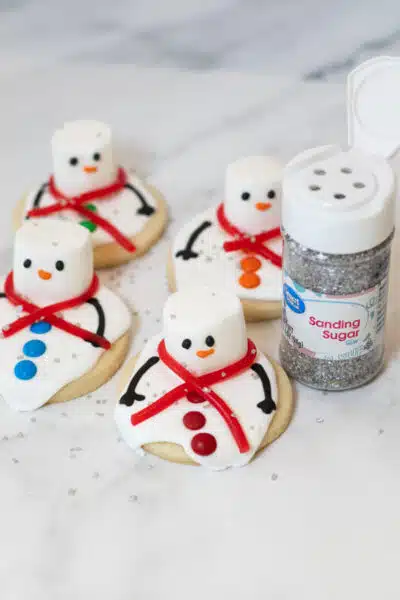
- Sprinkles - Some silver sanding sugar for a festive touch.
- Mini M&Ms - 90 mini M&M candies, or 3 per cookie.
- Twizzlers - A package of pull n' peel Twizzlers to make the scarf.
*Be sure to see the free printable recipe card below for ingredients, exact amounts & instructions with tips!*
🔪 Instructions
There may be a lot of steps, but these cookies are easy to make! You will need your measuring utensils, some mixing bowls, a stand mixer or hand mixer, a baking sheet, a rolling pin, and some food tweezers.
This recipe will make approximately 30 snowman cookies.
Prepare and Make the Sugar Cookies
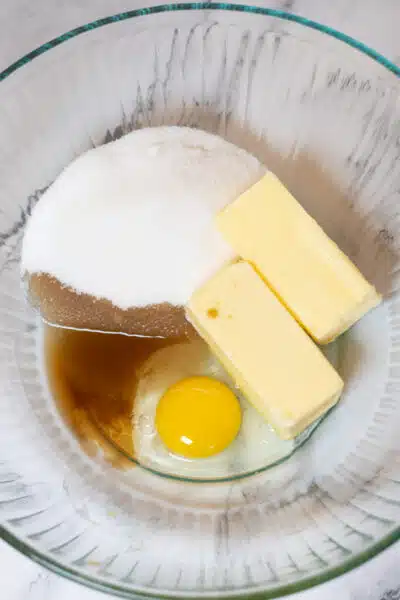
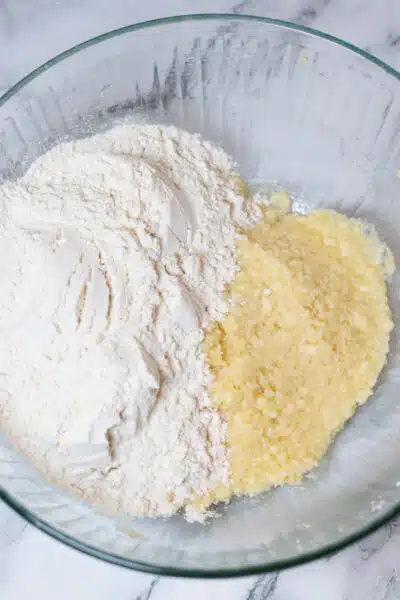
Step 1: Combine. In a medium-sized mixing bowl, use a stand mixer or hand mixer to beat together 1 cup (227 grams) of butter, 1 cup (200 grams) of sugar, 2 teaspoons (10 milliliters) of vanilla extract, and 1 large egg (50 grams).
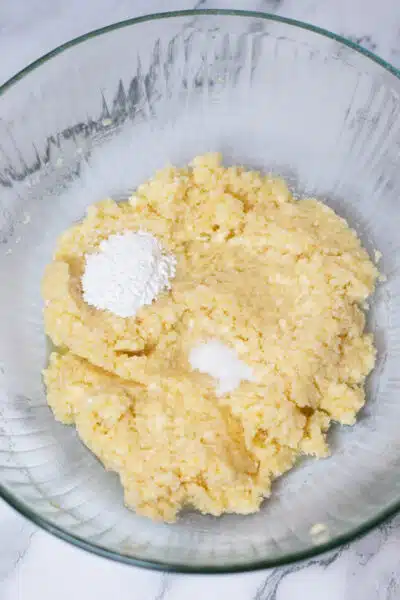
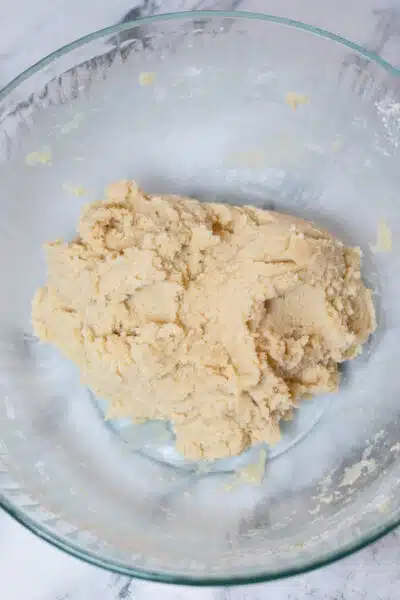
Step 2: Add. Add 2 teaspoons (8 grams) of baking powder and 1 pinch of salt to the wet ingredients. Then, start with the first 2 cups (250 grams) of all-purpose flour. Mix until blended, adding more flour if the dough is too sticky (typically ¼-½ cup extra).
Step 3: Preheat. Preheat your oven to 350°F (175°C/Gas Mark 4) and line a couple of baking sheets with parchment paper.
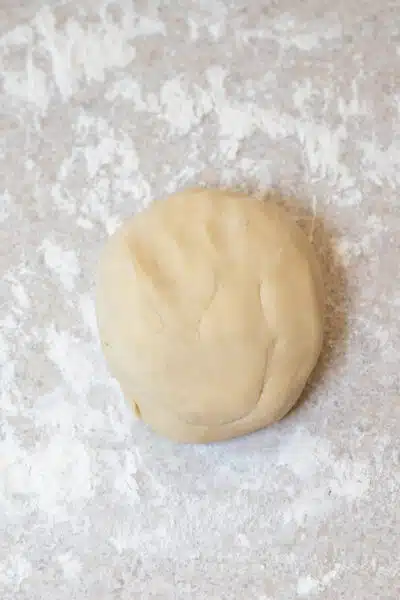
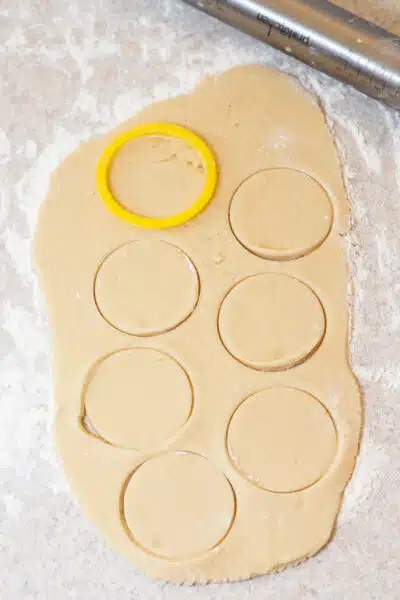
Step 4: Roll. Transfer your cookie dough to a lightly floured work surface and roll it out until it is ¼-inch thick.
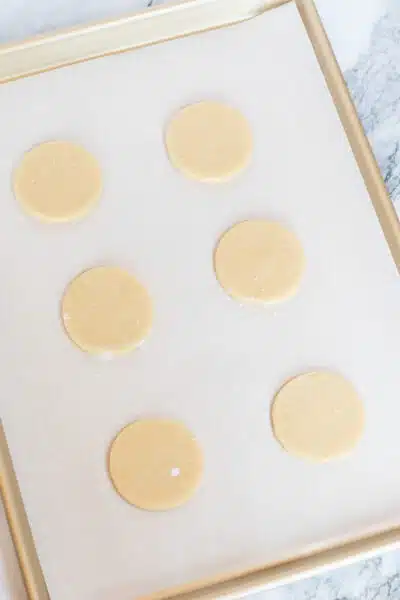
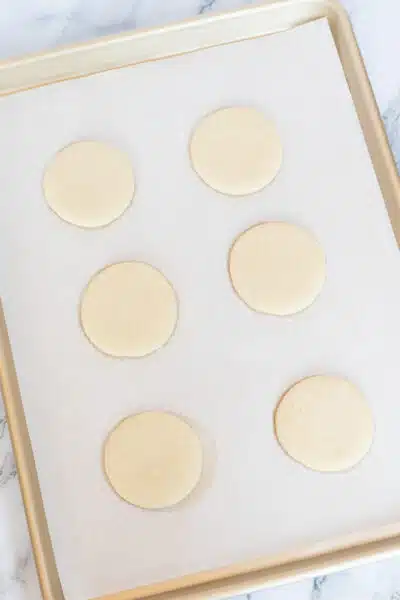
Step 5: Cut. Lightly flour a 2½-inch round cookie cutter and cut out as many cookies as possible.
Step 6: Bake. Place the cookie rounds onto the prepared baking sheet 1 inch apart from one another. Then, bake in the oven at 350°F (175°C/Gas Mark 4) for 7-10 minutes or until the edges are only barely golden.
Step 7: Cool. Let the cookies cool on the baking sheet for 5 minutes before moving them to a wire cooling rack. They need to cool completely before decorating.
Make the Royal Icing
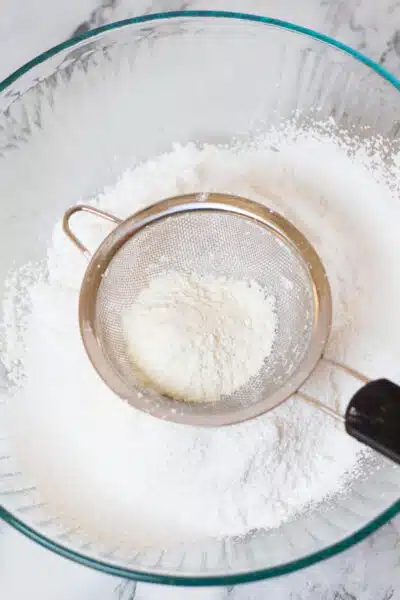

Step 8: Sift. Sift together 4 cups (480 grams) of confectioner's sugar and 3 tablespoons (44 grams) of meringue powder into a large mixing bowl.
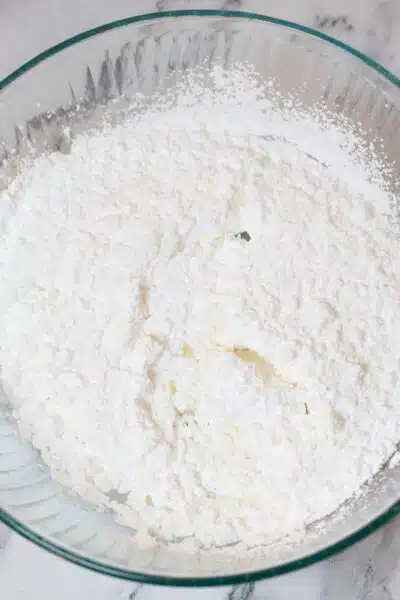
Step 9: Mix. Add 5 tablespoons (103 milliliters) of warm water and use an electric hand mixer or stand mixer (with a whisk attachment) to beat the mixture for 10 minutes. *Add more water in small increments if the icing is too thick.
Decorate the Cookies
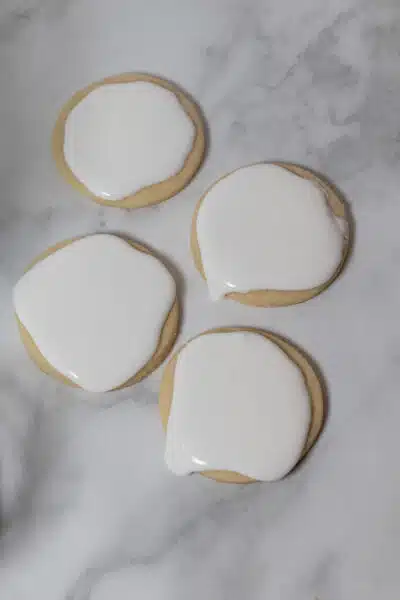

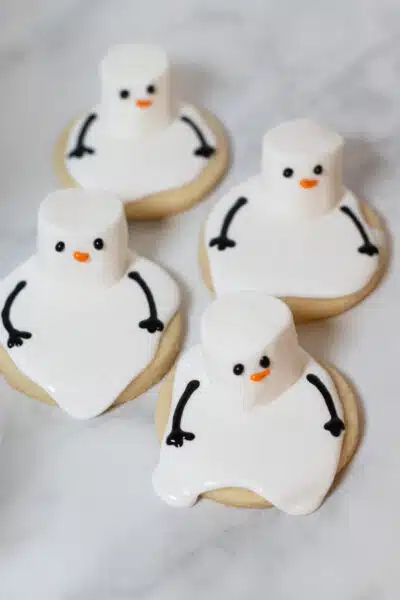

Step 10: Spread the icing. Spoon some of the icing into the middle of your cooled cookies and gently spread it towards the edges. This can be neat or messy, as it represents a snowman that has melted.
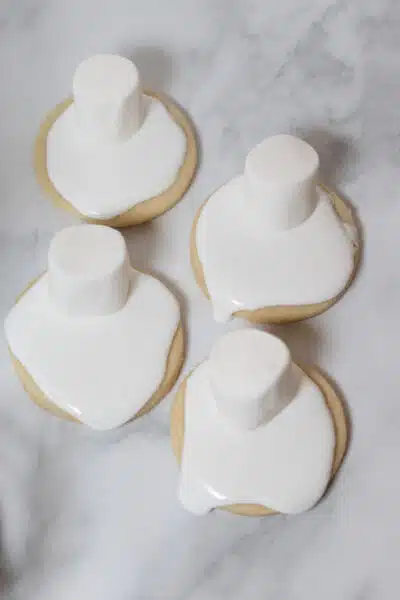
Step 11: Add the head. Place one marshmallow onto each cookie, positioning them towards one edge in order to leave room for the buttons.
Step 12: Mix the food coloring. Separate some of your icing into 2 small bowls. Add your orange and black gel food coloring and mix until combined.
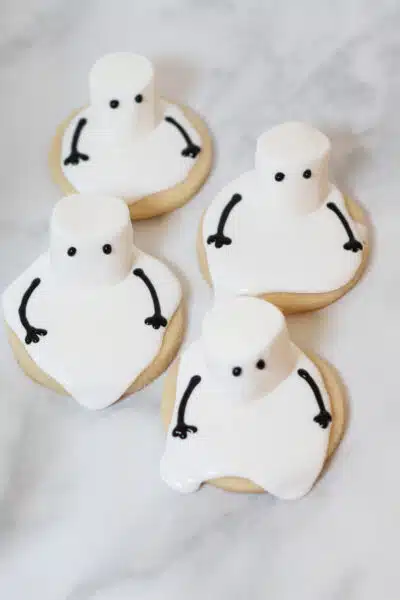
Step 13: Pipe. Thinly pipe the black icing to make arms and eyes and use the orange to make the carrot nose.
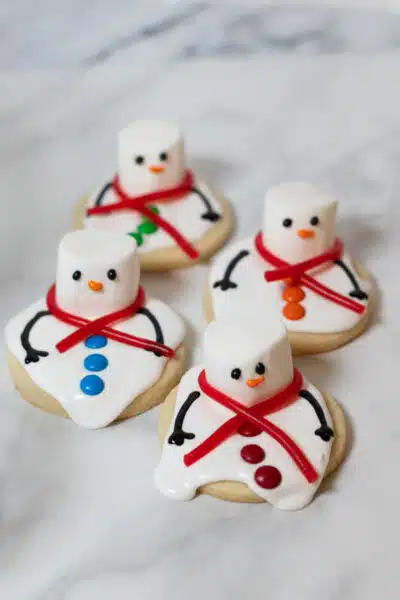
Step 14: Finish decorating. Place 3 mini M&M chocolate candies onto each cookie to make the buttons and wrap pulled-apart Twizzlers around the neck to make the scarf. Finish the cookie off with some sprinkles.
Step 15: Set. Let the cookies set at room temperature for at least 2-4 hours to harden the icing. Refrigerate your melted snowmen to set more quickly.
💭 Angela's Pro Tips & Recipe Notes
- You'll want your icing to be thick but still able to spread on the cookie easily. If it is too thick, you can add more water. If it is too thin, continue to beat it for longer (as it thickens while it is beaten).
- Some icing may run off the sides of your cookies, which is fine. If it is pouring off your cookie too quickly, the icing may be too thin and needs to be beaten for longer.
- Feel free to add some vanilla, peppermint, or almond extract to the royal icing for fun flavor combinations. I recommend using clear vanilla extract so that the color isn't tinted. Begin with just one teaspoon at a time and adjust to taste.
- You can color your icing if desired. I recommend using gel food coloring so the consistency isn't affected.
- Skip the cookie dough steps and use refrigerated cookie dough if desired. I'd grab two to make this fun holiday cookie project.
>>>>See all of my recipes here<<<<
🥡 Storing
Store any unused royal icing in the refrigerator for up to 2 weeks or in the freezer for up to 3 months. Store with a sheet of plastic cling film touching the surface of the icing (to prevent drying out during storage).
Keep your cookies in a sealed, airtight container at room temperature for up to 1 week. You can read all about how long sugar cookies last here.
Freezing
These cookies can also be frozen for up to 3 months, but separate any layers with parchment paper if you stack them. See my guide on how to freeze sugar cookies for more information.
Do you love a recipe you tried? Please leave a 5-star 🌟rating in the recipe card below and/or a review in the comments section further down the page.
Stay in touch with me through social media @ Pinterest, Facebook, Instagram, or Twitter! Subscribe to the newsletter today (no spam, I promise)! Don't forget to tag me when you try one of my recipes!
📖 Recipe Card

Melting Snowman Sugar Cookies
Ingredients
Cookies
- 1 cup butter (softened, at room temperature)
- 1 cup sugar
- 2 teaspoon vanilla extract
- 1 large egg (at room temperature)
- 2 teaspoon baking powder
- 3 cups all-purpose flour (spooned and leveled)
- 1 pinch salt (optional, use ½ teaspoon if using unsalted butter)
Royal Icing
- 4 cups confectioners sugar
- 3 tablespoon meringue powder
- 5 tablespoon water (warm, plus more as needed)
Garnish
- 30 regular marshmallows (1 per cookie)
- gel food coloring (black and orange)
- sprinkles (silver sanding sugar)
- 90 mini M&Ms chocolate candies (3 per cookie)
- twizzlers (pull n peel)
(Note: 2x or 3x only changes the ingredient list)
Instructions
Prepare the Sugar Cookies
- In a medium-sized mixing bowl, use a stand mixer or hand mixer to beat together 1 cup butter, 1 cup sugar, 2 teaspoon vanilla extract, and 1 large egg.
- Add 2 teaspoon baking powder and 1 pinch salt to the wet ingredients. Then, start with the first 2 cups of 3 cups all-purpose flour. Mix until blended, adding more flour if the dough is too sticky (typically ¼-½ cup extra).
- Preheat your oven to 350°F (175°C/Gas Mark 4) and line a couple of baking sheets with parchment paper.
- Transfer your cookie dough to a lightly floured work surface and roll it out until it is ¼-inch thick.
- Lightly flour a 2½-inch round cookie cutter and cut out as many cookies as possible.
- Place the cookie rounds onto the prepared baking sheet 1 inch apart from one another. Then, bake in the oven at 350°F (175°C/Gas Mark 4) for 7-10 minutes, or until the edges are only barely golden.
- Let the cookies cool on the baking sheet for 5 minutes before moving them to a wire cooling rack. They need to cool completely before decorating.
Make the Royal Icing
- Sift together your 4 cups confectioners sugar and 3 tablespoon meringue powder into a large mixing bowl.
- Add the warm 5 tablespoon water and use an electric hand mixer or stand mixer (with a whisk attachment) to beat the mixture for 10 minutes. *Add more water in small increments if the icing is too thick.
Decorate the Cookies
- Spoon some of the icing into the middle of your cooled cookies and gently spread it towards the edges. This can be neat or messy, as it is representing a snowman that has melted.
- Place one of your 30 regular marshmallows onto each cookie, positioning them towards one edge in order to leave room for the buttons.
- Separate some of your icing into 2 small bowls. Add your orange and black gel food coloring and mix until combined.
- Thinly pipe the black icing to make arms and eyes and use the orange to make the carrot nose.
- Place 3 of your 90 mini M&Ms chocolate candies onto each cookie to make the buttons and wrap pulled-apart twizzlers around the neck to make the scarf. Finish the cookie off with some sprinkles.
- Let the cookies set at room temperature for at least 2-4 hours to harden the icing. Refrigerate your melted snowmen to set more quickly.
Notes
- You'll want your icing to be thick but still able to spread on the cookie easily. If it is too thick, you can add more water. If it is too thin, continue to beat it for longer (as it thickens while it is beaten).
- Some icing may run off the sides of your cookies, which is fine. If it is pouring off your cookie too quickly, the icing may be too thin and needs to be beaten for longer.
- Feel free to add some vanilla, peppermint, or almond extract to the royal icing for fun flavor combinations. I recommend using clear vanilla extract so that the color isn't tinted. Begin with just one teaspoon at a time and adjust to taste.
- You can color your icing if desired. I recommend using gel food coloring so the consistency isn't affected.
- Skip the cookie dough steps and use refrigerated cookie dough if desired. I'd grab two to make this fun holiday cookie project.
- Store any unused royal icing in the refrigerator for up to 2 weeks or in the freezer for up to 3 months. Store with a sheet of plastic cling film touching the surface of the icing (to prevent drying out during storage).
- Keep your cookies in a sealed, airtight container at room temperature for up to 1 week.
- These cookies can also be frozen for up to 3 months, but separate any layers with parchment paper if you stack them.
Comments
No Comments