
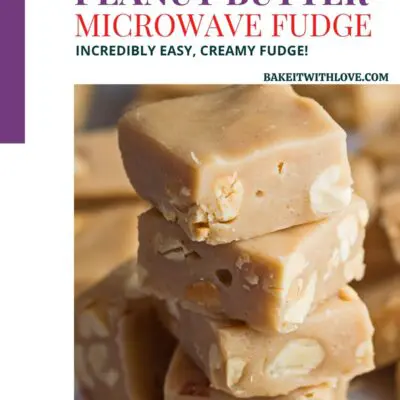
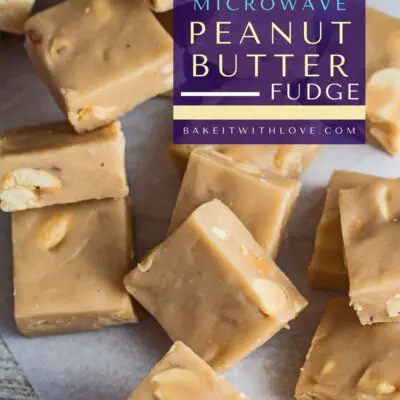
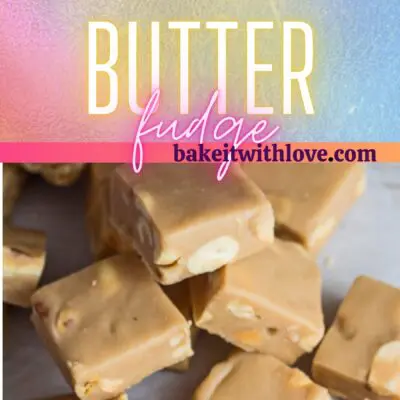
This microwave peanut butter fudge couldn't be easier to make. It is wonderfully creamy and tastes divine! It's ideal for the holidays, treat platters, or just because you need something rich and peanut buttery! It takes practically no effort to whip up with only 4 ingredients!
Jump to:
Easy 4 Ingredient Peanut Butter Fudge
Chocolate gets all the attention when it comes to fudge, but I am not joking when I say that this recipe for peanut butter fudge is not only incredibly simple but also the BEST combination of salty, sweet, and creamy! Plus, you don’t even need an oven or stovetop to make it, which means this is a perfect treat to make in the summer when you don’t want to heat up the kitchen.
My family is addicted to this ultra-easy, ultra-creamy peanut butter fudge. And as a side note, from personal experience, if you leave the fudge out on the counter for too long you simply won't have any leftovers!
But it’s also a great gift around the holiday season - make several batches and wrap them with a pretty bow for friends and family! This creamy fudge is the perfect addition to your holiday baking!
🥘 Ingredients
All you need is four ingredients and a microwave! Yep - you read that right. Delicious fudge made in the microwave. It doesn’t get any easier!
- Sweetened Condensed Milk - 14 ounces of sweetened condensed milk. This is the best choice for fudge, as it won’t curdle when cooked at a high temperature and has a sweet, caramelized taste.
- White Chocolate Chips - 2 cups of white chocolate chips. These rich and creamy white chocolate chips are the base of many fudge recipes!
- Creamy Peanut Butter - ½ cup of creamy peanut butter. Use your favorite brand! However, the natural brands will not be quite as creamy as Jif, Skippy, or their generic brand equivalents.
- Vanilla Extract - ½ tablespoon of vanilla extract. Be sure to use real vanilla for the best taste, as this heightens all of your ingredient flavors.
- Dry Roasted Peanuts (optional) - 1 cup of dry roasted peanuts. These are completely optional but add extra peanut flavor and a wonderful crunch to your fudge.
*Be sure to see the free printable recipe card below for ingredients, exact amounts & instructions with tips!*
🔪 How To Make Microwave Peanut Butter Fudge
Start out with some quick prep of lining your baking pan, then gather ingredients. Toss everything directly into a microwave-safe dish, and voila! You'll have fudge ready to set in no time!
This recipe will make about 40 servings, making it perfect for a crowd or gift baskets!
- Prepare your pan. Choose your baking pan - a 9x13 is perfect for this recipe, but use an 8x8 if you like thicker fudge. Cover the entire pan with parchment paper (edges should hang over the side of the pan), for super easy clean-up and removal of the chilled and set fudge slab. *If the paper isn’t fitting well into the pan, you can crumple it a few times and stretch it.
- Combine ingredients. Take a medium-sized, microwave-safe bowl and combine all of the ingredients, including 2 cups white chocolate chips, 14-ounce can of sweetened condensed milk, ½ tablespoon of vanilla extract, ½ cup of creamy peanut butter, and the optional 1 cup of roasted peanuts.
- Microwave. Heat the combination of ingredients on high in the microwave, stopping every 30 seconds to stir. Do this until everything is melted and smooth, approximately 1- 1½ minutes. *Small pieces of white chocolate will dissolve with stirring.
- Transfer the mixture. Pour the entire mixture into your prepared baking pan and smooth the top with a spatula.
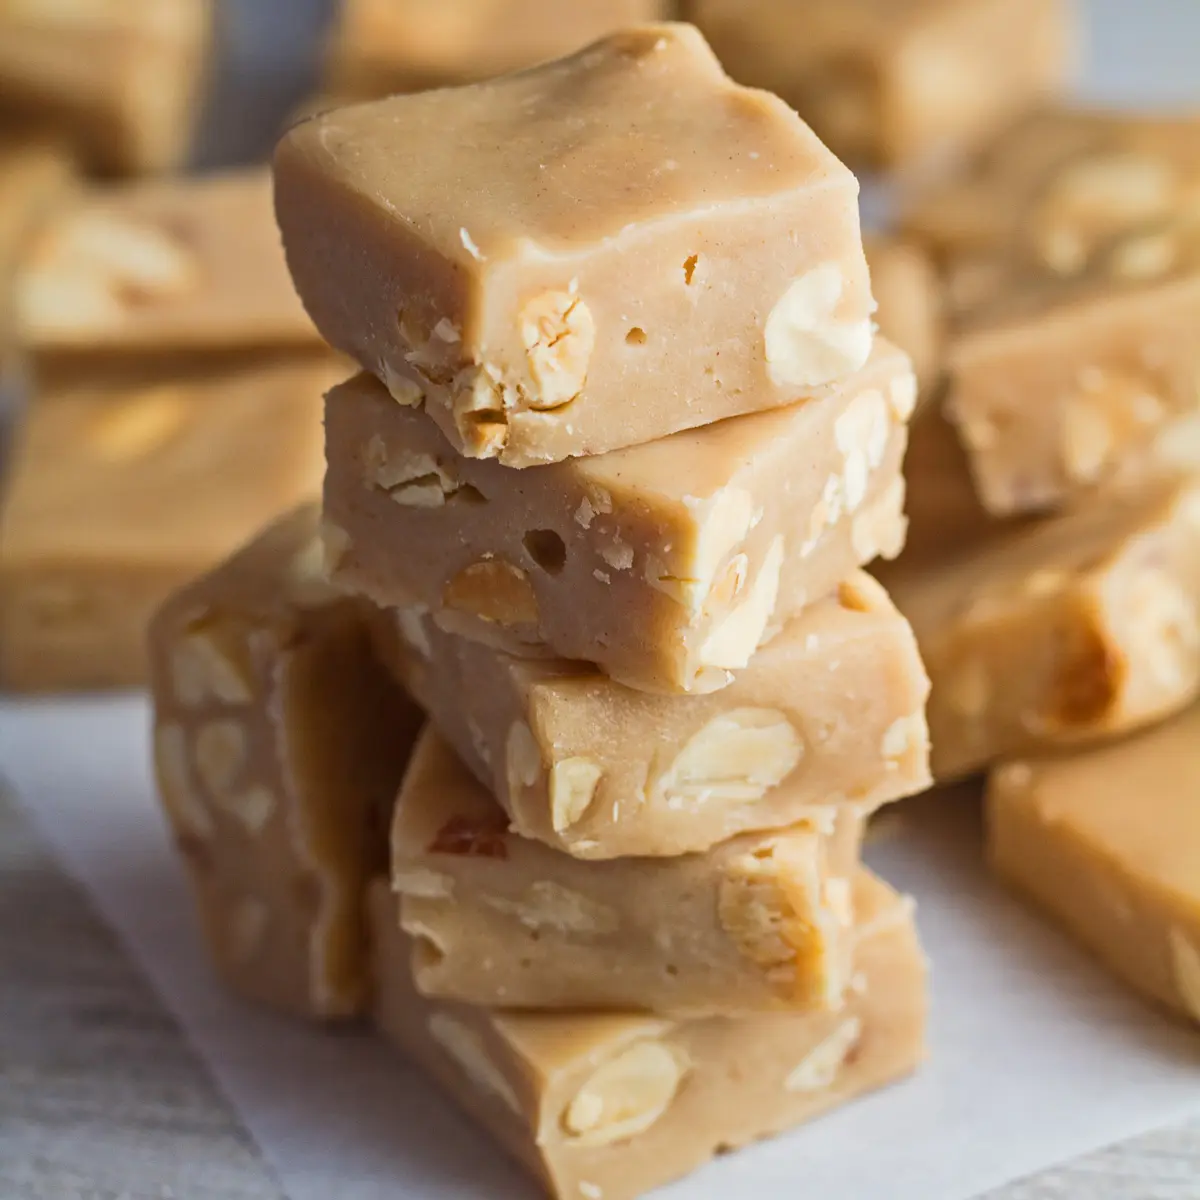
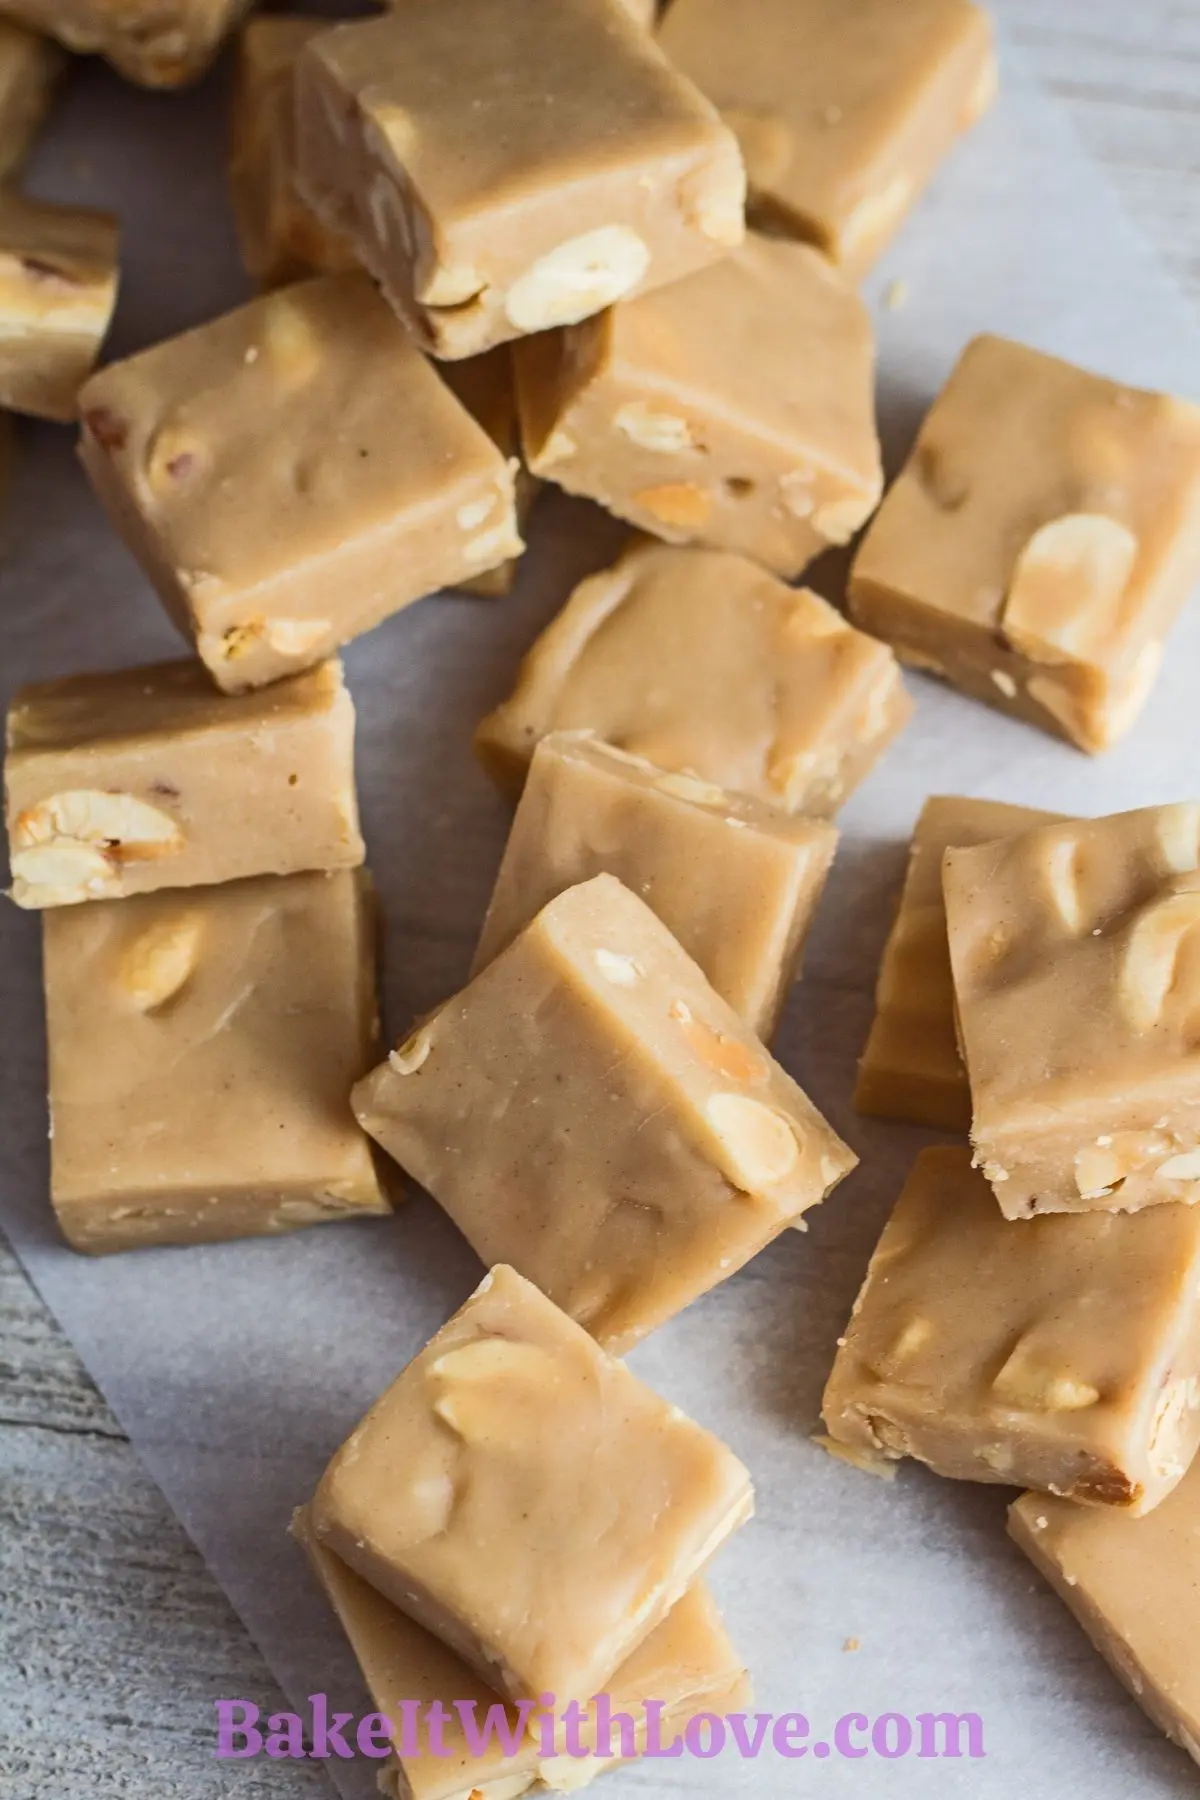
- Chill and set. Place the fudge in the refrigerator to chill and set completely, which will take at least an hour. Remove the pan and cut the fudge into one-inch squares for serving.
This creamy, decadent fudge goes great with a hot cup of coffee or tea or a big glass of milk! No matter the time of year, these are a real treat! Enjoy!
💭 Angela's Pro Tips & Recipe Notes
- If you use a smaller pan for thicker squares of fudge, the cooling and setting time can take longer.
- Make sure to store your fudge in an airtight container to keep it from absorbing flavors from other foods!
- For some extra texture and crunch, mix in some roasted peanuts!
🥡 Storing & Reheating
Your microwave peanut butter fudge can be kept in the refrigerator in an air-tight container for up to three weeks.
It is best to store the fudge in an airtight container. Place sheets of parchment paper between the layers and store at room temperature for up to 1-2 weeks.
Keep the fudge tucked away in a pantry rather than on the countertop. If your fudge gets a bit mushy or soft, place it out for an hour or two to firm up again.
If you make several batches and want to freeze some, you can wrap the entire block of fudge in cling film, or cut it into pieces and wrap them individually. Then, place in a freezer-safe plastic bag to keep it fresh for up to three months.
To thaw, simply remove it from the freezer and place it in the refrigerator until soft.
❓ Recipe FAQs
Fudge that doesn't set up after cooling but isn't grainy, didn't reach a high enough temperature while cooking the fudge. Return your fudge to a microwave-safe bowl and add 1½ cups water. Heat until melted again and the water is fully combined with your fudge. Double-check the fudge temperature using a candy thermometer. Once it is between 235-245°F (113-118°C), it has reached the 'soft ball' stage the fudge needs to be set correctly.
Stirring too much during cooling allows the sucrose molecules to form crystals (basically forming sugar crystals). Resist the urge to stir and simply transfer the fudge to your prepared pan, spread, and refrigerate to set.
This is totally up to you! I like to use a 9x13 pan, but 8x8 works well if you like your fudge to be thicker.
🍫 More Sweet Treats
- Cherry Pie Bars - These tasty bars have all the flavors of classic cherry pie but in convenient bars!
- Puff Pastry Apple Turnovers - These on-the-go treats are perfect for breakfast or dessert!
- Chocolate Frosting Fudge - This sweet and rich fudge only uses 2 ingredients to make!
- 3 Ingredient Peanut Butter Cookies - You won't need to run to the grocery store for these easy and delicious cookies!
- Chocolate Chip Mug Cake - This incredibly easy treat is ready in just a few minutes!
- Brownie Blondies - This easy recipe combines both blondies and brownies together for one sweet and decadent dessert!
Do you love a recipe you tried? Please leave a 5-star 🌟rating in the recipe card below and/or a review in the comments section further down the page.
Stay in touch with me through social media @ Pinterest, Facebook, Instagram, or Twitter! Subscribe to the newsletter today (no spam, I promise)! Don't forget to tag me when you try one of my recipes!
📖 Recipe Card

Microwave Peanut Butter Fudge
Ingredients
- 14 ounces sweetened condensed milk (1 14 ounce can)
- 2 cups white chocolate chips
- ½ cup creamy peanut butter
- ½ tablespoon vanilla extract
- 1 cup dry roasted peanuts (optional)
(Note: 2x or 3x only changes the ingredient list)
Instructions
- Prepare either an 8x8 baking pan (for thicker fudge pieces) or a 9x13 baking pan with a sheet of parchment paper. Leave the parchment paper overhanging two sides to be your handles for easy removal of the set fudge. *Parchment paper can be crumpled up and stretched, repeating a few times to make it fit into baking pans easier.
- In a medium-sized mixing bowl combine all of the ingredients including the 14 ounce can of sweetened condensed milk, 2 cups of white chocolate chips, ½ cup of creamy peanut butter, ½ tablespoon of vanilla extract, and the optional 1 cup of dry roasted peanuts.
- Heat the ingredients on high power in 30-second increments. Stir between each heating until fully melted, about 1 - 1 ½ minutes.
- Transfer the melted fudge mixture into your prepared baking dish and smooth the top using a spatula.
- Chill the microwave peanut butter fudge in the refrigerator for at least an hour, or until fully set. Remove from the pan and cut into approximately 1-inch squares for serving.
Notes
- If you use a smaller pan for thicker squares of fudge, the cooling and setting time can take longer.
- Make sure to store your fudge in an airtight container to keep it from absorbing flavors from other foods!
- For some extra texture and crunch, mix in some roasted peanuts!
Mike says
I can't believe how good this was!
Mike D says
This was easiest fudge Ive ever made, the family loved it! I used natural peanut butter with no problems, I will be bringing this over for Christmas this year.
Angela @ BakeItWithLove.com says
Thank you! So happy to hear that you and your family have enjoyed the fudge! Happy holidays!
Earl Bennett says
I'm looking for a easy pie shell crust made with ghram crackers I'm missing butter what other ingredient could I use ?
Thank you ..Earl Bennett
Angela @ BakeItWithLove.com says
If you have some shortening or unflavored cooking oil, either will work. I'd opt for butter-flavored shortening if you have it. I also like unrefined coconut oil (depending on what your filling flavor will be). Hope that helps!