
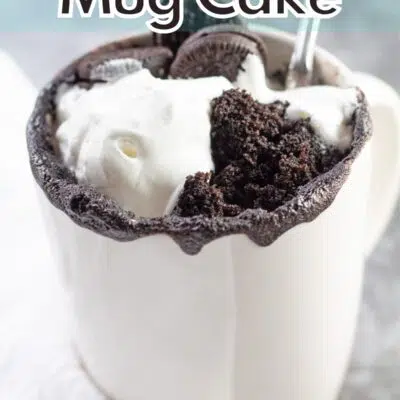
This Oreo mug cake is an incredibly easy-to-make dessert recipe. It has an equally incredible taste and texture for a perfectly portioned quick dessert! With just 2 ingredients and about as much time, you can whip up this rich, chocolatey cake and satisfy your sweet tooth and chocoholic cravings!

Jump to:
The Best 2-Minute Oreo Cake In A Mug
Transform the classic cookie into a fluffy, personal-sized cake by combining crushed Oreos with milk, a hint of vanilla extract, and a dash of baking powder.
In just minutes, you can indulge in a light and scrumptious dessert that captures the essence of Oreos in every bite.
This Oreo mug cake is sure to be a hit with everyone, from kids to adults, making it a perfect treat for family dessert nights or a quick sweet fix.
Its viral fame on social platforms like TikTok is a testament to its deliciousness and eye-catching appeal.
Embrace the enduring trend of mug cakes and enjoy customizing this quick and easy dessert to suit your taste, or share the joy by making one for a friend!
Looking for more mug cakes? Take a look at my chocolate chip or peanut butter varieties!
🥘 Ingredients
There are only 2 required ingredients in this mug cake. Adding the last two will make it extra fluffy and give it a boost of rich flavor.
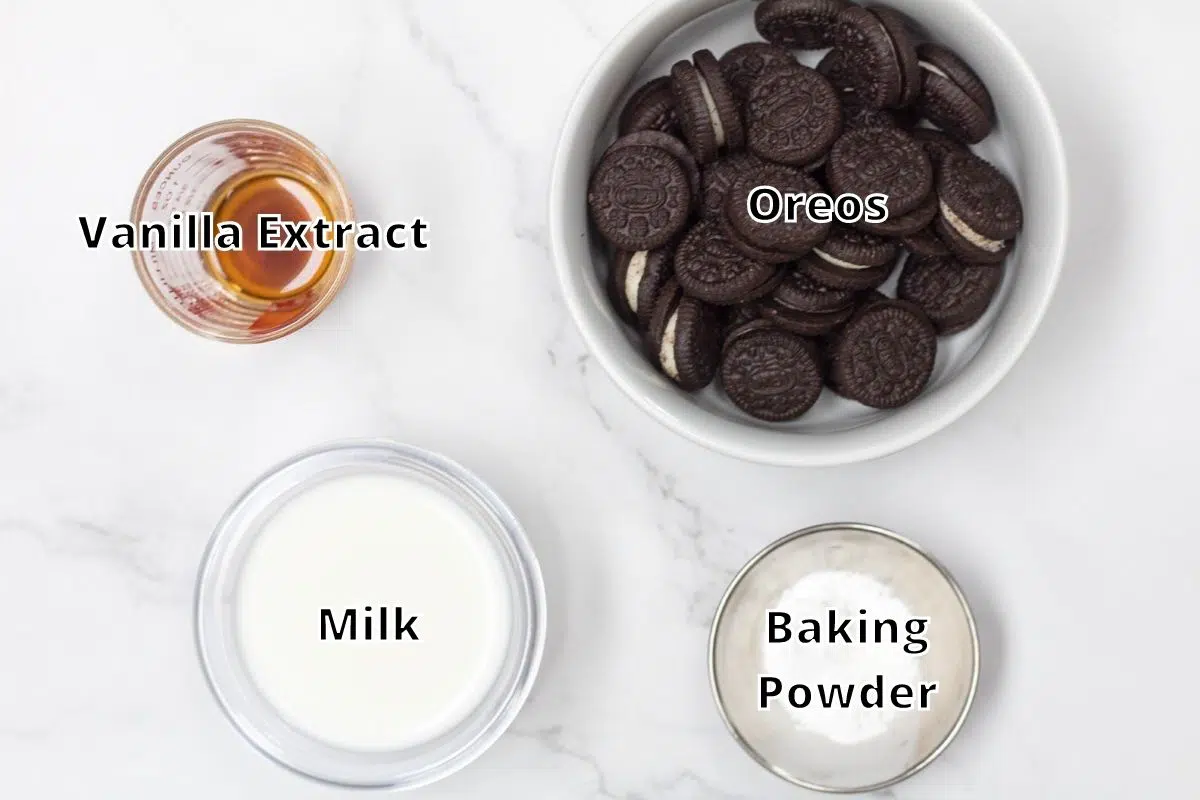
- Oreo Cookies - This classic cookie always reminds me of childhood! You can use regular Oreos, Oreo Thins, Double Stuffed, or a single packet of mini Oreos like I am here.
- Milk - Dairy, soy, oat, nut milk - any kind will work.
- Baking Powder (optional) - Add this to make your Oreo mug cake light and fluffy.
- Vanilla Extract (optional) - I say optional, but I really mean that unless there's no vanilla extract in your house, it's pretty much a must-have. Vanilla highlights other flavors, so your mug cake will be that much better!
🔪 How To Make A Oreo Mug Cake
This is a great cake for a random craving or a last-minute guest. It only takes a few minutes from start to finish for a really beautiful and delicious dessert.
All you need to get started is a 12-14 ounce coffee mug, a measuring cup, and a spoon!
Step 1. Crush The Oreos
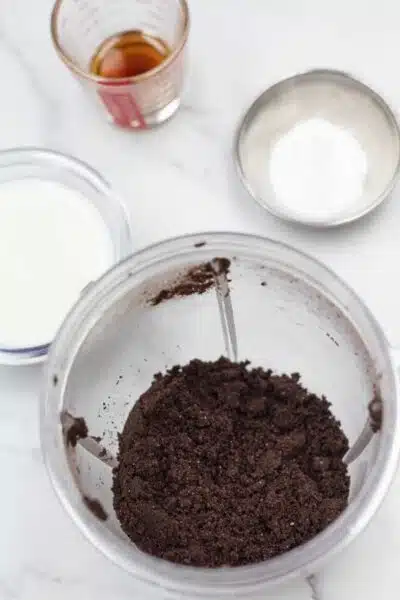
- Crush the Oreos. Start out by crushing 4 Oreo cookies either by hand or in a food processor or blender. The latter will result in finer crumbs and a lighter mug cake. For the lightest cake possible, blend them to fine dust.
- Mix the ingredients. Next, transfer the Oreo crumbs into a small bowl or microwave-safe mug. If using baking powder, combine it with the crushed Oreos now.
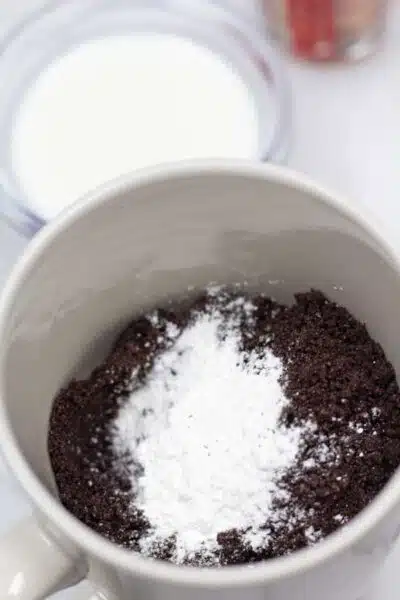
Step 2. Combine & Microwave

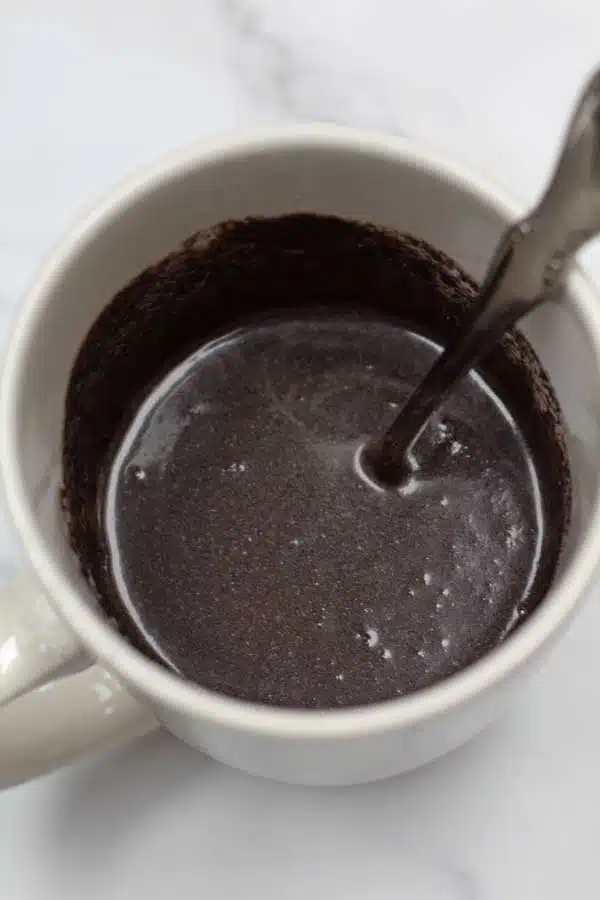
- Add wet ingredients. Pour in 3 tablespoons of milk and the optional ½ teaspoon of vanilla extract. Stir until there are no clumps. In order to ensure all of the Oreos have been moistened by the liquids, be sure to scrape the bottom of the mug with a spatula. If you’re using a bowl, transfer the batter into a microwave-safe mug.
- Cook the cake. Set your microwave to high power and cook for 90 seconds to 2 minutes. It will vary by microwave. When it’s finished, the cake should be set and will spring back when you touch it.
- Cool slightly. Allow the cake to set up and cool in the microwave for 1 minute before serving.
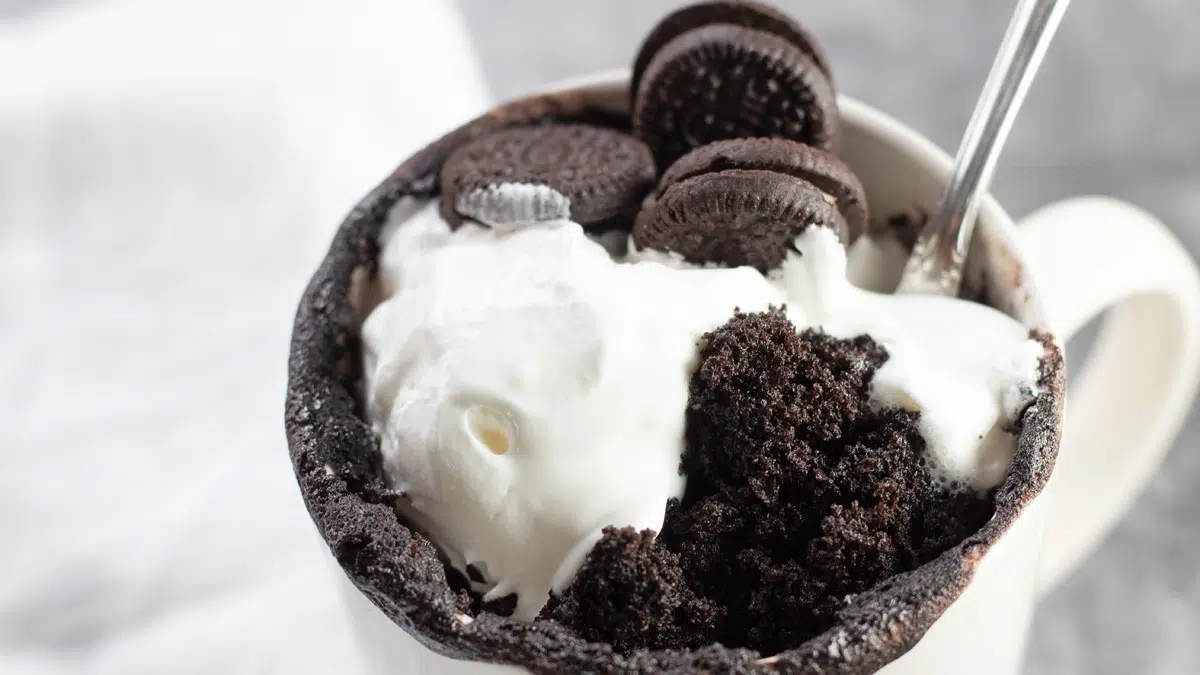
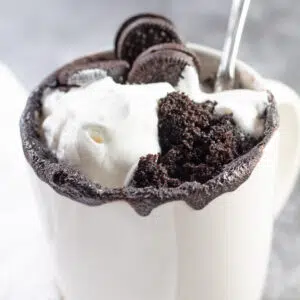
Serve with whipped cream and some extra Oreos or your other favorite toppings! My vanilla or chocolate nice cream would also be an excellent touch.
Any of your favorite cake flavors can be made into all types of mug cakes! Check out my recipes for both Nutella and vanilla mug cakes! They really are amazing for those late-night dessert cravings or those evenings when you don’t want to make an entire cake.
💭 Angela's Pro Tips & Recipe Notes
- Baking Soda & Vanilla Extract: Add baking powder for a lighter, airier cake texture. While not essential, it can transform your cake from dense to delightfully fluffy. Vanilla extract isn't crucial, but it significantly enhances the Oreo flavor. Use a high-quality extract for the best taste.
- Presentation Perfection: Make your cake in microwave-safe ramekins for a more elegant presentation. They're ideal for serving a special dessert to guests or enjoying a fancier treat. Garnish with whipped cream and a cherry for an extra special touch.
- Gooey Center Surprise: Elevate your mug cake with a molten center. Before cooking, add a dollop of peanut butter, Nutella, or a handful of chocolate chips to the batter. The filling will sink as it cooks and create a deliciously gooey core. It will be hot, so let it cool slightly before you enjoy it.
🥡 Storing & Reheating
Cake typically lasts 3-4 days at room temperature but will start drying out after that. If stored in the fridge, it may keep its moisture for another day or two. Either way, wrap it tightly with foil or plastic cling wrap, eliminating as much air as possible.
Cover your mug cake tightly in aluminum foil or plastic cling wrap to freeze it. It will be good for 3-4 months in the freezer before losing flavor.
Reheating
There’s no need to reheat these. If you’re pulling your cake out of the freezer, leave it in the fridge overnight to thaw. It can take several hours.
Are you in a rush? Leaving your mug cake out on the countertop is fine if you’re going to eat it in a couple of hours.
>>>>See all of my recipes here<<<<
❓ Oreo Mug Cake FAQ
Microwave cooking can be tricky. They are all slightly different, and your power setting also affects how fast things cook. Try taking 30 seconds to 1 minute off your baking time. Cook for 15 to 20 seconds at a time, checking for doneness between each interval.
Another trick is adding a tablespoon of water to the mixed batter before putting it in the microwave. While it evaporates, it will keep the top of the cake from drying out.
Mug cakes are fantastic when served hot right out of the microwave, but they are also good when completely cool. After all, you wouldn’t reheat leftover birthday cake, would you? I don’t recommend reheating them, as it will likely dry them out.
If you have followed the tip above and added a molten center, try reheating in the microwave for 10-20 seconds. It’s important only to heat the mug cakes until they're warm. Overheating can ruin your cake after it’s already been cooked completely.
Absolutely! While it’s great without icing, it would also be delicious with it. Either vanilla buttercream or chocolate buttercream frosting would be my top picks. It’s difficult to cut down an icing recipe for a single mug cake, but if you have some leftovers from a full cake you made, this is an ideal place to use it.

🎂 More Mug Cake Recipes
- Snickerdoodle Mug Cake
- Nutella Mug Cake
- Coffee Cake Mug Cake
- Chocolate Chip Mug Cake
- Chocolate Mug Cake
- Vanilla Mug Cake
Do you love a recipe you tried? Please leave a 5-star 🌟rating in the recipe card below and/or a review in the comments section further down the page.
Stay in touch with me through social media @ Pinterest, Facebook, Instagram, or Twitter! Subscribe to the newsletter today (no spam, I promise)! Don't forget to tag me when you try one of my recipes!
📖 Recipe Card
2 Ingredient Oreo Mug Cake
Ingredients
- 4 Oreo cookies (crushed)
- 3 tablespoon milk
- 1 teaspoon baking powder (optional)
- ½ teaspoon vanilla extract (optional)
(Note: 2x or 3x only changes the ingredient list)
Instructions
- Crush the Oreo cookies by hand, or for a finer crumble (and lighter mug cake) use a food processor or blender to process the cookies to a fine dust.
- In a small bowl or microwave-safe mug, combine the crushed 4 Oreo cookies with optional 1 teaspoon baking powder. Add the 3 tablespoon milk plus optional ½ teaspoon vanilla extract and stir to combine until smooth. Make sure to scrape the bottom of your mug so that all of the Oreo is moistened. Transfer the mixture into a mug once combined (if using a bowl).
- Microwave on high for 90 seconds to 2 minutes, depending on your microwave. The top of the mug cake should feel set and spring back to the touch.
- Leave the mug cake to set for 1 minute in the microwave when done cooking. Remove and serve with your favorite toppings.
Notes
- The finer your cookie crumble is, the lighter the mug cake will be.
- The optional baking soda also makes the mug cake lighter.
- Use vanilla extract to make the Oreo flavor 'pop' more.
Anonymous says
This is better than the 2 ingredient TikTok version, thanks for including some extras!
Betty B says
This Oreo mug cake turned out perfect & was delicious!
Angela @ BakeItWithLove.com says
Fantastic! I love hearing that a recipe was a success, thanks for sharing!
Anonymous says
Saw this mug cake on tiktok...thank you for the easy instructions, what a simple and easy dessert.
Angela @ BakeItWithLove.com says
Happy to share! I love the simplicity of this tasty Oreo dessert too!
Amy White says
I love your mug cakes, the single serving hits the spot every time!
Angela @ BakeItWithLove.com says
Thank you very much! I think these easy microwave desserts are a fun treat to make (when I'm not baking)!
Beth says
I used the little snack sized mini Oreos for these and it worked perfectly, TY!
Angela @ BakeItWithLove.com says
I used those too and think they're perfect for this dessert!
Robert says
Overflowed just a bit in the microwave but maybe my mug was a bit too small? Still, fantastic cake in a mug!
Abbie Gardner says
I absolutely love this oreo mug cake just amazing and easy
Angela @ BakeItWithLove.com says
Fantastic, thank you! Thanks for stopping back in to share your results!
Fernando says
I didn't think this was gonna work, wow was I wrong, super easy mug cake here!