
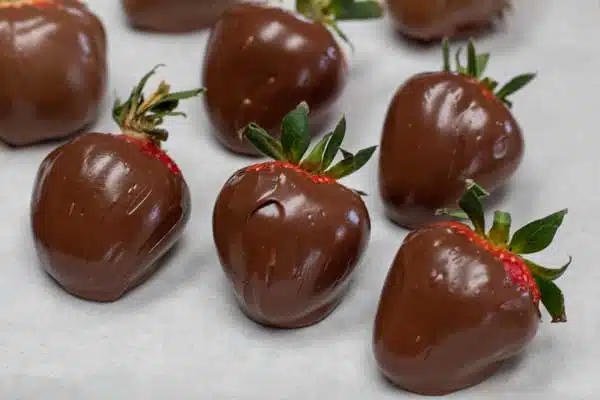
Easy, classic chocolate-covered strawberries are the perfect combination of ripe, juicy strawberries in shiny melted chocolate. Add your favorite drizzles, assorted toppings, and Valentine's Day heart-themed decorations to complete them.
Try my pink chocolate covered strawberries for a variation.

Jump to:
In my opinion, you can’t have Valentine’s Day without a chocolate-covered strawberry! They’re a sweet, perfect way to show someone you love them.
I make mine easy by melting chocolate in the microwave and dipping fresh strawberries to coat. Decorate with your favorite toppings or leave them plain – they always come out beautifully no matter what!
Chocolate-covered strawberries are such an easy recipe, too. My recipe is ready in just 20 minutes!
You can have fresh, delicious chocolate-covered strawberries ready in a flash. These sweet morsels are perfect for date nights or Valentine's Day.
I also love letting kids decorate their chocolate-covered strawberries. There are so many different ways you can dress these up.
Try sprinkles, cookies, nuts, or even candy! It’s a process the whole family will love, especially the kiddos.
🥘 Ingredients
These beautiful, indulgent chocolate-covered strawberries only have two main ingredients! Be sure to use the best, ripest strawberries you can find (See Tips & Recipe Notes for help picking the best strawberries).
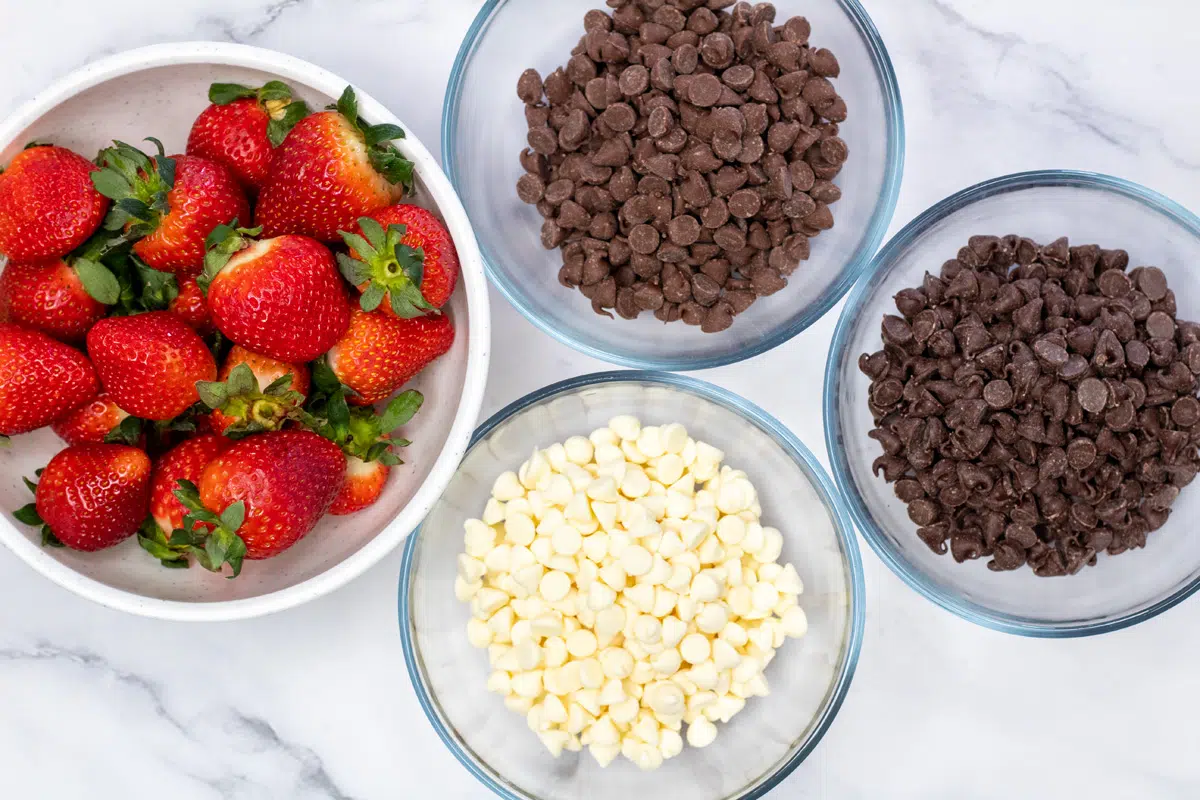
- Strawberries – 2 pounds. Your strawberries should be washed and dried, but the stems should be left on. I like to use medium-sized strawberries for this recipe, but you can use whatever size you prefer or is available!
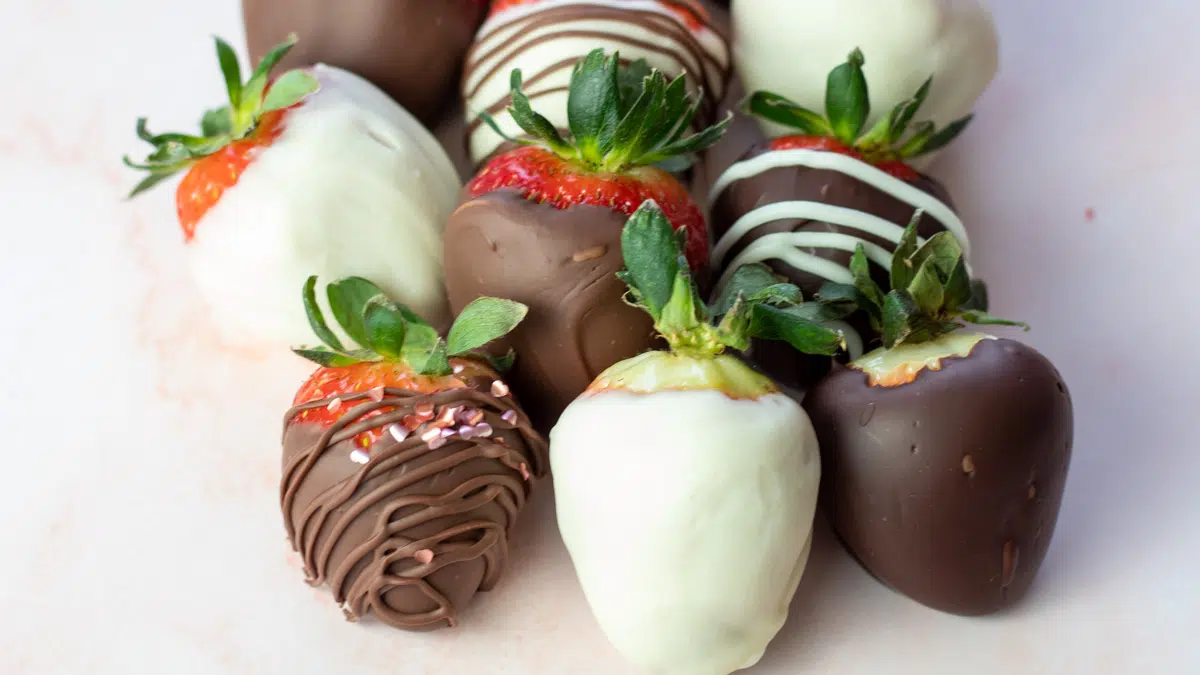
- Chocolate Chips – 10 ounces. You can use dark, semi-sweet, milk, or white chocolate morsels! You can also use a mix of any of these – covering the strawberries with different kinds of chocolate makes the strawberries fun for everyone!
Coating Add Ons
There are so many different toppings you can coat the chocolate-covered strawberries in! It’s such an easy and versatile confection!
- Sprinkles – Use red, white, and pink sprinkles for a sweet Valentine’s Day touch! You can also use red sugar sprinkles!
- Crushed Nuts – Chocolate and nuts are always a winning combo! Coat the strawberries in crushed walnuts, pecans, peanuts, or shredded coconut! For extra flavor, lightly toast the nuts or coconut in a clean, dry pan over medium heat until fragrant and lightly golden. Transfer to a clean bowl to remove the nuts or coconut from continuing to toast (or burn!) in the hot pan.
- Crushed Cookies – I like crushed Oreos, Nilla Wafers, or graham crackers!
- Valentine’s Day Candy – Like candy hearts or any other cute Valentine’s Day décor!
🔪 How To Make Chocolate-Covered Strawberries
These are so quick to make, especially when using the microwave to melt! Make sure you use microwave-safe bowls when melting the chocolate!
- Prep Strawberries. Prepare 2 pounds of fresh strawberries by rinsing well, then fully drying. It’s important that the strawberries are completely dry because water will make the melted chocolate seize when trying to apply a smooth coating (See Tips & Recipe Notes). Next, line a baking sheet with a sheet of parchment or wax paper.
- Melt Chocolate. Next, pour 10 ounces of your desired chocolate chip flavors into their own microwave-safe bowls. Heat the chocolate in 30-second increments, stirring between heating cycles. Once the chocolate has had about 1 ½ to 2 minutes of heating time, stir vigorously to finish melting any remaining small chocolate pieces.
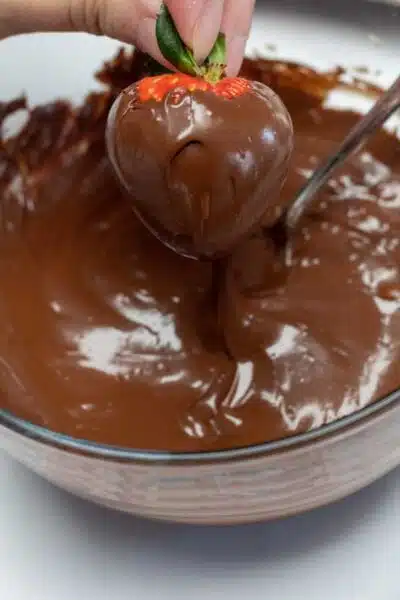
- Dip Strawberries. When the chocolate has melted, dip your clean, dried strawberries into the bowl of melted chocolate by pulling the stem back, then twist the berry to coat. Then, lift and twist, allowing as much excess chocolate to drip from your berries as possible.
- Set Strawberries. Place each chocolate-covered strawberry onto you prepared parchment or wax paper-lined baking sheet.
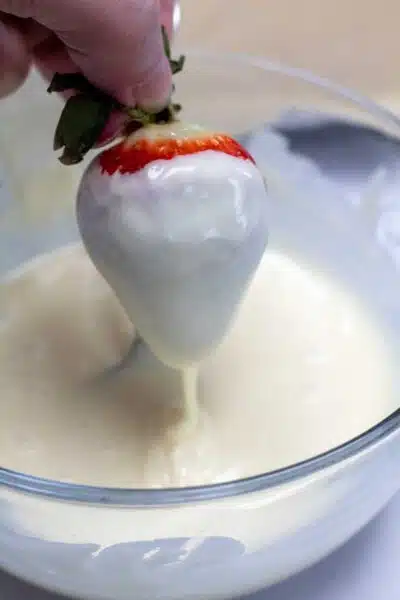
- Decorate Strawberries. To drizzle berries with white chocolate or contrasting chocolate, dip a fork into the melted chocolate and drizzle over chocolate-covered strawberries (Alternatively, you can dip or sprinkle each berry with red or pink Valentine’s Day décor, crushed nuts or coconut after coating with chocolate).
- Chill Strawberries. To finish setting the strawberries, chill the coated and decorated strawberries in the refrigerator for 15 minutes.
Easy to make, indulgent chocolate-covered strawberries are the perfect Valentine’s Day treat. Serve them to your sweetheart for a special dessert or cute snack as is or with hot cocoa, coffee, or a nightcap. Enjoy!
💭 Angela's Pro Tips & Recipe Notes
- Selecting Strawberries: Choose smaller strawberries with a bright, shiny red color and minimal white or green areas near the stem. Strawberries without full red color may not be fully ripe.
- Avoiding Chocolate Seizing: Ensure the strawberries and the bowls for melting chocolate are completely dry. Moisture can cause the chocolate to seize, resulting in a grainy texture.
- Chocolate Dipping Temperature: Melt the chocolate until it's warm but not hot. The chocolate should be fluid enough for dipping but thick enough to coat the strawberries evenly.
- Handling Pre-Cleaned Strawberries: If your strawberries have been washed and refrigerated, let them reach room temperature before dipping. This helps to dry off any condensation and ensures the chocolate adheres properly.
🥡 Storing
Chocolate-covered strawberries keep well in the fridge, but they should be eaten within the first 24 hours of making them! After that, the strawberries begin to soften, and the chocolate coating will start to sweat.
To help prevent this, I recommend storing it in an airtight container that is lined with paper towels to absorb excess moisture. Do not freeze, as they will become mushy when thawed.
❓ Recipe FAQs
You can use easy chocolate-covered strawberries to decorate almost any dessert! They make a beautiful and elegant decoration that will impress any guest! Try adding chocolate-covered strawberries on top of cakes, cheesecakes, cupcakes, fruit bouquets, ice cream, and sundaes.
If your chocolate falls right off your strawberry, or it comes off after cooling then your strawberries aren’t dry enough! I can’t emphasize enough how important a fully dry strawberry is to yield the best result. Without a completely dry berry, the coating process will be so much more difficult!
Chocolate chips are the most readily available and easy-to-use chocolate for this recipe! They work fantastically, but their intended purpose is for baked goods like chocolate chip cookies. Chocolate melting wafers are specifically made for candy coating – you can also use these if you have access to them!
If you don’t have a microwave, you can use the double boiler (or bain Marie) method to melt the chocolate! Bring a saucepan with about 2-inches of water to a simmer over medium-low heat. Then, place a dry glass or metal bowl on top of the water and add your chocolate. Repeat with separate bowls if using multiple kinds of chocolate. Stir until the chocolate is completely melted, and you’ll be ready to dip!

💖 More Valentine's Day Recipes
- Pink Chocolate Covered Strawberries
- Pan-Seared Ribeye Steak or NY Strip
- Puff Pastry Hearts
- Pan Seared Duck Breast
- Boiled Lobster or Broiled Lobster
- Dark Chocolate Cookies
Do you love a recipe you tried? Please leave a 5-star 🌟rating in the recipe card below and/or a review in the comments section further down the page.
Stay in touch with me through social media @ Pinterest, Facebook, Instagram, or Twitter! Subscribe to the newsletter today (no spam, I promise)! Don't forget to tag me when you try one of my recipes!
📖 Recipe Card

Valentine's Day Chocolate Covered Strawberries
Ingredients
- 2 lbs strawberries (washed and dried, stems left on)
- 10 oz chocolate chips (dark, semi-sweet, milk chocolate, or white chocolate morsels)
(Note: 2x or 3x only changes the ingredient list)
Instructions
- Ready your fresh 2 lbs strawberries by making sure they're rinsed clean and then fully dried. Water will seize up your melted chocolate and make getting a smooth chocolate coating difficult.
- Pour the 10 oz chocolate chips (or desired chocolate chip flavor) into a microwave-safe bowl. Heat in 30-second increments, stirring between heating cycles. Stir vigorously after 1 ½ - 2 minutes of heating time, which will finish melting any remaining chocolate chips.
- Dip your strawberries into the chocolate by pulling the stem back, then twist the berry to coat in the chocolate. Lift and twist and allow as much excess chocolate to drip from your berries as possible.
- Place each chocolate covered strawberry onto a parchment paper or waxed paper-lined baking sheet. *Alternatively, you can dip or sprinkle each berry with red or pink Valentine's Day decor, crushed nuts, or coconut after coating with chocolate.
- To drizzle berries with white chocolate or a contrasting chocolate, dip a fork into the melted chocolate and drizzle over chocolate coated strawberries.
- Chill chocolate-covered strawberries for 15 minutes in the refrigerator.
Notes
- Selecting Strawberries: Choose smaller strawberries with a bright, shiny red color and minimal white or green areas near the stem. Strawberries without full red color may not be fully ripe.
- Avoiding Chocolate Seizure: Ensure the strawberries and the bowls for melting chocolate are completely dry. Moisture can cause the chocolate to seize, resulting in a grainy texture.
- Chocolate Dipping Temperature: Melt the chocolate until it's warm but not hot. The chocolate should be fluid enough for dipping but thick enough to coat the strawberries evenly.
- Handling Pre-Cleaned Strawberries: If your strawberries have been washed and refrigerated, let them reach room temperature before dipping. This helps to dry off any condensation and ensures the chocolate adheres properly.
Michelle says
This recipe is really easy and my three girls (Aged 8, 6, and 5) absolutely love it! I did not have to adjust this recipe like with other non-gluten-free recipes because chocolate is naturally gluten-free, and this saved my butt mainly because my 6-year-old is gluten-free! I highly recommend this recipe, especially to other Moms that are looking for a fun special occasion treat that is somewhat healthy!