

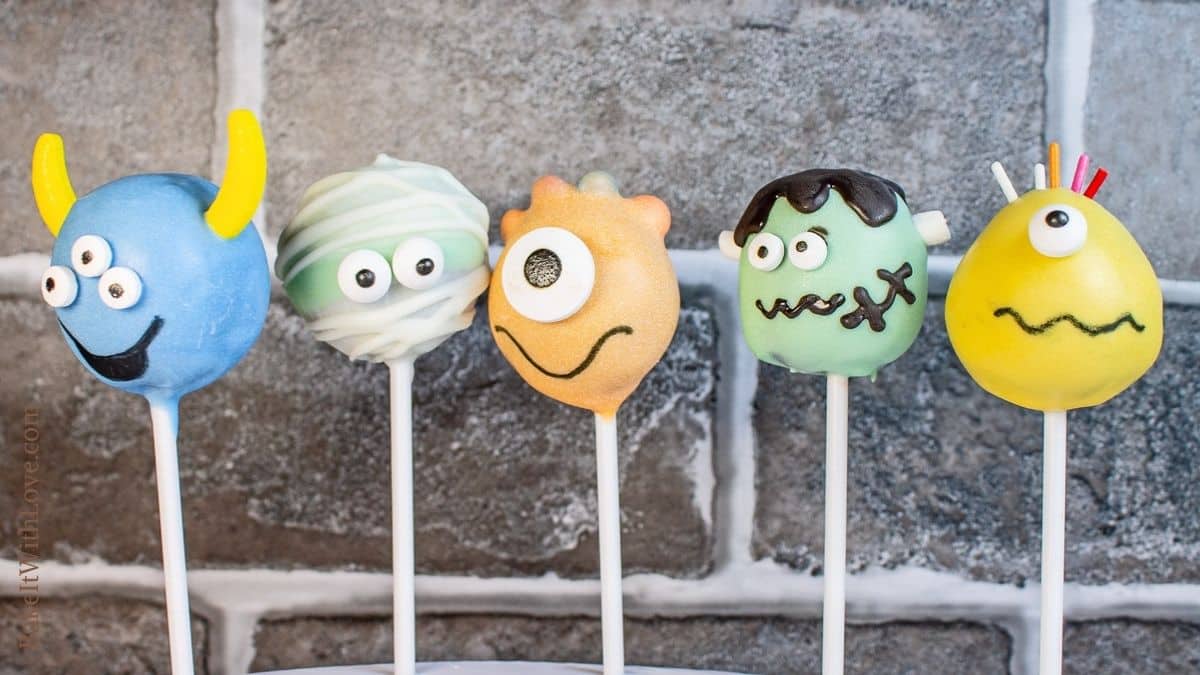
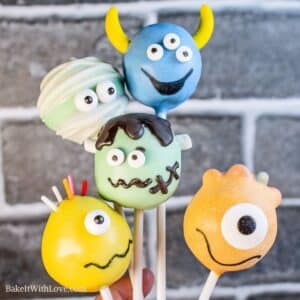
My monster cake pops use various pieces of candy, sprinkles, and edible markers to create fun and festive cake-filled monsters. These bite-sized treats are the perfect addition to any Halloween festivities; the kids are guaranteed to love them. Even if you've never made cake pops, these monsters are easy to master and fun to share.
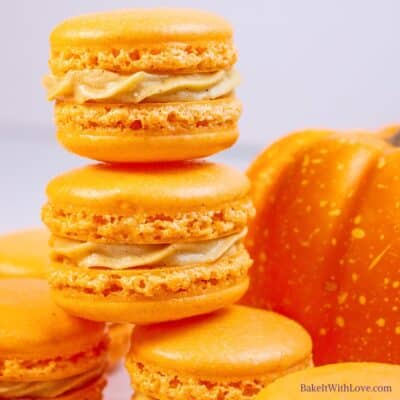
Try my Halloween muddy buddies, Halloween peanut butter spider cookies, or mummy macarons for more Halloween treats.

Jump to:
- 🥘 Ingredients
- 🔪 How To Make Monster Cake Pops
- ❗ Top Tip: Rolling Perfect Cake Pops
- For Frankenstein
- For the Mummy
- For the Orange Big-Eyed Monster
- For the Blue Horned Monster
- For the Yellow Cyclops Monster
- 💭 Angela's Pro Tips & Recipe Notes
- 📍🍡🎂 Top Tips to Master Cake Pops
- 🥡 Storing
- 📖 Recipe Card
- 💬 Comments & Reviews
As soon as fall hits, I know it's time for all of the fun Halloween festivities and treats. These monster cake pops were so much fun to make, and you can be as creative with them as you like.
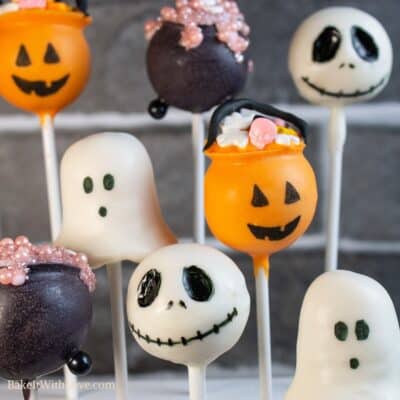
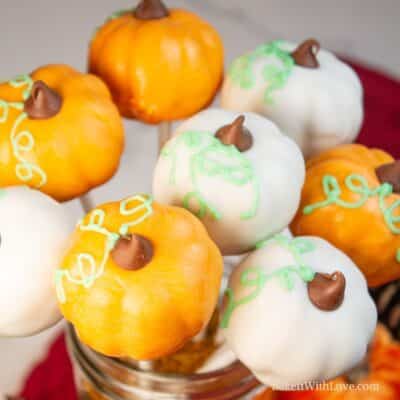
I opted for these cute Frankensteins, mummies, and google-eyed cuties in this batch, be sure to see my Halloween cake pops for more fun ideas!
Not only are they perfect for Halloween parties (or handing out to trick-or-treaters!), but they are delicious. Customize the cake pops with any cake flavor you like, and pair it with a complementary frosting to suit your preferences.
🥘 Ingredients

Cake Pop Dough
- Cake - You can use any variety of cake you like. It can be made from a boxed mix or homemade. You'll need a standard-sized cake, such as a 9x13 or two 8-inch rounds. Try it with my homemade white cake, yellow cake mix, or chocolate cake mix.
- Frosting - Frosting will help to bind your crumbled cake together. It can be any variety of frosting, store-bought or homemade. See all of my buttercream frosting flavors here.
- Almond Bark - Almond bark is an affordable melting chocolate. You can also use white chocolate or candy melts.
- Food Coloring - If using white chocolate or almond bark, make sure you use oil-based food coloring to dye your chocolate.
- Treat Sticks - Lollipop sticks or treat sticks can be found on the cake decorating aisle.
Decorations
- Mini Dried Marshmallow Bits - These dehydrated tiny marshmallows are used for Frankenstein's bolts and can be found near normal marshmallows.
- Candy Eyes - I like using a variety of different sizes of candy eyes to add some fun differences between the monsters.
- Sprinkles - Some colorful jimmies are used as hair on the yellow monster.
- Edible Marker - Edible marker or edible paint can be used to create the faces of your monsters.
- Mini M&Ms - Mini M&M candies are used to create an interesting shape for the orange monster's head.
- Banana Runts - You can find a package of runts at most grocery stores or buy just the bananas online! They make the perfect horns.
Be sure to see the free printable recipe card below for ingredients, exact amounts & instructions with tips!
🔪 How To Make Monster Cake Pops
I've added instructions for several different monsters, but they are all simple to make. In fact, these would be a great activity for the kids!
You will need a stand mixer (or your hands), some bowls for melting chocolate, and a cake pop stand or styrofoam block.
This recipe will make 28 cake pops.
Make the Cake Pop Dough
Make your cake. Prepare your cake according to the boxed directions, or make a cake from scratch. Bake like normal and let it cool completely before getting started.
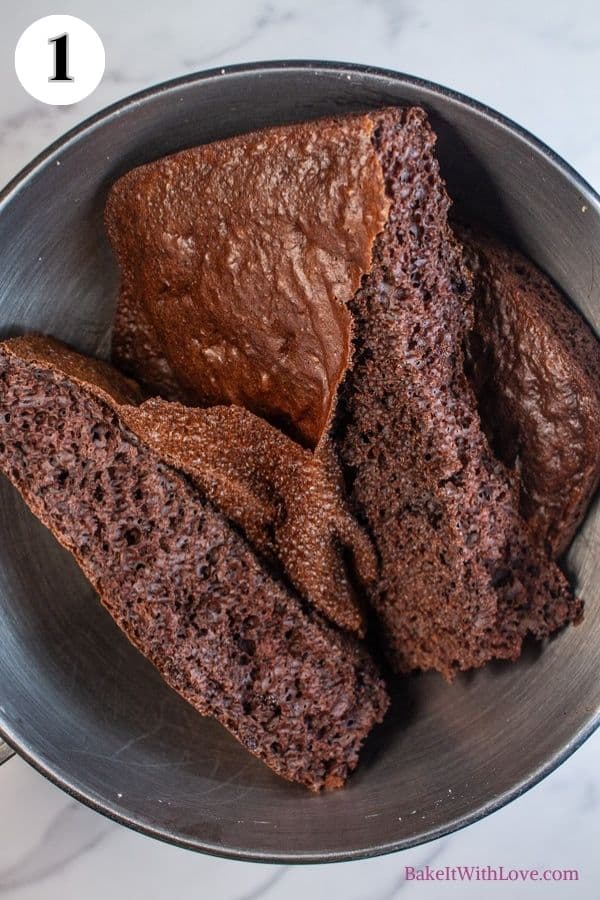
Break up the cake. Once cooled, break up your 1 cake and place the pieces into the bowl of your stand mixer (photo 1). *You can also do this by hand, but it takes longer.


Crumble the cake. Using the paddle attachment, turn the mixer on at a low speed. Let the cake mix until it is crumbled into small pieces.
Mix in the frosting. Add ⅓ cup (75 grams) of frosting (photo 2) and continue mixing on low to medium-low speed until thoroughly combined (photo 3). The consistency should be similar to Play-Doh putty or modeling clay.
If it is too dry and crumbly, add more frosting.
Portion. Use a cookie scoop, meatball maker, cakeballer, or kitchen scale to portion the cake pop dough into equal servings (photo 4 - a standard cake pop is 1 ounce each).


Roll into balls. Roll the portion dough around in your hand to form a smooth ball that's approximately the size and shape of a truffle. Repeat with all of the cake pop dough (photo 5).
❗ Top Tip: Rolling Perfect Cake Pops
The dough balls are easier to round out into smooth, better-shaped cake pops if you chill them after combining and portioning.
So, roll the cake mixture out and pop them all in the fridge. Chill for at least an hour before rolling them again to smooth out any misshapen edges.
For Frankenstein
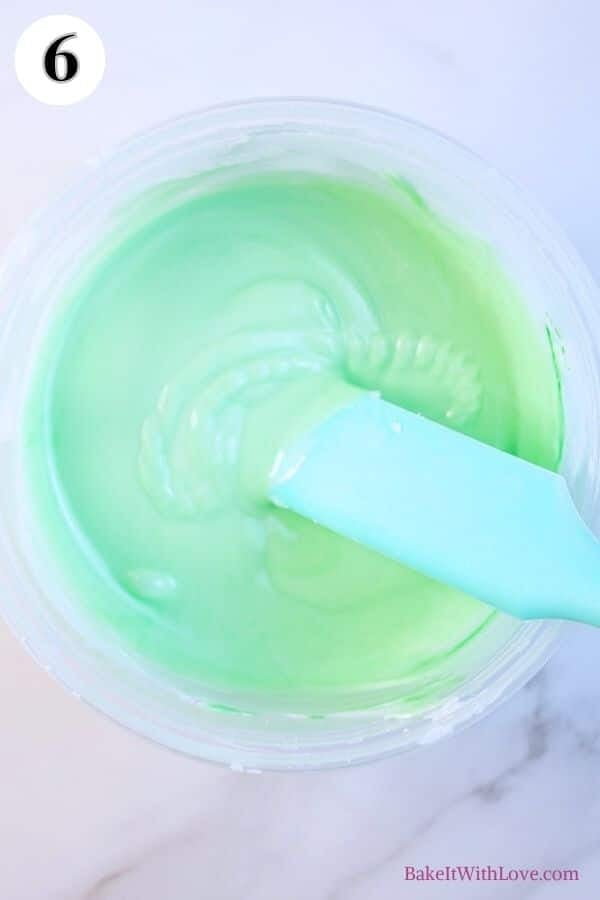
Melt the chocolate. Melt some of your almond bark in the microwave, stirring every 30 seconds. Use green oil-based food coloring (photo 6 - or use green candy melts).

Shape and add a stick. Take one of your portioned cake balls and shape it into a cylinder. Then, dip the end of one of your 28 treat sticks into your chocolate and poke it into the end of the cylinder (photo 7). Set aside to harden for a couple of minutes.
Coat in chocolate. Dip the cake pop into the green chocolate and immediately stick two mini, dried marshmallow bits onto each side of the head (photo 8). Set aside to harden.


Add the face. Once set, use black chocolate or candy melts to pipe on the hair, scars, and smile (photo 9).
Attach. Use small dots of chocolate to attach candy eyes (photo 10), then let it set aside to dry completely. Save the green candy coating for the mummy below.
For the Mummy
Melt the chocolate. Melt some white almond bark in the microwave, stirring every 30 seconds (photo 11).
Dip. Pick up one of your cake pops and use your hand to dip about ⅓ of it into the chocolate (photo 12) then immediately insert a stick into the chocolate-covered side. Set aside to harden for a few minutes.


Dip into the green chocolate. Once set, dip the uncoated portion of the cake ball into the green chocolate (photo 13) that you used for Frankenstein. Set aside to harden.
Dip into the white again. After the chocolate is set, dip it back into the white chocolate so that only a strip of green is showing (photo 14).

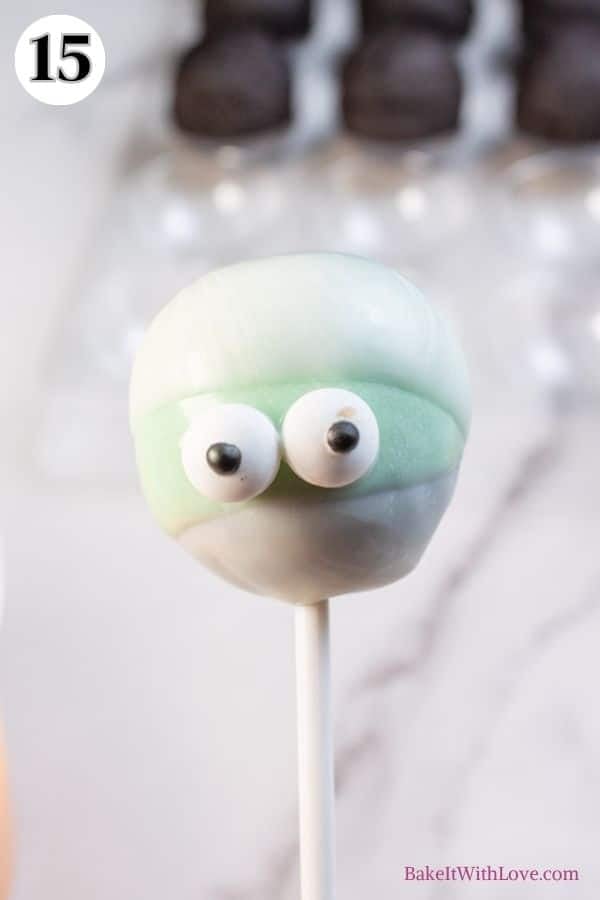

Add eyes. Use a couple of dots of chocolate to attach some eyes (photo 15).
Add the mummy wraps. Pour some white chocolate into a storage bag with the tip cut off and drizzle some thick strips over the cake pop to look like mummy wrap (photo 16). Set aside to harden.
For the Orange Big-Eyed Monster
Melt the chocolate. Melt some almond bark in the microwave, stirring every 30 seconds until smooth. Then, use orange oil-based food coloring to color it (photo 17).


Shape and add the stick. Pick up one of your cake balls and gently shape it into a taller oval (photo 18). Dip the end of one of the 28 treat sticks into the chocolate and press it into the larger side. Let it harden for a couple of minutes.
Add M&Ms. Take some mini M&Ms and use chocolate as glue by gently pressing them into the smaller side of the cake ball (photo 19). Let harden.
Dip. Once set, dip the entire cake pop into the orange chocolate, tapping off any excess chocolate (photo 20). Let it harden.

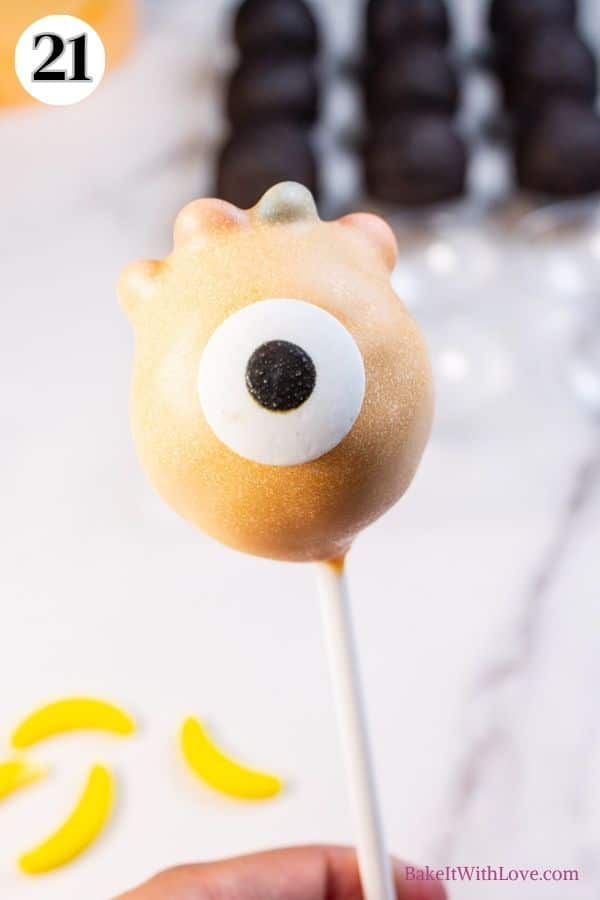

Add the face. Use chocolate to attach one large candy eye (photo 21), and then use an edible marker to draw on the smile (photo 22).
For the Blue Horned Monster
Melt the chocolate. Melt some almond bark in the microwave in 30-second increments, stirring in between each one. Then, use oil-based food coloring to color it blue (photo 23).
Add the stick. Take one of your cake balls and form it into an oval. Then, dip one of the 28 treat sticks into the chocolate and press it into the bottom (photo 24). Let harden for a couple of minutes.


Dip. Dip the cake pop into the blue chocolate and tap off any excess.
Add the horns. Immediately, while the chocolate is still wet, use two banana runts to make horns by gently pressing them into the sides of the cake pops (photo 25). Set aside and let them harden.


Make the face. Use chocolate to attach three candy eyes (photo 26) and then use an edible marker to draw the mouth (photo 27).
For the Yellow Cyclops Monster
Melt the chocolate. Melt some almond bark in the microwave, stirring frequently, and then use yellow oil-based food coloring to color it (photo 28).

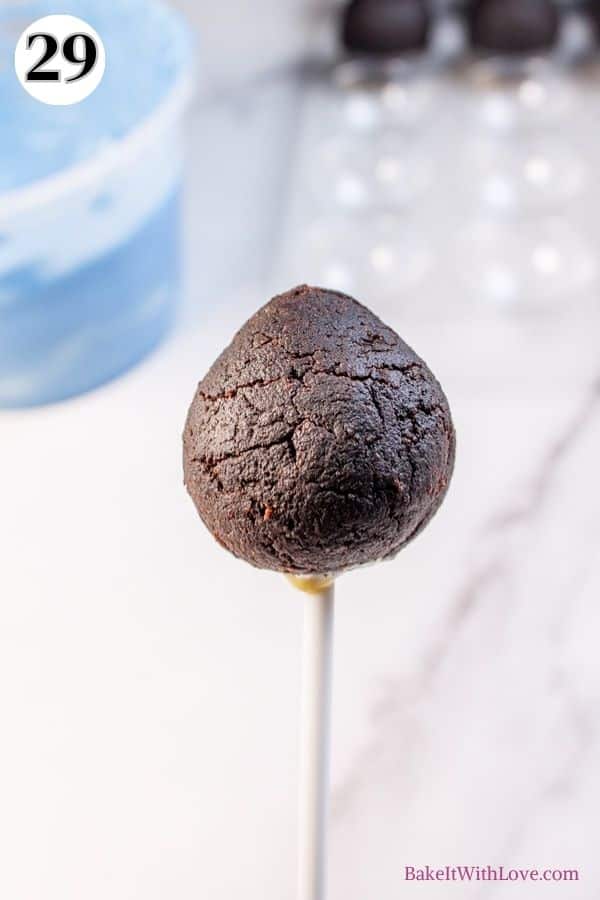
Shape. Shape one of the cake balls into a pointed egg-shape. Dip the end of one of the 28 treat sticks into the chocolate and press it into the larger side of the cake (photo 29). Let harden for a couple of minutes.
Add the hair. Dip the cake pop into the yellow chocolate and then immediately press some sprinkles into the smaller end of the cake pop (photo 30). Let harden.


Make the face. Use chocolate to attach candy eyes. Then use an edible marker to draw on the mouth (photo 31).
>>>See All Of My Tasty Recipes Here!<<<
💭 Angela's Pro Tips & Recipe Notes
- Use your favorite cake. Have fun experimenting with different flavors (like red velvet, funfetti, vanilla, strawberry, or chocolate).
- You only need a standard-sized cake. This is the amount that you would get from a box of cake mix or a regular cake recipe. It can be a 9x13, two 8-inch or 9-inch rounds, or even a bundt cake.
- Leave out the oil. If using a boxed cake mix, I recommend leaving the oil out altogether and then preparing the cake as directed. Sometimes, the added oil can make it hard for the cake pops to stay on the stick.
- Prepare it in advance. I recommend baking your cake a day in advance to make the assembly of your cake pops a snap.
- Use your favorite frosting. You can use storebought frosting or homemade buttercream. Choose a flavor that pairs well with the flavor of cake you are using.
- Use the right coloring. If you want to color your cake pops, make sure you are using an oil-based food coloring (not liquid or gel). This can be difficult to find in stores, but I've had some luck at Michael's. If you can't find it, you may need to order it online.
- Remove excess chocolate. After dipping your cake pops, tap the stick against the side of the container to shake off any excess chocolate. Turn the cake pop around and tap it a couple more times to smooth everything out.
- Make your own stand. If you don't have a cake pop stand or styrofoam, you can either make one by poking holes in an upside-down cardboard box.
- Thin out your chocolate. Almond bark melts really nicely with no additional ingredients. If using melting wafers or candy melts, you may need to thin out the chocolate with a small amount of coconut oil.
- Dip room temperature cake. It's best to dip your cake pops when they are at room temperature, or else the chocolate may crack. If your dough is in the fridge, let it sit out for about 30 minutes before dipping it. Cracks can happen if the chocolate bark or candy melts are overheated, too.
- Use homemade ingredients. You can literally taste the difference when every part of these tasty cake pops is homemade. There are plenty of cake and frosting recipes on BIWL to take your cake pops to the next level.
📍🍡🎂 Top Tips to Master Cake Pops
See my top tips for the best cake pops to master cake pops in no time. There are 13+ great tips and tricks to help you skip my early mistakes 🤪.
With these tips, your first attempt at cake pops will look better-than-store-bought!
🥡 Storing
The undipped cake pop dough can be stored in the refrigerator for 4-5 days or in the freezer for 3-6 months.
Once dipped, your cake pops can be kept at room temperature for four days or in the fridge for 7-10 days.

Freezing
Fully decorated cake pops can be frozen. I recommend flash-freezing fully set cake pops on a tray individually first. Once frozen, package them into a freezer container with parchment paper layers between the cake pops.
Store for up to 6 weeks in the freezer, then thaw overnight in your fridge before serving.
Do you love a recipe you tried? Please leave a 5-star 🌟rating in the recipe card below and/or a review in the comments section further down the page.
Stay in touch with me through social media @ Pinterest, Facebook, Instagram, or Twitter! Subscribe to the newsletter today (no spam, I promise)! Don't forget to tag me when you try one of my recipes!
📖 Recipe Card
Monster Cake Pops
Ingredients
Cake Pop Dough
- 1 cake (baked and cooled, any flavor - standard sized (9x13))
- ⅓ cup frosting (or more, if needed)
- 1 lb almond bark (or candy melting wafers)
- oil-based food coloring (optional)
- 28 treat sticks
Decorations
- mini dried marshmallow bits
- candy eyes
- sprinkles
- edible marker (or edible paint)
- mini M&Ms
- banana runts
(Note: 2x or 3x only changes the ingredient list)
Instructions
Make the Cake Pop Dough
- Prepare your cake according to the boxed directions or make a cake from scratch. Bake like normal and let it cool completely before getting started.
- Once cooled, break up your 1 cake and place the pieces into the bowl of your stand mixer. *You can also do this by hand, but it takes longer.
- Using the paddle attachment, turn the mixer on low speed. Let the cake mix until it is crumbled into small pieces.
- Add ⅓ cup frosting and continue mixing on low to medium-low speed until thoroughly combined. The consistency should be similar to play-doh. If it is too dry and crumbly, add more frosting.
- Use a cookie scoop, meatball maker, or kitchen scale to portion the cake pop dough into equal servings (a standard cake pop is 1 ounce each).
- Roll the portion dough around in your hand to form a smooth ball that's approximately the size and shape of a truffle. Repeat with all of the cake pop dough.
- Note: The balls are easier to round out into smooth, better-shaped cake pops if you chill them after combining and portioning. So, roll the cake mixture out and pop them all in the fridge. Chill for at least an hour before rolling them again to smooth out any misshapen edges.
For Frankenstein
- Melt some of your 1 lb almond bark in the microwave, stirring every 30 seconds. Use green oil-based food coloring to color it (or just use green candy melts).
- Take one of your portioned cake balls and shape it into a cylinder. Then, dip the end of one of your 28 treat sticks into your chocolate and poke it into the end of the cylinder. Set aside to harden for a couple of minutes.
- Dip the cake pop into the green chocolate and immediately stick on two mini dried marshmallow bits onto each side of the head. Set aside to harden.
- Once set, use black chocolate or candy melts to pipe on the hair, scars, and smile.
- Use small dots of chocolate to attach candy eyes and then let it set.
For The Mummy
- Melt some white 1 lb almond bark in the microwave, stirring every 30 seconds.
- Pick up one of your cake pops and use your hand to dip about ⅓ of it into the chocolate, and immediately insert a stick into the chocolate-covered side. Set aside to harden for a few minutes.
- Once set, dip the uncoated portion of the cake ball into the green chocolate that you used for Frankenstein. Set aside to harden.
- After the chocolate is set, dip it back into the white chocolate so that only a strip of green is showing.
- Use a couple of dots of chocolate to attach some eyes.
- Pour some white chocolate into a storage bag with the tip cut off and drizzle some thick strips over the cake pop to look like the mummy wrap. Set aside to harden.
For the Orange Monster
- Melt 1 lb almond bark in the microwave by stirring every 30 seconds. Then, use orange oil-based food coloring to color it.
- Pick up one of your cake balls and gently shape it into a very rounded triangle. Dip the end of one of the 28 treat sticks into the chocolate and press it into the larger side. Let it harden for a couple of minutes.
- Take some mini M&Ms and use chocolate as glue by gently pressing them into the smaller side of the cake ball. Let harden.
- Once set, dip the entire cake pop into the orange chocolate, tapping off any excess chocolate. Let it harden.
- Use chocolate to attach one large candy eyes and then use an edible marker to draw on the smile.
For the Blue Monster
- Melt 1 lb almond bark in the microwave in 30-second increments, stirring in between each one. Then, use oil-based food coloring to color it blue.
- Take one of your cake balls and form it into an oval and then dip one of the 28 treat sticks into the chocolate and press it into the bottom. Let harden for a couple of minutes.
- Dip the cake pop into the blue chocolate and tap off any excess.
- Immediately, while the chocolate is still wet, use two banana runts to make horns by gently pressing them into the cake. Let harden.
- Use chocolate to attach three candy eyes and then use an edible marker to draw on the mouth.
For the Yellow Monster
- Melt 1 lb almond bark in the microwave, stirring frequently, and then use yellow oil-based food coloring to color it.
- Shape one of the cake balls into a rounded triangle and then dip the end of one of the 28 treat sticks into the chocolate and press it into the larger side of the cake. Let harden for a couple of minutes.
- Dip the cake pop into the yellow chocolate and then immediately press some sprinkles into the smaller end of the cake pop. Let harden.
- Use chocolate to attach a candy eyes and then use an edible marker to draw on the mouth.
Notes
- You can make cake pops using any of your favorite cakes! Have fun experimenting with different flavors (like red velvet, funfetti, vanilla, strawberry, or chocolate). Pair them with your favorite frosting or homemade buttercream. Choose a flavor that pairs well with the flavor of cake you are using.
- You only need a standard-sized cake. This is the amount that you would get from a box of cake mix or a regular cake recipe. It can be a 9x13, two 8-inch or 9-inch rounds, or even a bundt cake.
- If using a boxed cake mix, I recommend leaving the oil out altogether and then preparing the cake as directed. Sometimes the added oil can make it hard for the cake pops to stay on the stick.
- I recommend baking your cake a day in advance to make the assembly of your cake pops a snap.
- If you want to color your cake pops, make sure you are using an oil-based food coloring (not liquid or gel).
- After dipping your cake pops, tap the stick against the side of the container to shake off any excess chocolate. Turn the cake pop around and tap it a couple more times to smooth everything out.
- Its best to dip your cake pops when they are at room temperature, or else the chocolate may crack. If your dough was in the fridge, let it sit out for about 30 minutes before dipping it. Cracks can happen if the chocolate bark or candy melts are overheated, too.
- The undipped cake pop dough can be stored in the refrigerator for 4-5 days, or in the freezer for 3-6 months.
- Once dipped, your cake pops can be kept at room temperature for 4 days or in the fridge for 7-10 days.
Angela Latimer says
These are just the cutest monster opos and they're loved by kids of all ages. You'll love how great they taste and the rave reviews! ~ Angela