
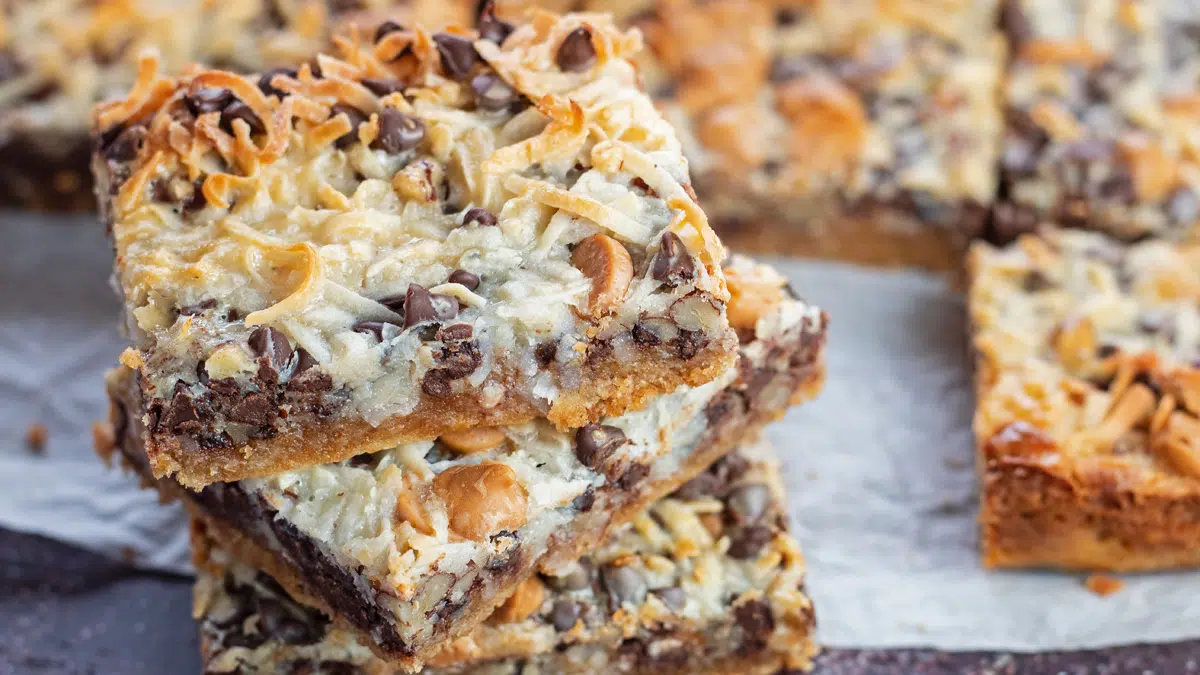
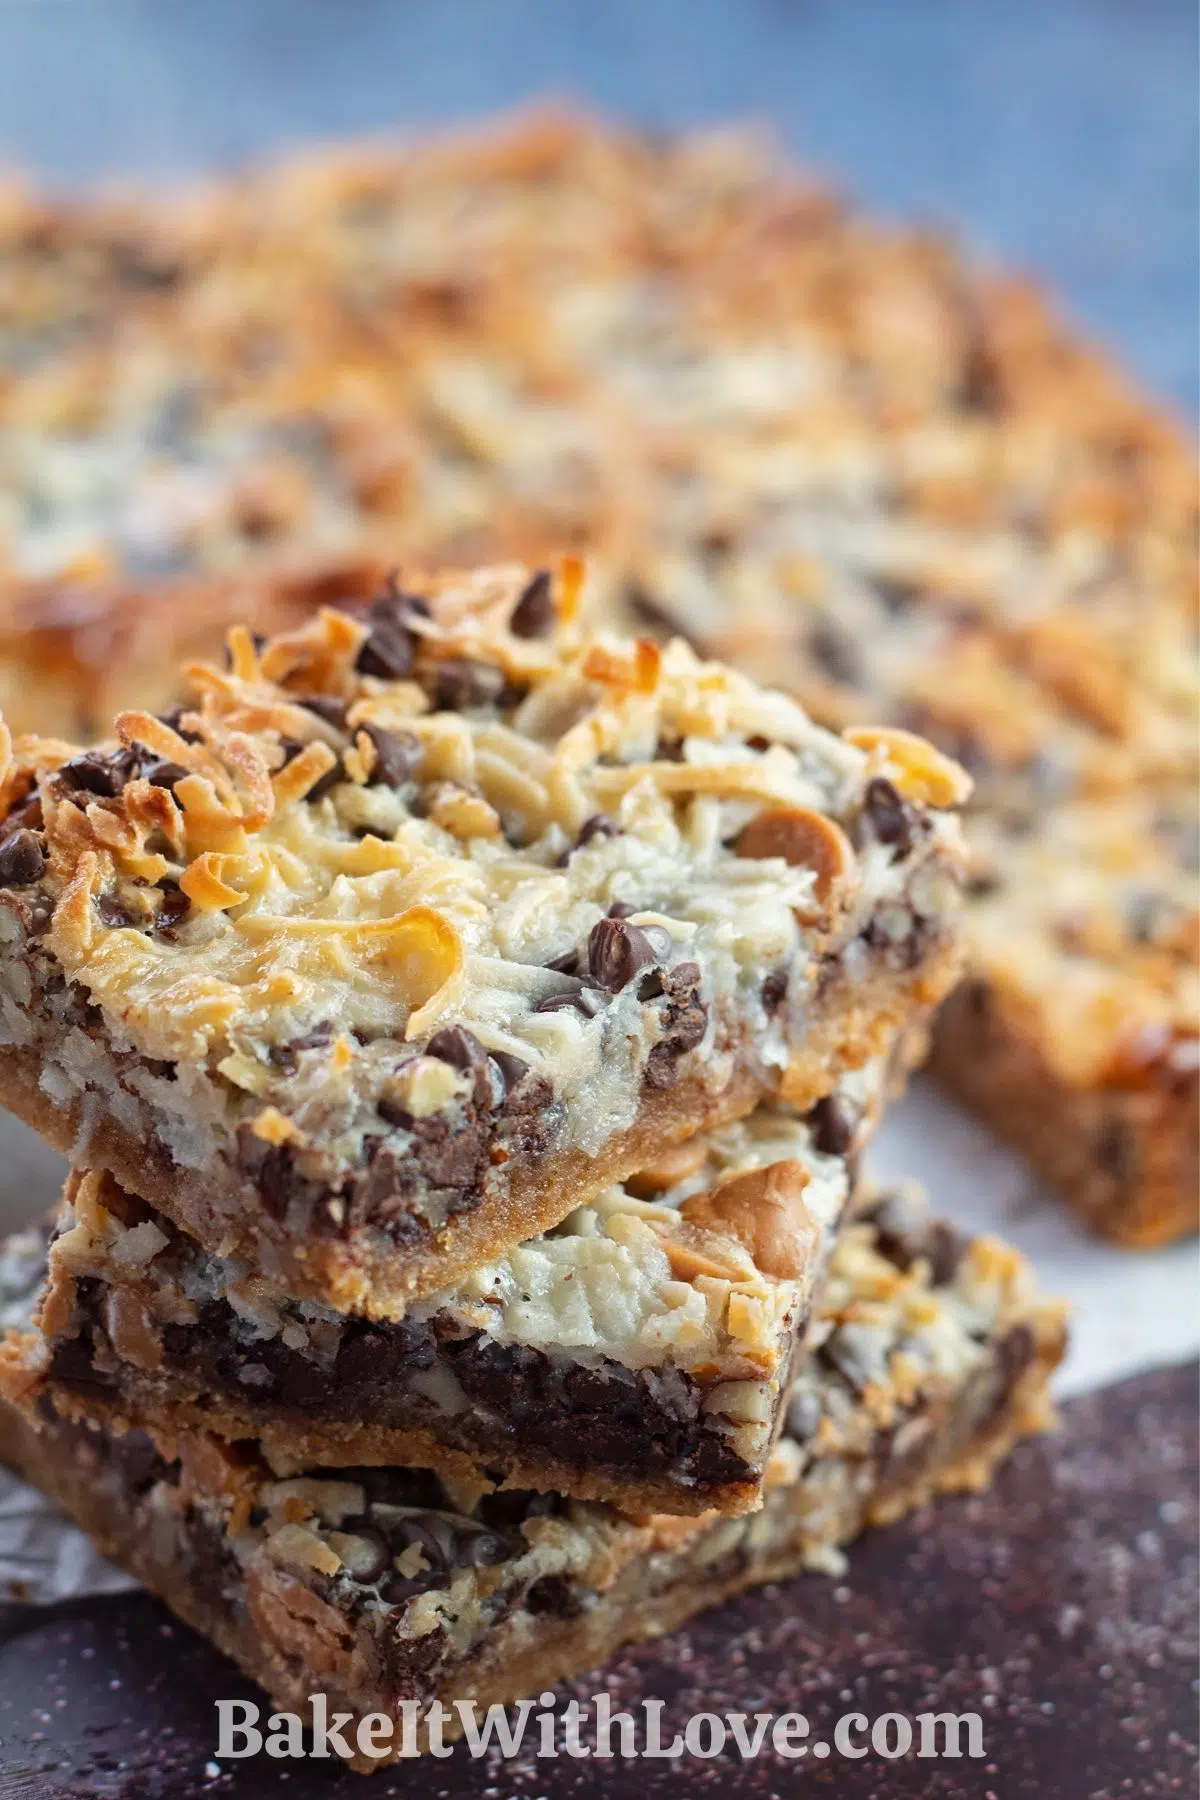
Hello Dolly Bars are an all-around favorite for everyone. Layers of tasty ingredients that magically turn into fabulous cookie bars! Also known as 7-layer bars, miracle bars, magic cookie bars, coconut dream bars, or magic bars. Whatever you may call them, they are fantastic and incredibly easy, with no special equipment needed!

Jump to:
Classic Coconut and Chocolate Treat
Even though many names know these scrumptious dessert bars, they all mean the same thing - flavor heaven! They may be loaded with decadent layers, but I promise they’re worth every calorie!
Your taste buds will love the decadent combination of butterscotch and chocolate any time of year. Coconut and pecans add the perfect amount of chewy, crunchy goodness. They’re a real crowd-pleaser, no matter the age of your crowd!
Kid-Friendly Hello Dolly Bars the Whole Family Will Love!
One bite, and you’ll know just how addictive this recipe can be. On the bright side, they store and transport exceptionally well, so these cookie bars also make great gifts to share!
Dress them up a bit on a decorative plate, then gift them to your family, friends, neighbors, or co-workers! This recipe is never forgotten during our holiday Christmas cookie baking either!!
❤️ Why I Love This Recipe
- Kid-friendly! This is a perfect recipe to make with your mini-me chefs at home. It’s fun and interactive, and they can sample any of the ingredients during the process.
- An easy win! Most of these ingredients are widely loved and very popular. They're even more appreciated when put together.
- It’s uniquely tasty! Butterscotch isn’t in a lot of desserts, but it will leave a lasting impression.
🥘 Ingredients
So many delicious things in one recipe! Butterscotch chips make this especially memorable, and the coconut adds that chewy texture we all know and love.
- Graham Cracker Crumbs - Honey or cinnamon-sugar graham crackers would both be good here. If desired, you can increase the graham cracker crust amounts to 16 graham crackers and 12 tablespoons of butter for a thicker graham cracker base layer. PS...my sweet shortcrust pastry is also an excellent base for these easy treats!!
- Unsalted Butter - Unsalted butter is typically used for baking, so you can better control the amount of salt, if any, in your dessert and let the creamy butter flavor shine. In this case, it's also a big part of what makes the graham cracker crust oh-so-good!
- Semi-Sweet Chocolate Chips - You can never go wrong with chocolate! If you don't have chocolate chips on hand, chunk up a semi-sweet chocolate bar.
- Butterscotch Chips - Butterscotch isn’t as popular as it once was, but I especially love it in this recipe!
- Shredded Sweetened Coconut - Coconut adds a tropical twist that reminds me of a Mounds bar, full of chewy goodness.
- Pecans - One of my favorite nuts! Of course, this can easily be swapped out for other nut varieties like almonds, walnuts, and more.
- Sweetened Condensed Milk - Any brand will work for this. Use your favorite or a generic brand with equally wonderful results!
*Be sure to see the free printable recipe card below for ingredients, exact amounts & instructions with tips!*
🔪 How To Make Hello Dolly Bars
There are only a few easy layers, and you’re on your way to a delicious, decadent dessert!
This recipe makes twenty-four servings.
- Start by preheating your oven to 350℉ (176℃).
- Next, prepare your pan. Lightly grease or spray a 9x13-inch baking dish with nonstick cooking spray or line it with parchment paper to prevent sticking.
- Melt your butter. Put ½ cup (one stick, or 8 tablespoons) of butter in a saucepan over low heat or in the microwave at 50% power for thirty to sixty seconds until warm. You might want to put a lid over it in case of splashes. Don’t let it get too hot!
- Crush the graham crackers. Seal about 12 sheets of graham crackers into a plastic baggie and use a mallet or bowl to crush them. You should have approximately 1 ½ cups after crushing.
- Mix the base layer. Add graham cracker crumbs and melted butter to a mixing bowl and combine thoroughly with a fork. It will look mealy, but it will solidify when you continue with the next step. *Alternatively, you can also layer the crushed graham crackers at the bottom of your baking dish over the melted butter.
- Now, line your pan. Press the mixture into the bottom of your 9x13-inch pan using your fingers. The bottom of the pan should be completely covered, and the mix should feel solid, not crumbly. Make sure to press firmly to really pack this layer down.
- Layer in the other ingredients. Sprinkle 1 cup of semi-sweet chocolate chips over the graham cracker layer. Follow this with a layer of 1 cup of butterscotch chips, then 1 cup of shredded sweetened coconut. Add ½ cup chopped pecans on top, and finally, pour on 14 ounces of sweetened condensed milk (1-14oz. can). It should be looking and smelling divine at this point.
- Bake. Drop this in the oven at 350℉ (176℃) and find something to distract yourself for 25-30 minutes while your magic bars bake up to golden brown perfection.
- Remove and cool. Take your baked dessert bars out of the oven and let them cool completely before eating or storing them for later.
These mouth-watering desserts are easy to transport and make great treats for kids' lunches, parties, or picnics. They’re parent-friendly as well - I dare you to try and eat just one! 🙂
💭 Tips & Notes
- Enhancing Pecans with Toasting: For a richer flavor, toast your pecans before adding them to the mix. You can lightly toast them in a dry skillet over low heat for 2-3 minutes or bake on a sheet in a 350℉ (176℃) oven for 5-10 minutes. Keep a close eye and stir frequently to prevent burning.
- Crushing Graham Crackers Cleanly: To minimize mess when crushing graham crackers, cover the plastic bag with a towel before you start. This helps prevent the bag from tearing and keeps your kitchen clean.
- Adding Sweetened Condensed Milk Last: Pour in the sweetened condensed milk as the final ingredient. It acts as a binder, ensuring your bars hold together nicely and don't crumble when you remove them from the pan.
- Lining Pan for Easy Removal: Line your baking pan with parchment paper for effortless removal of the bars. Not only does this prevent sticking, but it also allows you to lift out the entire batch at once. Plus, you can reuse the parchment to separate the bars when storing or freezing.
>>>>See all of my recipes here<<<<
🥡 Storing
This is a very sticky dessert, so you’ll want to follow storage instructions carefully to prevent your hard work from ending up in one giant, gooey glob.
While these bars don’t have to be kept in the fridge, they will keep longer if refrigerated. Hello Dolly Bars will last for three to four days in an airtight container at room temperature and about a week in the refrigerator, assuming they aren’t all eaten by then.
Freezing
Hello Dolly Bars, if wrapped tightly in foil, will last two to three months in the freezer. To keep them from sticking together, layer parchment or wax paper between each bar. You can enjoy these straight from the freezer if you’d like!
They don’t freeze solid, so I promise you won’t chip a tooth!
Bars should be eaten cool or at room temperature so you can just pull them out of the refrigerator and enjoy them. If serving your 7 Layer Bars after being frozen, thaw them in the fridge overnight or set them out on the counter until bite-ready.
❓ FAQ
You can substitute semi-sweet baking chocolate in a 1:1 ratio. Using one ounce of unsweetened baking chocolate for one ounce of semi-sweet chocolate chips will also work, but you should add one tablespoon of sugar for each ounce used to make up for the lost sugar.
Substituting dark or milk chocolate chips or bittersweet chocolate, for example, can change the sweetness level in the recipe. If you feel like experimenting, or that’s all you have in the house, you can definitely try either, but it will slightly change the outcome.
Absolutely! This is a fast and easy way to evenly crush the graham crackers. I sometimes use the bag method to avoid dirtying more dishes, but they are equally effective.
No. You can leave these on your counter for three to four days, but to keep them fresh longer, store them in the fridge. They’ll keep them for approximately one week.
The original recipe was sent in by 11-year-old Alecia Leigh Couch of Dallas, Texas. The recipe was reportedly one of her grandmother's recipes that went on to be featured in The Week food column by Clementine Paddleford on September 9th, 1965.
Since then, it has become very familiar to many as a regular printed recipe on the Eagle brand sweetened condensed milk. I've also been told that Land O Lakes butter had the recipe printed on packaging at one point in time as well.
🍪 More Awesome Cookie Recipes
- Lemon Crinkle Cookies
- Almond Flour Butter Cookies
- No Bake Cookies
- Rolled Sugar Cookies
- Almond Flour Chocolate Chip Cookies
- Chocolate No-Bake Cookies
Do you love a recipe you tried? Please leave a 5-star 🌟rating in the recipe card below and/or a review in the comments section further down the page.
Stay in touch with me through social media @ Pinterest, Facebook, Instagram, or Twitter! Subscribe to the newsletter today (no spam, I promise)! Don't forget to tag me when you try one of my recipes!
📖 Recipe Card
Hello Dolly Bars
Ingredients
- 1 ½ cups graham cracker crumbs (about 12 graham crackers crushed)
- ½ cup unsalted butter (1 stick of butter, melted)
- 1 cup semi-sweet chocolate chips
- 1 cup butterscotch chips
- 1 cup shredded sweetened coconut
- ½ cup pecans (chopped or crushed)
- 14 oz sweetened condensed milk (1 14 ounce can)
Instructions
- Preheat your oven to 350°F (175°C) and lightly oil a 9x13 baking dish (or coat it with non-stick cooking spray, or line with parchment paper).
- Put the graham crackers in a ziplock baggie, seal, and crush the crackers.
- In a mixing bowl add the crushed graham crackers and pour the melted butter over the top. Mix completely using a fork.
- Transfer the graham cracker/butter mixture to your 9x13 baking pan. Press it down using your fingers covering the entire bottom of the baking pan (layers 1 & 2).
- Sprinkle in the chocolate chips (layer 3), then add in the butterscotch chips (layer 4), next add in the shredded coconut (layer 5), then the chopped pecans (layer 6), finally pour the can of sweetened condensed milk over the top (layer 7).
- Bake at 350°F (175°C) for 25 to 30 minutes or until golden brown in color.
- Remove from your oven and allow the bars to cool completely. Eat or store them for later, enjoy!
Notes
- Try toasting the pecans for an added boost of flavor. You can toss them in a dry skillet for two to three minutes over low heat. Or put them on a baking sheet in a 350℉ (176℃) oven for five to ten minutes. Remember to watch closely and stir them to keep them from burning!
- Place a towel over the bag of graham crackers to keep things clean. It’s not uncommon for a plastic bag to break when crushing the contents inside. Putting a towel between your crushing tool of choice and the plastic should help prevent tears.
- Be sure to add the sweetened condensed milk last. This acts as a binding ingredient, so your bars won’t be a crumbly mess when you try to remove them from the pan after cooking, which brings me to my next tip...
- For the easiest removal, line your pan with parchment. This way, you can pull out the entire slab of bars without worrying about sticking. They slide out perfectly intact every time, and you can keep that parchment to layer between cut bars in the freezer. This way, you can pull out the entire slab of bars without worrying about sticking. They slide out perfectly intact every time, and you can keep that parchment to layer between cut bars in the freezer.

Samantha says
Should each layer cover the last completely? I found with my 9”x13” pan the measurements weren’t quite enough to make a complete layer, they all kind of mixed together. Still delicious tho!!
Angela @ BakeItWithLove.com says
Hello Samantha! No, the layers don't need to completely cover the previous layer. I just like to spread them all the way to the edges of the pan. If that means your layer is a bit sparse, it's OK. Thanks for asking!
Cyn says
A+. Easy and delicious recipe. Turned out perfectly. Thanks for posting!
Anonymous says
Adding butterscotch chips makes them too sweet. Instead I use an extra cup of semi sweet chocolate chips.
Anonymous says
These are too sweet! If you leave out the butterscotch chips, they are delicious.
Jaclyn says
These squares are amazing...Followed the recipe exactly and the squares turned out perfect!
Angela @ BakeItWithLove.com says
Super! So glad you liked the Hello Dolly Bars! Thanks for stopping back in to share your results! 🙂
Kelly says
Why isn't one of the steps to cook the crist before adding the fillings? Crust was soggy.
Angela @ BakeItWithLove.com says
Cooking the crust isn't necessary, unfortunately, it sounds like your hello dolly bars were under-baked. I hope you give it another try, with a few more minutes of baking time. They're worth it!
Giuseppina says
Io la faccio da anni devi farle cuocere bene e poi si devono raffredare completamente.
"I've been doing it for years, you have to cook them well and then they have to cool completely."
Christy P. says
Wow seriously good, I grew up knowing these as 7-layer bars. I will be making these again for the holiday.
Anonymous says
Easy and really yummy!
billie c. harrell says
when using the sweet shortcut pastry for hello dollys do you bake crust first
Angela @ BakeItWithLove.com says
Yes, I parbake for 10-15 minutes at 350F as instructed in the shortcrust pastry post. Enjoy!
Jazmyn Jenkins says
Fabulous recipe, I totally botched it this time but I can't lie it still tatse amazing but definitely looking forward to perfecting this (with the correct pan)LOL !
Anonymous says
Five star! But end with cocoanut, it gets toasted that way.
Peggy J Chapman says
I have made these many times.The kids love them.Easy to make and bake. Peggy in Georgia.
Grana Tada says
Great treat… simple but has the wow factor!
Lanice Fentress says
I followed the recipe to the tee and they came out perfect!!
Yummy and delicious
Thank you
Bob Campbell says
Replace the graham crackers with vanilla wafers...leave them in the plastic bag and break up with a rolling pin...carefully. Vent the bag with a small hole, so you don't blow out the bag! The wafers are best if they are not completely crushed to dust but broken into small pieces
Angela @ BakeItWithLove.com says
Yum! Sounds like a great variation! Thanks for sharing!!