

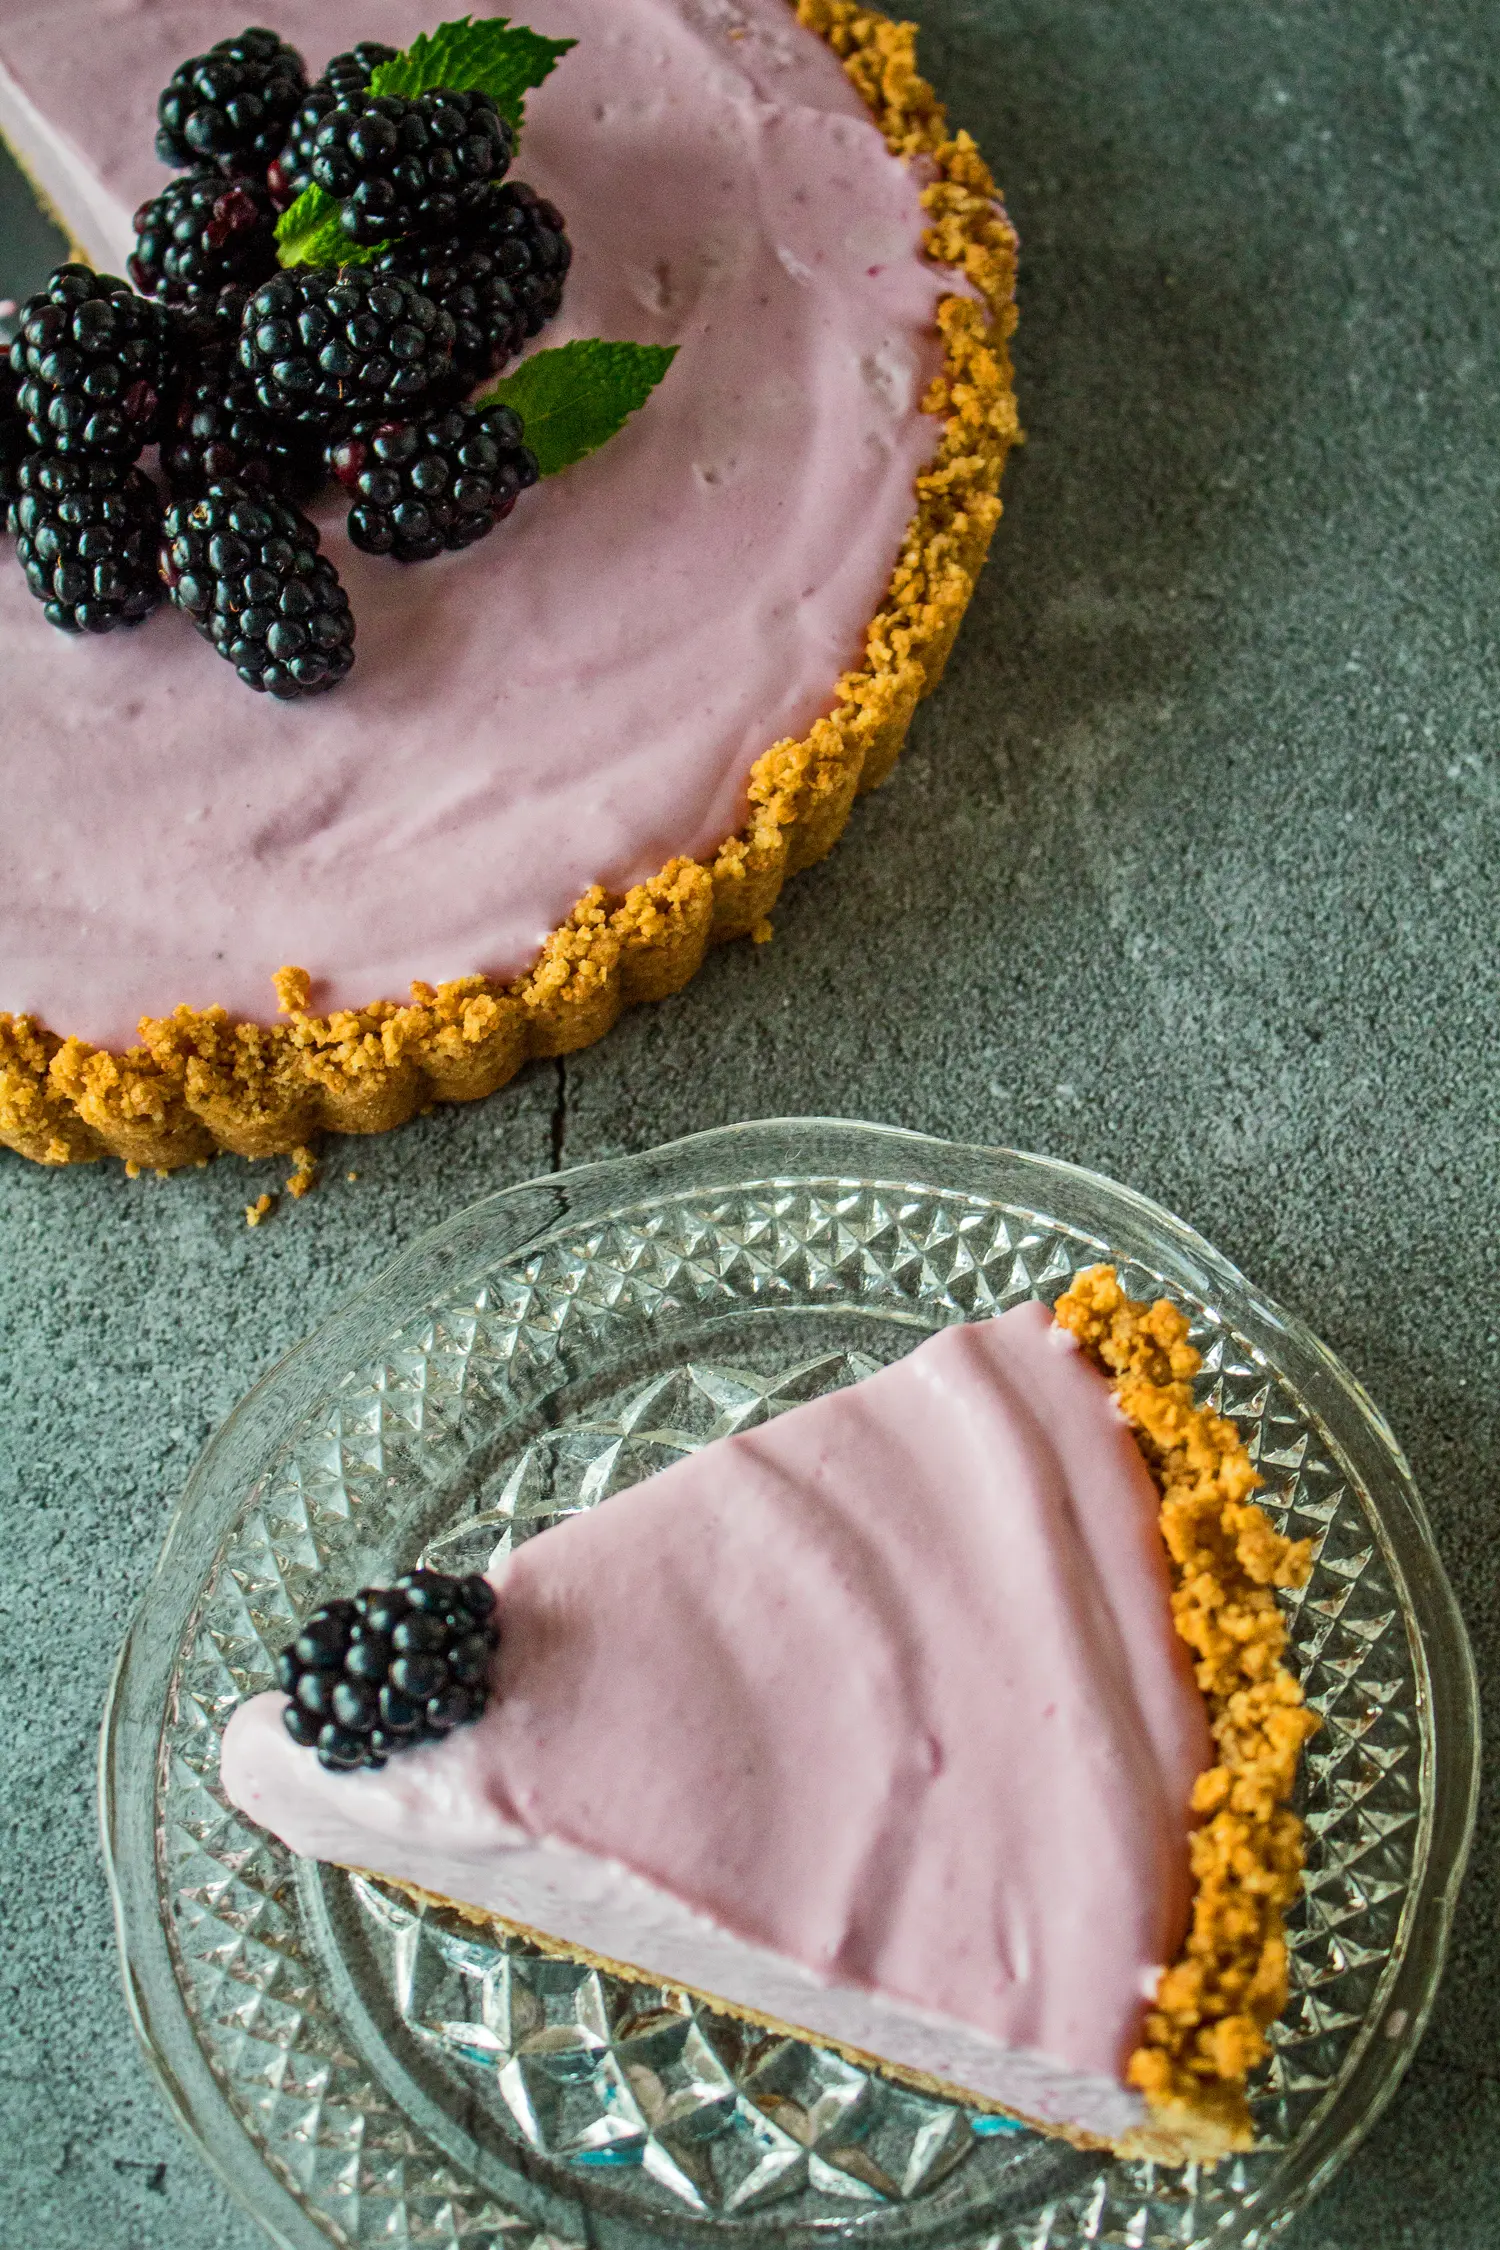
This graham cracker crust is a staple ingredient for so many delicious desserts and is a great base for beginner bakers. This 'better than store-bought' crust can be used for any pie, cheesecakes, cream pies, ice box pies, and decadent dessert bars. Best of all, it only takes 3 ingredients and can be done in 5 minutes or less.
Use your crust to make chocolate pie, no-bake cheesecake, hello Dolly bars, chocolate chip cookie pie, or other dessert bars.
Jump to:
I'm always experimenting with using different pie crusts in various recipes. From my gingersnap cookie crust to Oreo crust and shortcrust pastry, I have a pie crust for every occasion.
Of all of my tasty pie crust alternatives, though, this graham cracker one is the one I use the most. It tastes much better than the store-bought version, and the flavors pair well with everything.
🥘 Ingredients
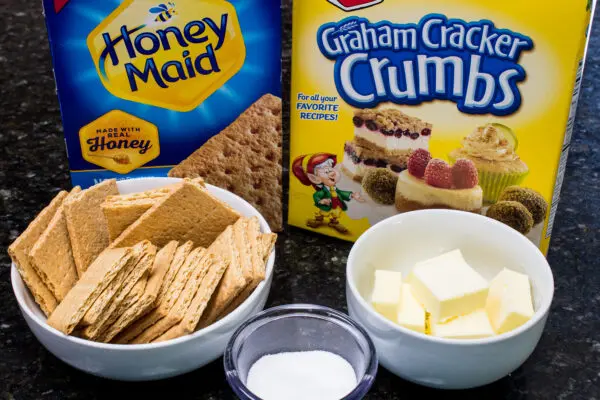
- Graham Cracker Crumbs - You can buy graham cracker crumbs from the store or make your own. Place the crackers in a sealed bag, cover it with a towel, and crush them with a rolling pin. You can also pulse them in a food processor.
- Sugar - You can use white granulated sugar or brown sugar.
- Butter - Melted butter binds the graham cracker together so it can be formed into a crust.
*Be sure to see the free printable recipe card below for ingredients, exact amounts & instructions with tips!*
🔪 How To Make A Graham Cracker Crust
This pie is so easy to make—you don't even have to bake it. You will need a mixing bowl, a fork, or a food processor.
This recipe will make one nine-inch pie crust.
Make Your Graham Cracker Crumbs
Step 1: Crush the crackers. If you aren't using store-bought crumbs, you'll need to crush ten whole graham crackers to get 1½ cups of crumbs. Use a large plastic storage bag and crush the crackers with a rolling pin or the mallet of a meat tenderizer until they reach a fine consistency. Or, pulse the crackers in your food processor until you have finely ground crumbs.
Mix the Crust
Step 2: Add. In a medium-sized mixing bowl, combine the graham cracker crumbs with 3 tablespoons of sugar, then add 7 tablespoons of melted butter.
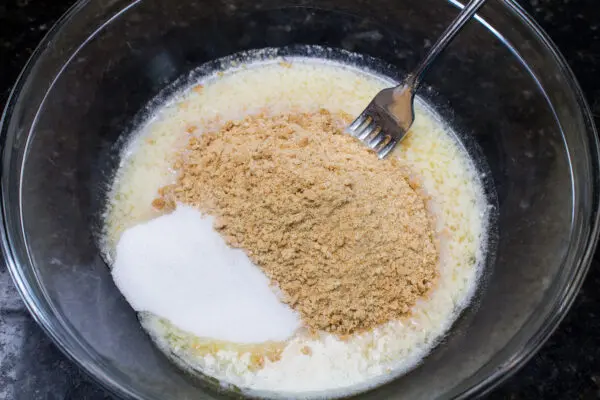
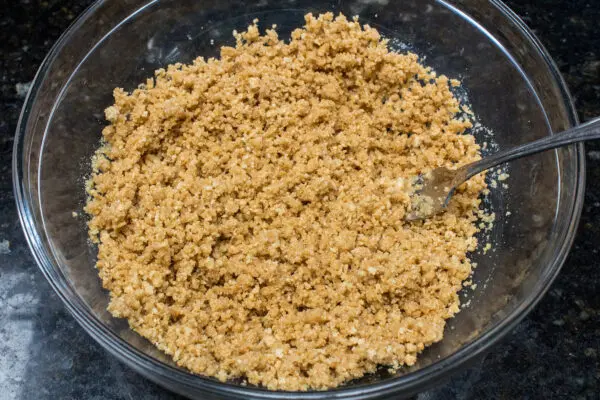
Step 3: Combine. Use a fork to combine the ingredients and evenly distribute the butter throughout the crumb.
Form & Bake or Chill
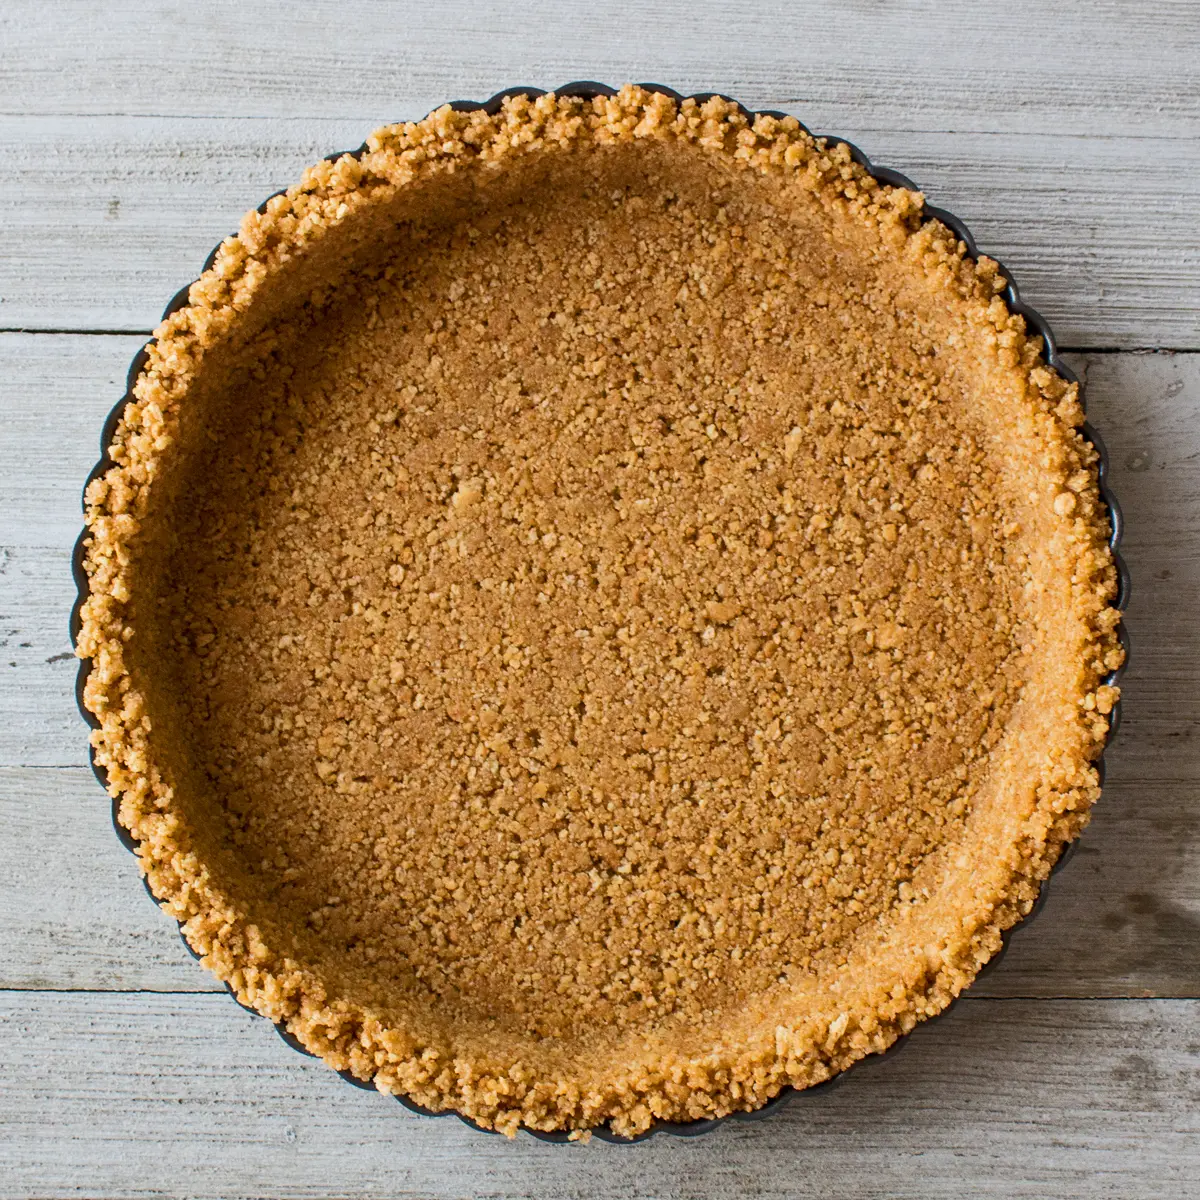
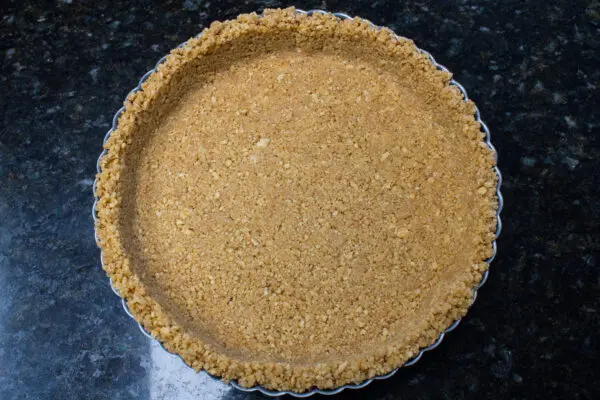
Step 4: Spread. Pour the graham cracker mixture into your pan and spread evenly. Use the bottom of a clean measuring cup to firmly pack the graham cracker crust into the bottom of your pan.
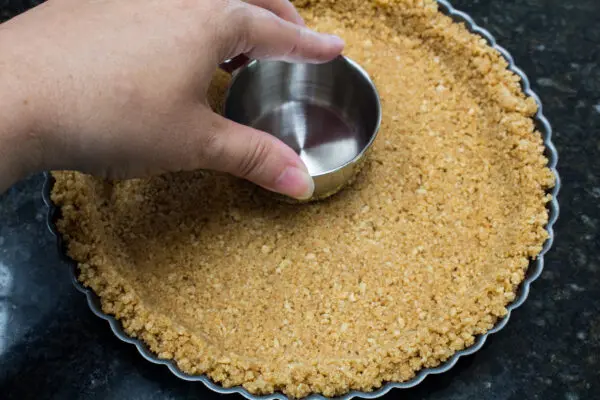
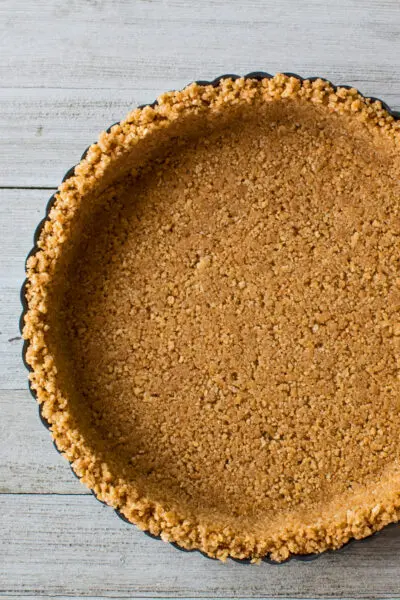
Step 5: Form. Use your fingers to tightly pack the graham cracker crust up the sides of the pan (and into fluting, if needed). Once done, you can bake, refrigerate, or freeze the crust to set it up depending on the instructions of your dessert recipe.
Step 6: Bake or chill.
Bake: Preheat your oven to 375ºF (190ºC/Gas Mark 5) and bake for 7 - 8 minutes. Remove from the oven and allow the crust to cool completely before filling.
Chill: To chill, refrigerate the crust for one hour before filling. Or, chill it in the freezer for 10-20 minutes before filling.
🥧 Great Stir-Ins
- Cinnamon - This complements so many desserts typically paired with a graham cracker crust. You'd be surprised how well cinnamon works with lemon too.
- More Spices - Other great spices are the ones I typically keep in the baking section of my spice cabinet: nutmeg, allspice, cloves, ginger, star anise, cardamom, caraway, and mace.
- Spice Blends - Spice blends like garam masala, pie spice blends (like pumpkin or apple), and British mixed spice can elevate your pie crust flavor!
- Nuts - Other great additions are nuts, toasted or not, then ground to match the crumble consistency. The most popular nuts are walnuts, almonds, and pecans, but I think macadamia nuts would be an extra special add-in.
- Coconut - Coconut could also be used, and like nuts, it would be a fantastic flavor enhancement, whether plain or toasted. You can also opt for unsweetened or sweetened coconut, shredded or dessicated coconut (which can be found already ground at times).
- Other flavors like coffee grounds and candied or zested citrus peel are also incredibly tasty ideas.
💭 Angela's Pro Tips & Recipe Notes
- Use graham crackers. Ten whole graham crackers will yield 1½ cups of graham cracker crumbs. One standard sleeve has nine graham crackers, but you need all ten.
- Use a food processor. If you use a food processor to make the crumbs, you can use it for the entire recipe. Pulse the crackers until you have a fine crumb, then add the sugar, and pulse to blend. Add the melted butter and pulse a few times to combine and get a crumbled mixture.
- Use the right pan. This recipe works for a standard 9-inch pie pan or a 9 to 10-inch springform pan, as well as similarly sized tart pans and an 8 x 8 baking pan.
>>>See All Of My Recipes Here!<<<
🥡 Storing
Your pie crust should be used within two days of making it. Whether baked or unbaked, it should be stored in the fridge.
Alternatively, you can freeze the crust (baked or unbaked) for up to four months.
Does Graham Cracker Crust Need To Be Baked?
Nope! This crust works beautifully for both baked and no-bake recipes. It can be baked if needed or used in cold desserts that skip the oven altogether (but it does need to be chilled if not baking).
A baked crust will have a sturdier texture and won't be as crumbly. However, chilling the crust in the fridge or freezer can achieve a similar result.
The crust will fall apart if you don't bake or chill it.
In my experience with this graham cracker crust, if you have a recipe that calls for the crust to be baked but then freeze the cream or icebox pie for 3 - 4 hours, you can skip the baking step. My crusts have always held up to being warmed at room temperature, then sliced and served.
Do you love a recipe you tried? Please leave a 5-star 🌟rating in the recipe card below and/or a review in the comments section further down the page.
Stay in touch with me through social media @ Pinterest, Facebook, Instagram, or Twitter! Subscribe to the newsletter today (no spam, I promise)! Don't forget to tag me when you try one of my recipes!
📖 Recipe Card

Graham Cracker Crust
Ingredients
- 1 ½ cups graham cracker crumbs (about 10 graham crackers, if crushing manually or using a food processor)
- 3 tablespoon sugar (or brown sugar)
- 7 tablespoon butter (salted, melted)
(Note: 2x or 3x only changes the ingredient list)
Instructions
- If you are not starting with the boxed graham cracker crumbs, you will need 10 graham crackers (my Honey Maid brand package held 9 crackers). Use a large Ziploc plastic storage bag and crush the crackers with a rolling pin or the mallet of a meat tenderizer until they reach a fine consistency. Or pulse the crackers in your food processor until you have finely ground crumbs.
- In a medium-sized mixing bowl, combine the 1 ½ cups graham cracker crumbs with 3 tablespoon sugar (or the same amount of packed brown sugar), then add the melted 7 tablespoon butter. Use a fork to combine the ingredients and evenly distribute the butter throughout the crumb.
- Pour the graham cracker mixture into your pan and spread evenly. Use the bottom of a clean measuring cup to firmly pack the graham cracker crust into the bottom of your pan, then use your fingers to pack the crust up the sides of your pan.
- Follow your recipe instructions if it calls for your graham cracker crust to be baked. In general, I have found that despite recipe instructions, any pie that will be frozen to set up for several hours can skip the pre-baking.To pre-bake: bake for 7-8 minutes at 375℉ (190℃).For no-bake: refrigerate and chill for about an hour or freeze the graham cracker crust for 10-20 minutes before filling.
Maud D'Antonio says
waar koop jij je graham crackers in nederland?!
sorry, I only see now that you are in America LOL !!! Never mind, I'll have to make them from scratch, oh boy
Angela @ BakeItWithLove.com says
You can use biscoff cookies instead! (Je kunt in plaats daarvan biscoff-koekjes gebruiken!)
Sylvie Girouard says
Je ne vois pas la quantité de beurre...
"I don't see the amount of butter..."
Angela @ BakeItWithLove.com says
Toutes les quantités sont dans la fiche recette (il y a 7 cuillères à soupe de beurre utilisées). Merci d'avoir posé la question!
"All amounts are in the recipe card (there are 7 tablespoons of butter used). Thanks for asking!"
Jennifer says
I'm looking for a recipe that will make enough crust for eight 4-inch mini tarts. Any idea on if a single batch would work or double?
Angela @ BakeItWithLove.com says
Since this recipe lines an 8-9 inch tart pan or pie pan, I would go with doubling the recipe to make sure you have more than enough (rather than running short). Have fun with your tartlets!