These cream cheese stuffed mini peppers make a fantastic appetizer or snack that is ready in under 30 minutes. Sweet peppers are packed with cream cheese, bacon, cheddar cheese, and green onions for a crowd-pleasing dish. They are naturally gluten-free and can easily be adapted to suit your dietary needs or preferences.
For easy appetizers, try my sausage cream cheese biscuit bites, cream cheese wontons, or air fryer meatballs.

I love the sweet mini peppers that are sold in bags at the grocery store. They are delicious and perfectly portioned for snacking.
I've used them for salads, roasted them (see my roasted mini peppers), tossed them in a savory pasta dish, or used them to make these stuffed peppers. They're one of my favorite quick recipes to serve at parties, whether I bake them or serve them as a cold app.
🥘 Ingredients
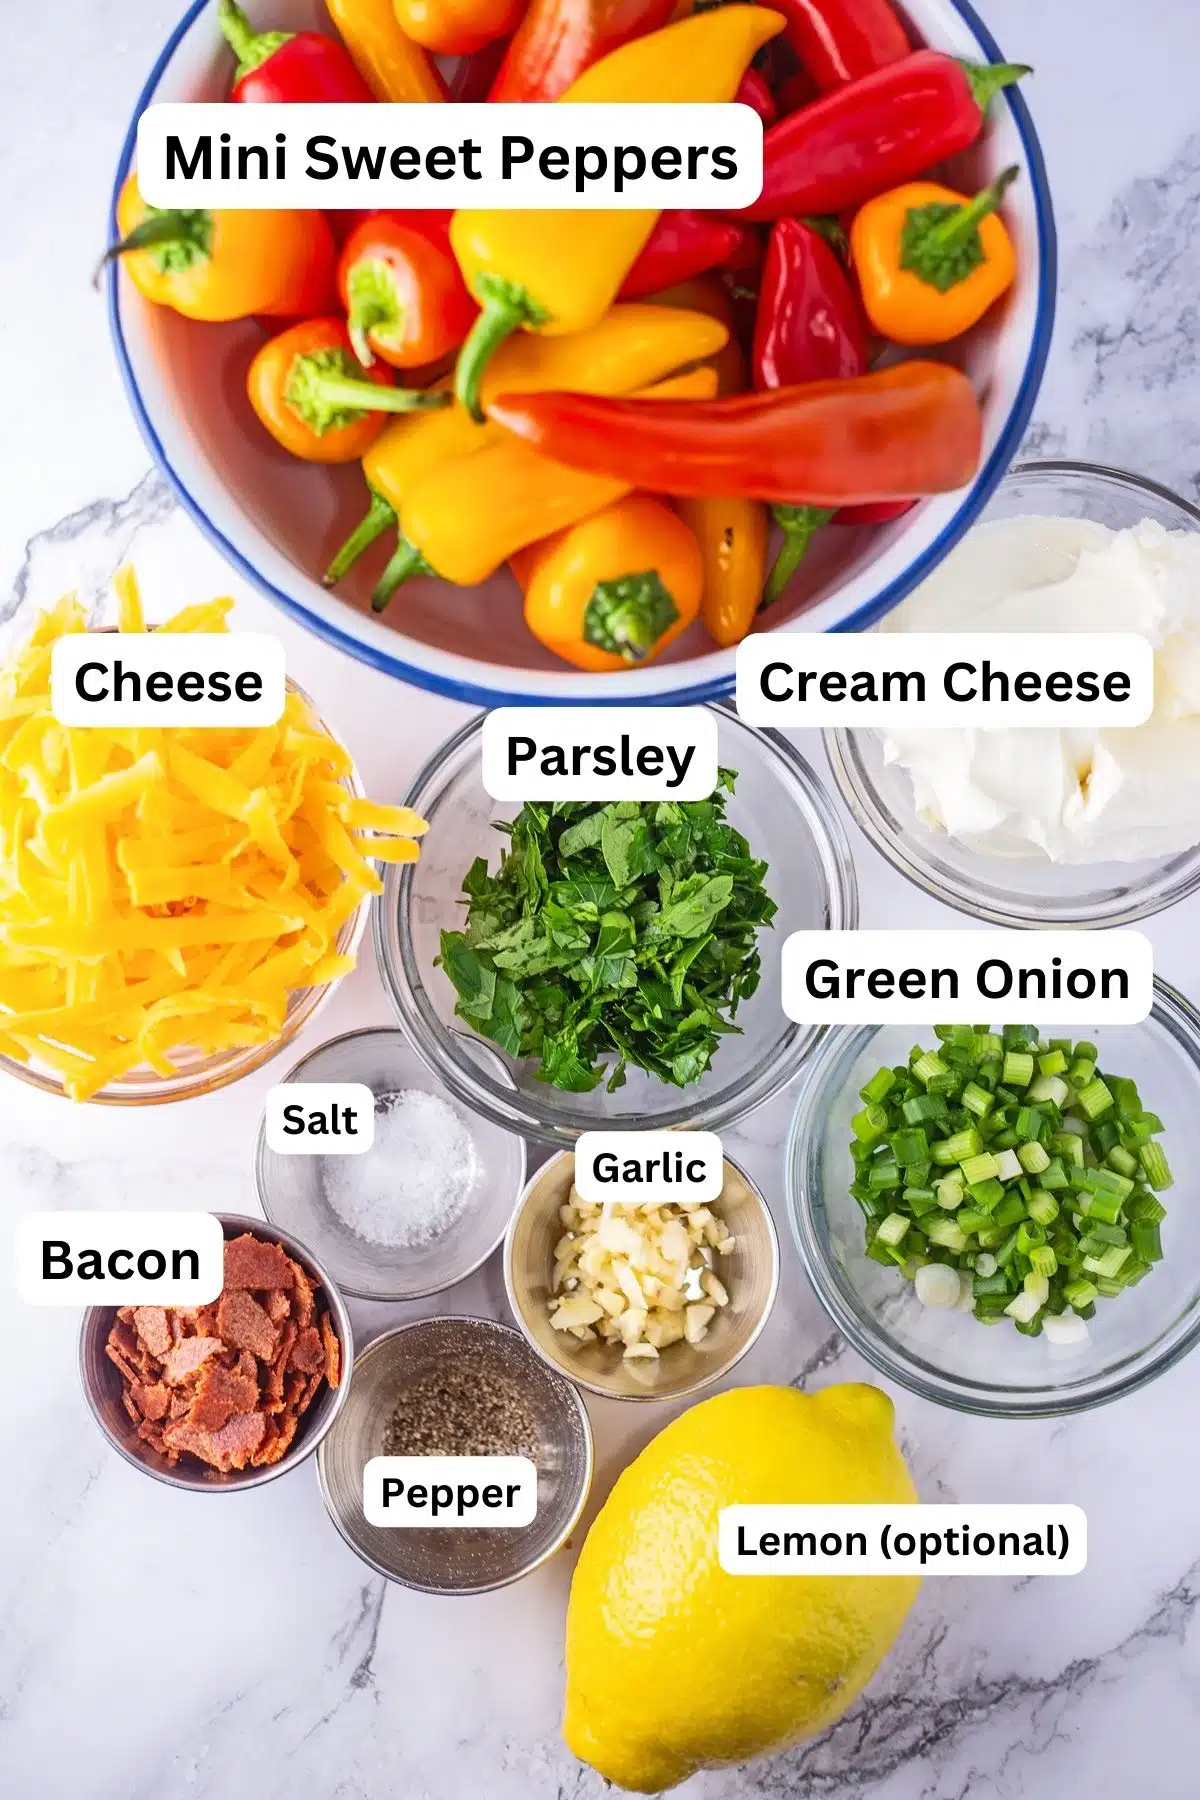
- Peppers - Slice your mini sweet peppers in half lengthwise and remove the ribs and seeds. Peppers look best with the stem left intact, like my lobster poppers here.
- Cream Cheese - You can use full-fat or low-fat cream cheese. Let it come to room temperature so that it is easier to mix.
- Garlic - Minced garlic. If you don't have any, you can use ½ tablespoon of garlic powder.
- Seasonings - Some simple salt and pepper. Add a pinch of onion powder if desired.
- Bacon - Cook and crumble your bacon. To make this recipe vegetarian, omit the bacon or use vegan bacon.
- Cheese - Shred your cheddar cheese so that it melts the best. I prefer sharp cheddar cheese, but Colby or Colby-Jack are also perfect for these snack-sized peppers.
- Green Onions - Sliced green onions.
- Parsley (optional) - Freshly chopped parsley for garnish.
- Lemon (optional) - A squeeze of lemon juice is a nice flavor boost for cream cheese fillings.
Be sure to see the free printable recipe card below for ingredients, exact amounts & instructions with tips!
🔪 How To Bake Cream Cheese Stuffed Mini Peppers
These peppers can be made in advance or prepared at the last minute. You only need a couple of baking sheets, parchment paper, an electric mixer, a silicone spatula, and measuring utensils.
This recipe uses twelve sweet peppers for 24 halves, but the number may be more or less depending on the size of the peppers.
Make The Filling
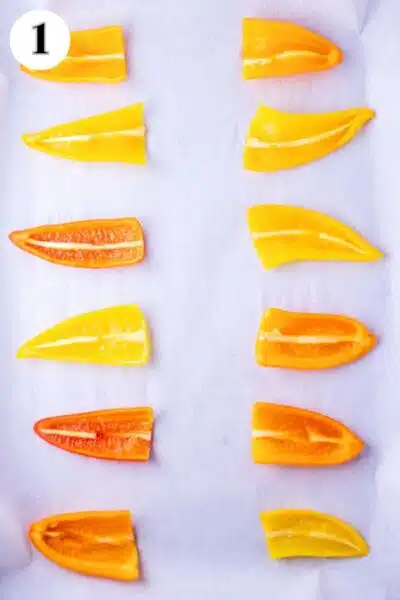
Step 1: Preheat. Preheat your oven to 425°F (220°C/Gas Mark 7). Line 2 baking sheets with parchment paper and arrange your 12 mini sweet peppers (336 grams) on top (photo #1).

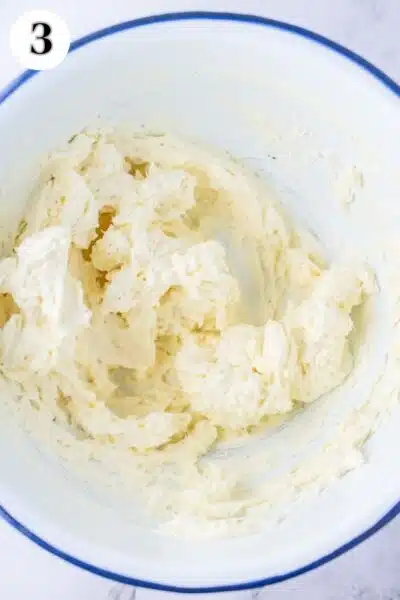
Step 2: Mix the filling. Using your stand mixer or an electric mixer, beat together 8 ounces (227 grams) of cream cheese, 1 teaspoon of garlic, ¼ teaspoon of salt & pepper, and the optional squeeze of lemon juice until completely smooth (photos #2, #3).
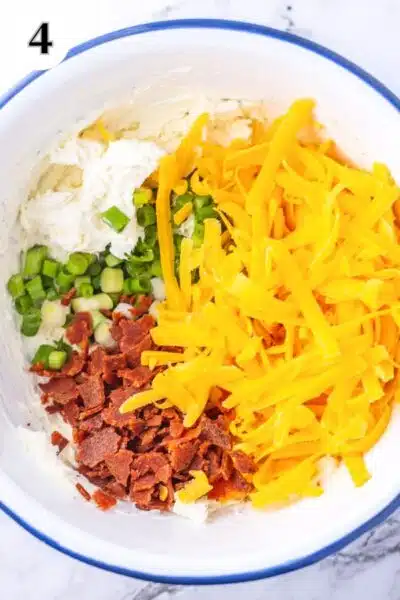
Step 3: Stir. Use a silicone spatula to stir in the crumbled 4 slices of bacon, ¾ cup (85 grams) of cheddar cheese, and ¼ cup (25 grams) of green onions until well combined (photos #4, #5).
Assemble & Bake
Step 4: Assemble. Scoop the filling into the prepared peppers. It should fill the peppers completely and be slightly mounded over the top (photo #6).


Step 5: Bake. Bake at 425°F (220°C/Gas Mark 7) for 16-18 minutes or until hot.
Step 6: Serve. Remove the baked peppers from your oven and top with the optional 1 tablespoon of parsley. Serve immediately.

💭 Angela's Pro Tips & Recipe Notes
- Adjust your peppers. Your sweet peppers may vary in size, so you may have some leftover filling. Feel free to adjust how many peppers you use to accommodate this. When using peppers that were medium-large in size, I found that 24 peppers was a good amount.
- Make it vegetarian. For a vegetarian version, simply omit the bacon or use a vegan variety.
- Cook your bacon. You can prepare your bacon however you like. Bake it in the oven, or make bacon in the air fryer, cook it in a skillet, or my favorite easy way microwave bacon.
- Use garlic powder. If using garlic powder instead of fresh minced garlic, use ⅛ teaspoon.
- Make them in advance. You can prepare these peppers in advance by filling and stuffing them, covering them, and storing them in the fridge for 1-2 days. Then, bake as directed.
- Skip the cooking. You can serve these mini peppers chilled, as well. Prepare them as directed and skip the oven altogether.
>>>See All Of My Recipes Here!<<<
🥡 Storing & Reheating
Keep your peppers in an airtight storage container in the refrigerator for up to 4-5 days.
Let your peppers cool completely before freezing them for up to 6 months. Thaw them overnight in the fridge before reheating.
Reheating
Reheat your peppers in the oven at 350°F (175°C/Gas Mark 4) for 10-15 minutes or until warmed. They're also easy to reheat in your air fryer at the same temp. Be sure to watch them closely so that the filling doesn't burn or bubble over.

Do you love a recipe you tried? Please leave a 5-star 🌟rating in the recipe card below and/or a review in the comments section further down the page.
Stay in touch with me through social media @ Pinterest, Facebook, Instagram, or Twitter! Subscribe to the newsletter today (no spam, I promise)! Don't forget to tag me when you try one of my recipes!
📖 Recipe Card
Cream Cheese Stuffed Mini Peppers
Ingredients
- 12 mini sweet peppers (sliced in half lengthwise with ribs and seeds removed)
- 8 oz cream cheese (softened, at room temperature)
- 1 teaspoon garlic (minced)
- ¼ teaspoon each, salt & pepper
- 4 slices bacon (cooked and crumbled)
- ¾ cup cheddar cheese (shredded)
- ¼ cup green onions (sliced)
- 1 tablespoon parsley (chopped, optional for topping)
- 1 squeeze lemon juice (optional)
(Note: 2x or 3x only changes the ingredient list)
Instructions
- Preheat your oven to 425°F (220°C/Gas Mark 7) and line 2 baking sheets with parchment paper and arrange your 12 mini sweet peppers on top.
- Using your stand mixer or an electric mixer, beat together 8 oz cream cheese, 1 teaspoon garlic,¼ teaspoon each, salt & pepper, and 1 squeeze lemon juice until completely smooth.
- Use a silicone spatula to stir in the crumbled 4 slices bacon, ¾ cup cheddar cheese, and ¼ cup green onions until well combined.
- Scoop the filling into the prepared 12 mini sweet peppersweet peppers. The filling should fill the peppers completely and be slightly mounded over the top.
- Bake at 425°F (220°C/Gas Mark 7) for 16-18 minutes, or until hot.
- Remove from the oven an top with the optional 1 tablespoon parsley. Serve immediately.
Notes
-
- Your sweet peppers may vary in size, so you may have some leftover filling. Feel free to adjust how many peppers you use to accommodate this. When using peppers that were medium-large in size, I found that 24 peppers was a good amount.
-
- For a vegetarian version, simply omit the bacon or use a vegan variety.
-
- You can prepare your bacon however you like. You can make it in the oven, or make bacon in the air fryer, cook it in a skillet, or even microwave bacon.
-
- If using garlic powder instead of fresh minced garlic, use ⅛ teaspoon.
-
- You can prepare these peppers in advance by filling and stuffing them, covering them, and storing them in the fridge for 1-2 days. Then, bake as directed.
-
- You can serve these mini peppers chilled, as well. Prepare them as directed and skip the oven altogether.
- Keep your peppers stored in a sealed container in the fridge for up to 5 days.
- Let your peppers cool completely before freezing them for up to 6 months. Thaw them before reheating.
- Reheat your peppers in the oven at 350°F (175°C/Gas Mark 4) for 10-15 minutes or in your air fryer.





Comments
No Comments