Pumpkin Cake Pops
My festive pumpkin cake pops have pumpkin cake mixed with cream cheese frosting before being shaped into a pumpkin and dipped in chocolate. Not only are they super cute, but they are delicious and easy to make. This beginner-friendly guide will walk you through how to make these crowd-pleasing fall or Halloween treats.1x batch of this recipe yields 28 cake pops; you can mix-and-match with any of my other cake pop recipes to make as many of your favorite styles as you like. See my top tips for the best cake pops to help master cake pops in no time.
Servings: 28 cake pops
Calories: 125kcal
Ingredients
- 1 box yellow cake mix
- 15 oz pumpkin puree
- 3 large eggs (at room temperature)
- 1½ teaspoon pumpkin pie spice
- 3 tablespoon cream cheese frosting (or more, if needed)
- 28 chocolate chips (semi-sweet, milk, or dark)
- 12 oz orange candy melts (or white chocolate or almond bark with food coloring)
- ¼ cup green candy melts (or white chocolate or almond bark with food coloring)
- 28 treat sticks
Instructions
- Preheat your oven to 350°F (175°C/Gas Mark 4) and spray a 9x13 baking dish with cooking spray.
Make the Pumpkin Cake
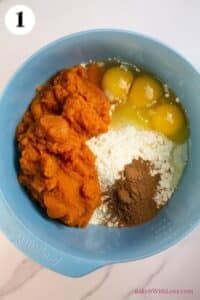
- In a large mixing bowl, add your 1 box yellow cake mix, 15 oz pumpkin puree, 3 large eggs, and 1½ teaspoon pumpkin pie spice.1 box yellow cake mix, 15 oz pumpkin puree, 3 large eggs, 1½ teaspoon pumpkin pie spice
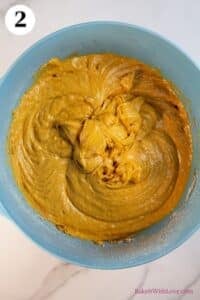
- Use a hand mixer to mix the ingredients until completely combined, scraping down the bowl as needed.
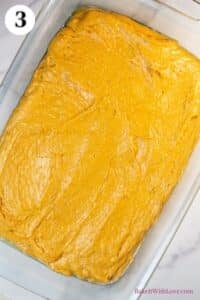
- Pour the batter into the prepared baking dish.
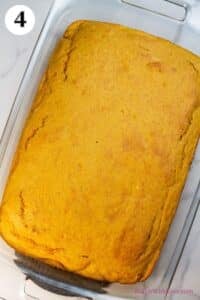
- Bake for 22-25 minutes, or until a toothpick inserted into the center of the cake comes out clean.
- Remove the cake from the oven and let it cool completely before continuing.
Prepare the Cake Pop Dough
- Once cooled, break your cake into large chunks so that it fits into the bowl of your stand mixer.
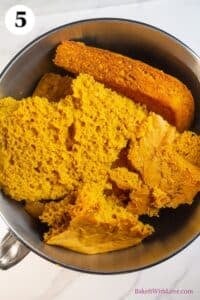
- Mix the cake on low speed with the paddle attachment until completely crumbled.
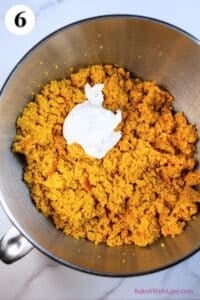
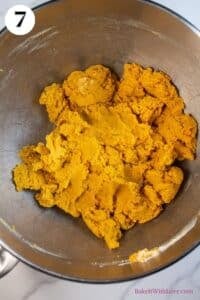
- Add 3 tablespoon cream cheese frosting and keep mixing until a dough has formed with a consistency similar to play-doh.3 tablespoon cream cheese frosting
Make the Pumpkin Shape
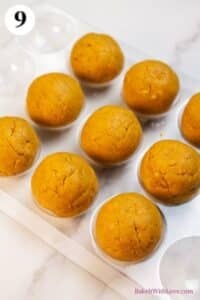
- Portion the dough with a kitchen scale, cookie scoop, or meatballer (a standard cake pop is 1 ounce).
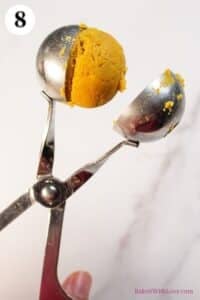
- Roll the portioned dough into balls.
- Use a treat stick to press a cross into the top of one of the cake balls, then divide each of those sections in half so that you have 8 divided sections on your cake ball.
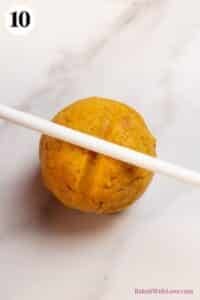
- Still using the treat stick, turn the ball and continue each indention all the way down the sides of the cake.
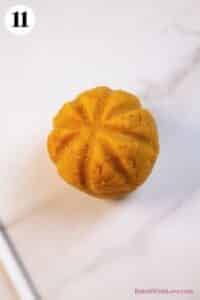
- Use your hand to slightly flatten the ball and then use your finger or knuckle to create a slight dip in the top center where all of the indentions intersect.
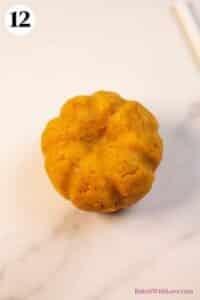
- Repeat with all of the cake balls.

Decorate
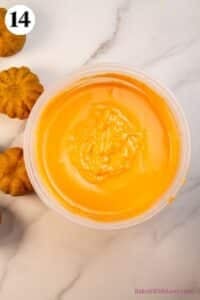
- Melt 12 oz orange candy melts in the microwave using 30-second increments and stirring well between each session.12 oz orange candy melts
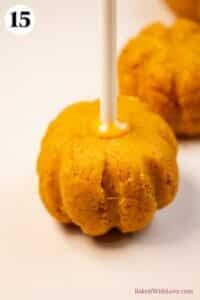
- Dip the end of one of your 28 treat sticks into the chocolate and gently push it into the bottom (flat part) of the pumpkin. Set aside to harden for 2-3 minutes.28 treat sticks
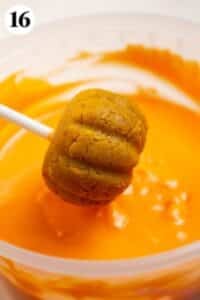
- Dip your pumpkin into the orange chocolate, turning so that it is completely coated. Remove from the chocolate and tap off any excess.
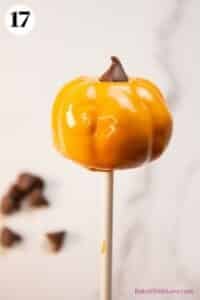
- Immediately, while the chocolate is still wet, place one of your 28 chocolate chips onto the top of the pumpkin to make the stem. Set them aside to harden.28 chocolate chips
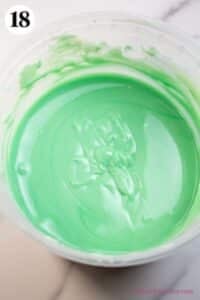
- Melt ¼ cup green candy melts in the microwave, stirring well, and then pour it into a piping bag or storage bag with a tiny portion of the tip cut off.¼ cup green candy melts
- Use the green chocolate to draw some squiggly vines on the top of the pumpkins.

- Repeat with all of the cake pops and let them sit for 2-3 minutes to fully harden before serving them or storing them for later.
Notes
Notes:
- To speed up the cooling process of your cake, flip the cake out of the baking dish onto a wire cooling rack.
- While orange is the traditional color for pumpkins, you could also make them white! I think they would look wonderful in pastel shades of blue or pink, too.
- You can buy pre-colored candy melts. These may be slightly thicker than typical chocolate. If you find it too thick for dipping, stir in some paramount crystals, coconut oil, or Wilton's EZ Thin.
- If you want to skip using pre-colored candy melts, you can use chopped white chocolate, white chocolate chips, or almond bark. Melt them using the same method in the microwave, and add an oil-based food coloring to make your chosen colors (or just keep them white to avoid dye altogether).
- If you don't have a cake pop stand, you can use a styrofoam block or a box with holes poked into it.
- You can skip the pumpkin cake if you like the look of the pumpkins but aren't a fan of pumpkin-flavored things. Instead, use any baked cake crumbled together with three tablespoons of your preferred frosting. Shape and design as instructed.
- The cake pop dough can be kept in the fridge for 4-5 days or in the freezer for 3-6 months.
- Once you have dipped and assembled your cake pops, they can be kept at room temperature for 4 days or in the fridge for 7-10 days.
- Fully decorated cake pops can be frozen, you just need to freeze fully set cake pops on a tray individually first. Once frozen, package them into a freezer container with parchment paper layers between the cake pops. Store for up to 6 weeks in the freezer, then thaw overnight in your fridge before serving.
Nutrition
Calories: 125kcal | Carbohydrates: 22g | Protein: 2g | Fat: 3g | Saturated Fat: 2g | Polyunsaturated Fat: 0.3g | Monounsaturated Fat: 0.4g | Trans Fat: 0.05g | Cholesterol: 20mg | Sodium: 153mg | Potassium: 49mg | Fiber: 1g | Sugar: 14g | Vitamin A: 2395IU | Vitamin C: 1mg | Calcium: 48mg | Iron: 1mg