

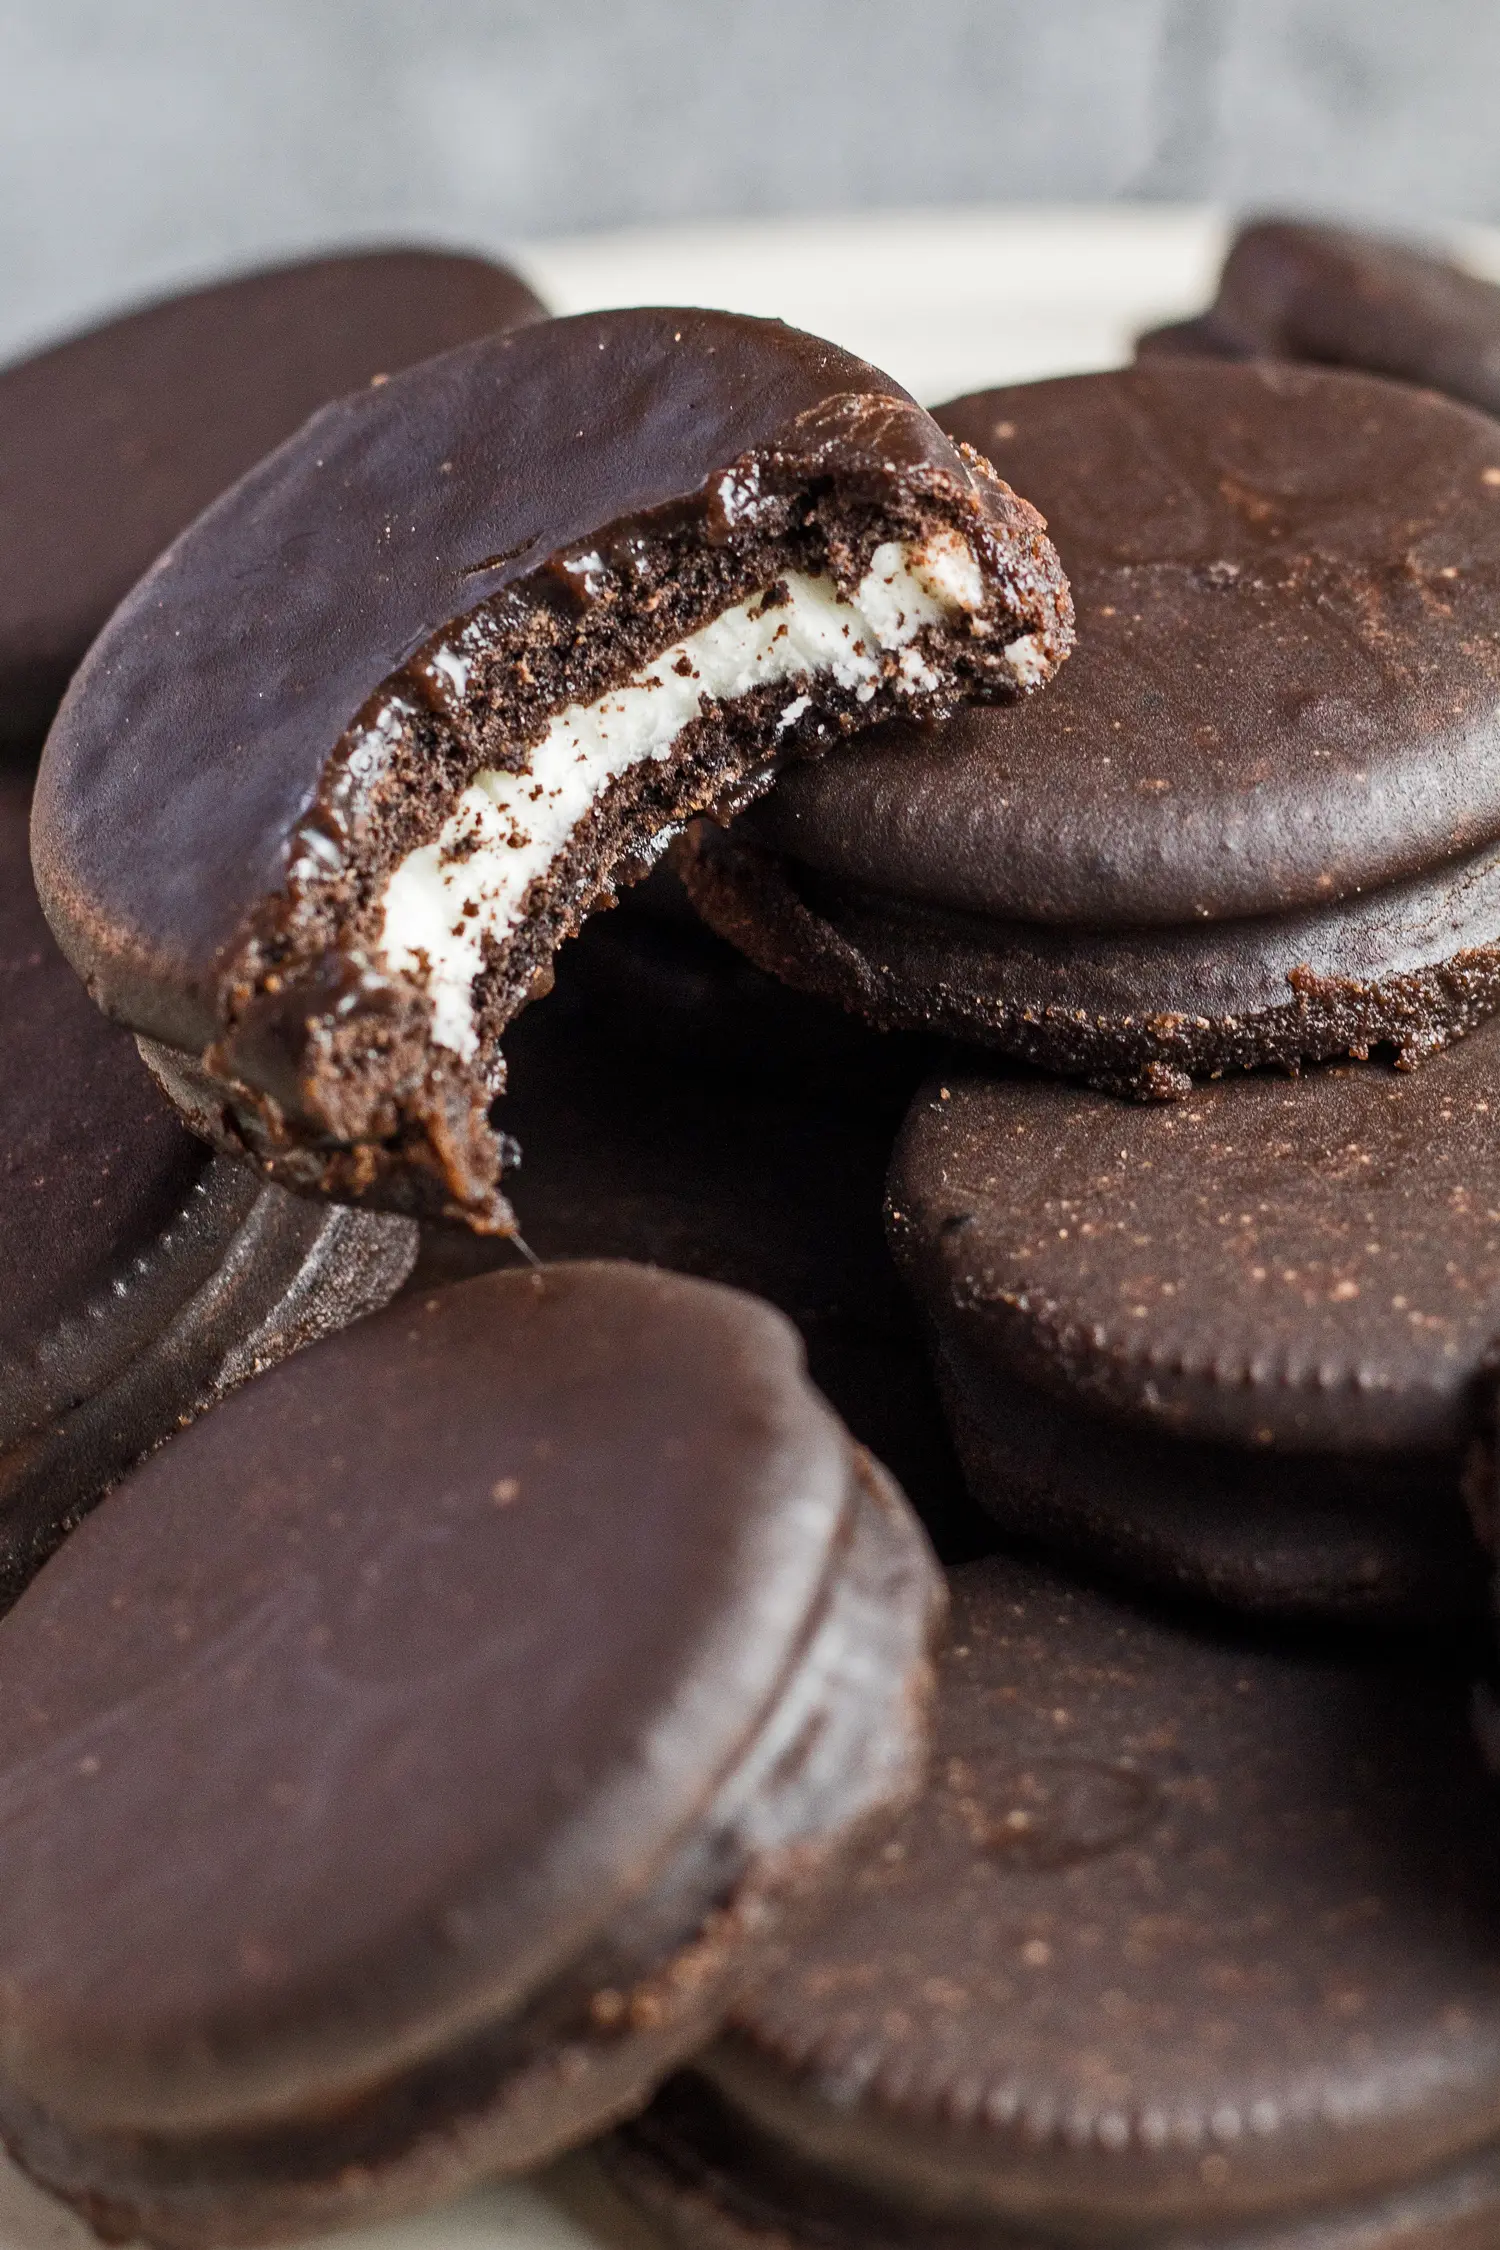
My easy homemade Fudge Covered Oreos are so much better than the packaged Oreo cookies sensation that everyone loves!! The fudge coating makes one of the most popular store-bought cookies around even more delicious and truly to the point of being so delish there's no way to enjoy just one!
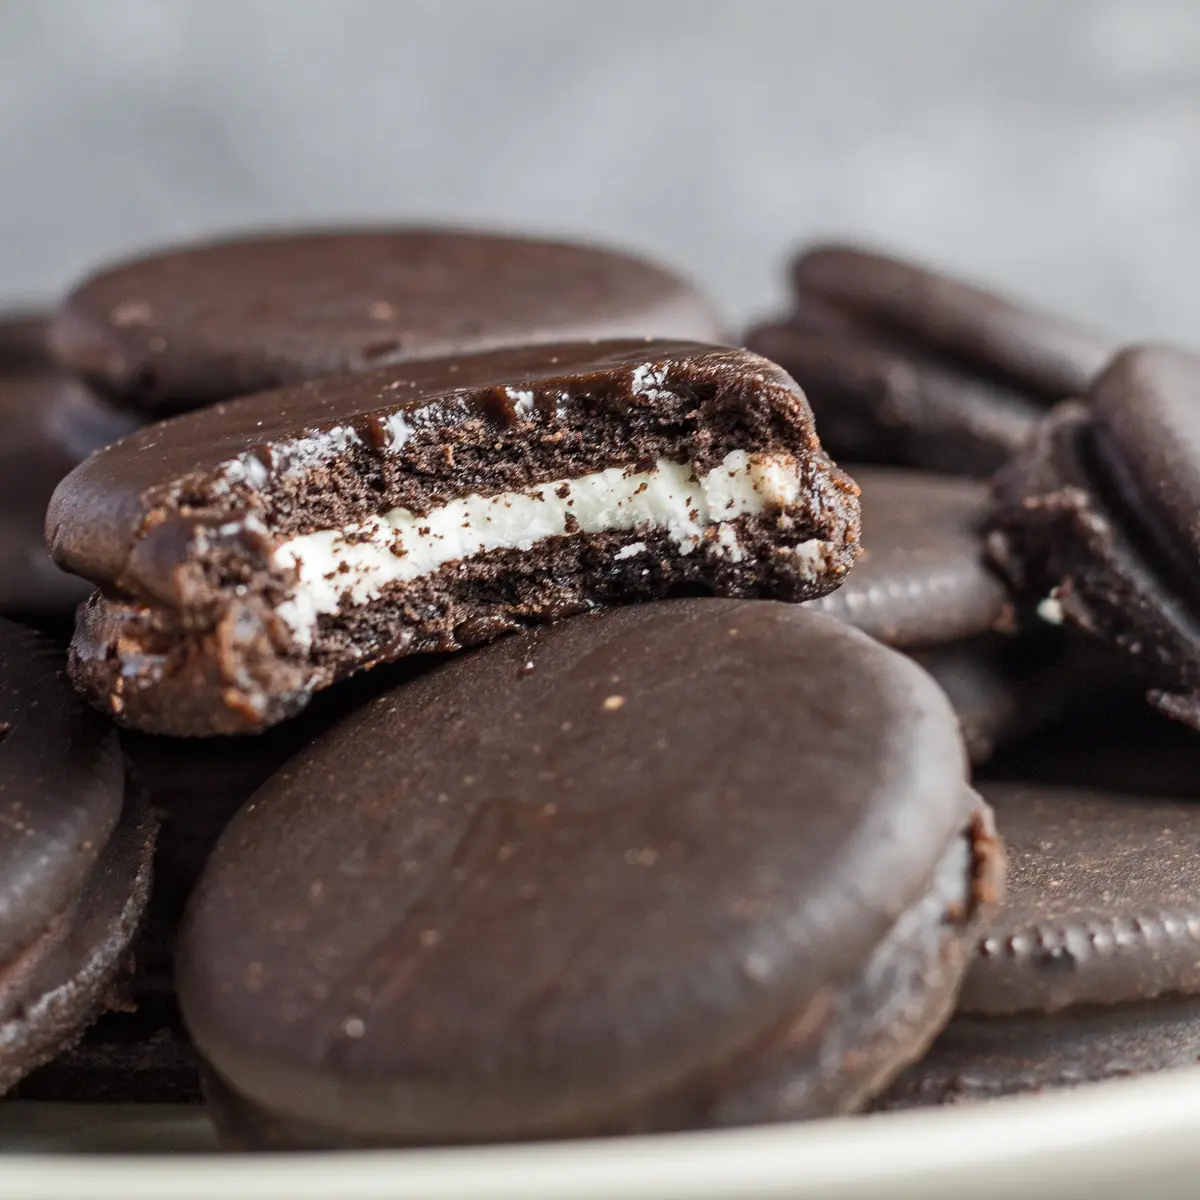
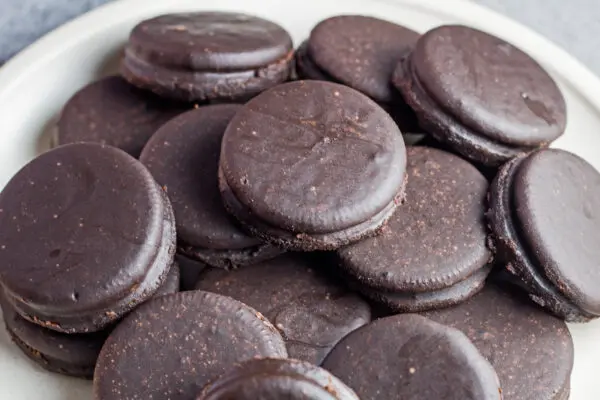
The best fudgy sandwich cookies ever!
If you love the Oreos brand fudge-covered cookies, you're going to really L-O-V-E this homemade version of the popular Oreos even MORE!! Yes, I said it and I'll say it again - these are way better than the original!
Wanna know why I can say that?! Get ready for this...
I don't like chocolate. Just not crazy about it, it's never been my 'thing' that I crave when I have a sweet tooth.
BUT I LIKE THESE! Like a lot. Too much? Probably! These ridiculously addictive cookies barely made it to the point of me being able to test out storage methods. Heck, I even made an Easter Fudge Covered Oreos version too!
Seriously, they're delicious. They're easy to make. They store well and I'm going to say that they will ship well when holiday baking starts (so bookmark the page, save the recipe, and add them to your to-do lists)!
🥘 Ingredients
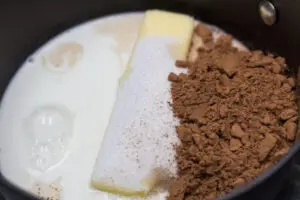
These pantry staple ingredients + some fresh Oreos combine to make some truly addictive fudgy cookies! This is my go-to combination for boiled fudge frosting too!!
- Sugar - Not just for sweetness! The sugar crystals will bind together to help this fudge coating 'set' once cooled!
- Butter - For the buttery richness and a super smooth texture!
- Milk - This also adds richness and great texture to our fudge! You can use 1%, 2%, or whole milk.
- Cocoa - Of course! We need some fudge chocolate flavor too! I've made these with both regular cocoa and dark cocoa powder with great results! Dutch-process cocoa powder would add a super taste too!
- Vanilla - A generous portion to highlight all of our rich, delicious ingredients!
- Oreos - I used the full, normal size package of regular Oreos. Minus a few broken ones and one that came apart (Oops! The fudge icing was still too warm!), I ended up with somewhere between 30-32 fudge covered Oreos.
Do these ingredients look familiar?! They're the base for the best no-bake cookies too! All of my tips for effortlessly perfect no-bake cookies hold true to this fudge icing as well.
🔪 Instructions
Start out with gathering your ingredients and having a work surface ready. I also placed all of my Oreos within easy reach right next to my parchment paper-lined baking sheet that I placed all of the fudge-coated Oreos onto for setting up.
Boil the Fudge Icing
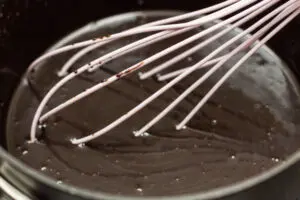
I whisked my boiled fudge icing by hand, but a hand mixer on the slow setting would work well too! Just be sure that you don't start whipping the icing up into a luscious frosting.
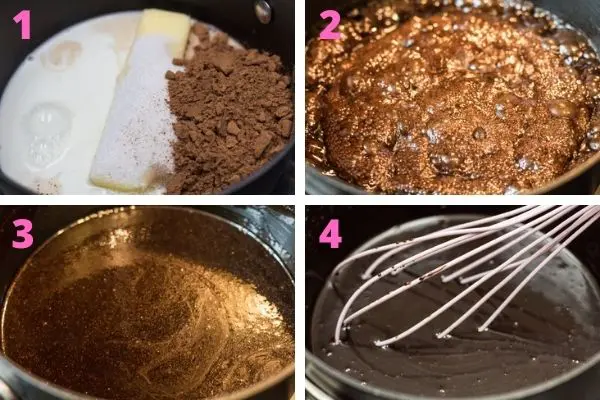
- Combine and heat. Bring a saucepan with the sugar, butter, milk, and cocoa to medium-high heat. Stir while the butter is melting until the icing ingredients are well combined.
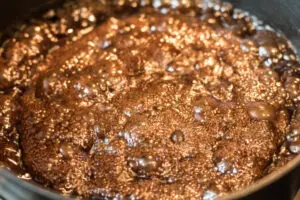
- 1 minute at a rolling boil. Once the icing reaches a full rolling boil, time it for exactly one minute, then remove your saucepan with the icing from heat.
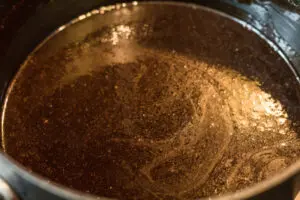
- Add vanilla. Stir in the vanilla extract - this usually causes some more bubbling, it's OK.
- Cool slightly. Whisk for 3-4 minutes to cool the icing. Once the icing is clinging to your utensils and drips, it is ready. *The icing is runny at first when hot!
Pro Tip:
The rolling boil is very important to the success of your icing setting up correctly! One full minute of boiling needs to be timed once a solid, bubbling, and rolling boil is achieved.
**Video demonstrates the amount and rate of bubbling that you want to achieve.**
Coating the Oreos
Once the icing is cooled, you'll want to move quickly through coating each of your Oreos while the icing is at that 'just right' temperature.
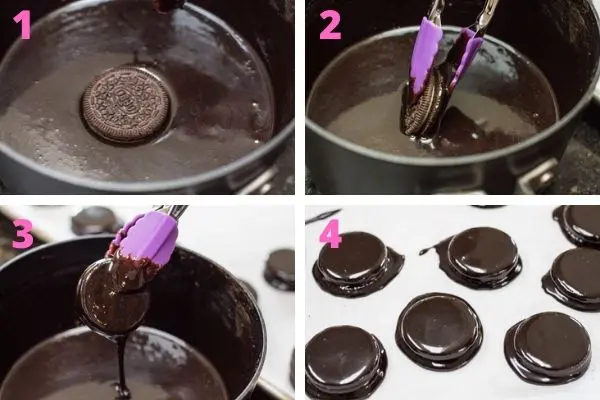
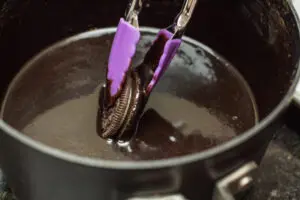
- Drop Oreos into icing. The easiest way to coat your Oreos completely is to simply drop them into your saucepan of icing.
- Coat all sides. Use tongs to grab the cookies right after dropping them into the warm icing, and turn to coat all sides.
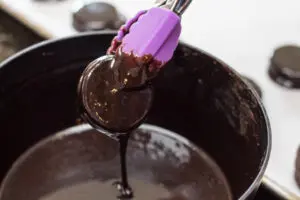
- Lift and drip. Lift each coated Oreo cookie and allow the icing to drip for a second until it can be lifted away. *The icing will run freely off the Oreos, once it slows to a drip it can be moved.
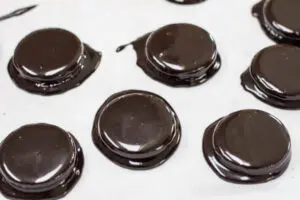
- Transfer. Place each of the coated cookies on your prepared workstation, leaving approximately 1-inch spacing between the fudge covered Oreos.
- Cool and set. The coated cookies will take about 1 hour to set up at room temperature. This can be done in about 30 minutes if the cookies are refrigerated.
- Trim and remove. Once set, the cookies can be trimmed, if desired. Use a sharp knife to trace around the round cookies, then push each cookie up from underneath the parchment paper. *If your fudge coated cookies are too sticky to be removed easily, allow them to set up longer.
- Smooth and serve. Trimmed edges can be smoothed by running your fingertips over the edges for a very tidy appearance.
*For best results, use fresh Oreo's. Stale Oreo's won't give a nice texture contrast between the crisp, firm cookie and creamy, fudgy coating.
Serve these tasty cookies with a big glass of milk. Enjoy!!
🥡 Storing
They're all set up, you're full to the max, and now you need to save the rest. Preferably somewhere hidden too, these disappear ridiculously fast if your kids know where they are!!
I stored mine in two test batches. One in the refrigerator. The second was on the counter at room temperature. Both in airtight containers.
Also, I didn't place parchment paper sheets between my layers (something I would usually do with chocolate-covered Oreos). There were absolutely no issues with the cookies sticking together AT ALL!
Both methods stored very well for up to a week. My taste testers and I agree that we MUCH PREFER the room temperature cookies!
I'm sure that these fudgy, delicious cookies may have been able to store reasonably well for up to 2 weeks. I blame the taste testers for the short test period! 🙂
Do you love a recipe you tried? Please leave a 5-star 🌟rating in the recipe card below and/or a review in the comments section further down the page.
Stay in touch with me through social media @ Pinterest, Facebook, Instagram, or Twitter! Subscribe to the newsletter today (no spam, I promise)! Don't forget to tag me when you try one of my recipes!
📖 Recipe Card

Fudge Covered Oreos
Ingredients
- 2 cups sugar
- ½ cup butter
- ½ cup milk
- 4 tablespoon cocoa powder
- 2 teaspoon vanilla extract
- 30 Oreo cookies
(Note: 2x or 3x only changes the ingredient list)
Instructions
- In a saucepan, combine the fudge icing ingredients. Add the sugar, butter, milk, and cocoa.

- Heat to a rapid, rolling boil over medium-high heat. Set your timer and let the fudge icing boil for ONE FULL MINUTE. *This is so very important to the coating setting up correctly!
- Remove from heat and stir in the vanilla extract.
- Whisk or beat the icing for 3-5 minutes until the fudge is dark, glossy, and clinging to your whisk. The cooler it gets, the slower the icing will drip from your utensils.
- Drop your Oreos into the cooled icing directly for the easiest method of coating each cookie completely.
- Use tongs to flip and thoroughly coat each of the Oreos.
- Allow as much of the fudge icing to drip from the Oreo cookie as possible.
- Place each fudge-coated Oreo onto a parchment paper-lined baking sheet or work surface. Allow the coated cookies to cool completely so that the coating sets up.

Maggie says
Hello! The fudge on my oreos was super grainy, I looked it up and it seems like that can happen if you stir a mixture with sugar after it has melted, but that is a key step in this recipe. Is there anyway to prevent this?
Angela Latimer says
The cooking time is key to setting up correctly, but you read right, the sugar can crystallize if over-cooked. Here are a few tips for correcting that: use room temperature butter so it melts quickly (warmed milk is great too), combine the sugar and warm the mixture until the sugar is melted (and you no longer feel the grainy sugar if you rub some between your fingers), make sure that any sugar on the sides of the pot get scraped down into the mixture, and add a 1/4 teaspoon of cream of tartar - this will take all of the guesswork out of timing.
Joe says
Best oreo recipe ever!
Linda says
Made these for Christmas as a gift. Everyone loved them! My boyfriend ate most of them before I could package them 🙂
Aqis says
I have seen your recipe for this fudge but I haven't tried it yet. Is your ingredient estimate suitable for me to make a batik cake?
I hope you respond to me quickly.
Angela @ BakeItWithLove.com says
This is not the same recipe for fudge that would be used in batik cake (hedgehog slice). I would use a thicker dairy like sweetened condensed milk or heavy cream and include eggs as well.
kathy says
Delicious fudge taste. Recipe was easy. Make sure boil to see boil bubbles completely covering to the center of fudge sauce.
Ruth W says
I'm so sorry to say that these did not work out for me. The fudge did not stay on the cookie, the cookie is not as crispy as it should be, and I think I was careful to boil it at least one minute. At least the leftover fudge icing will make a lovely ice cream topping. I will just have to warm it.
Angela @ BakeItWithLove.com says
Hi Ruth, it's also important to whisk the fudge icing until thickened so that it is both thick enough to stay on the cookies and not so 'saucy' that it will soak into your Oreos. This helps to keep them crisp on the inside. I do hope you give it another try sometime! Thanks for sharing your experience with them!