


These super easy fork biscuits are a wonderful treat to enjoy with tea, coffee, or as a stand-alone dessert. Plus, they're a perfect beginner baked item with only 3-ingredients and no special equipment needed.
Jump to:
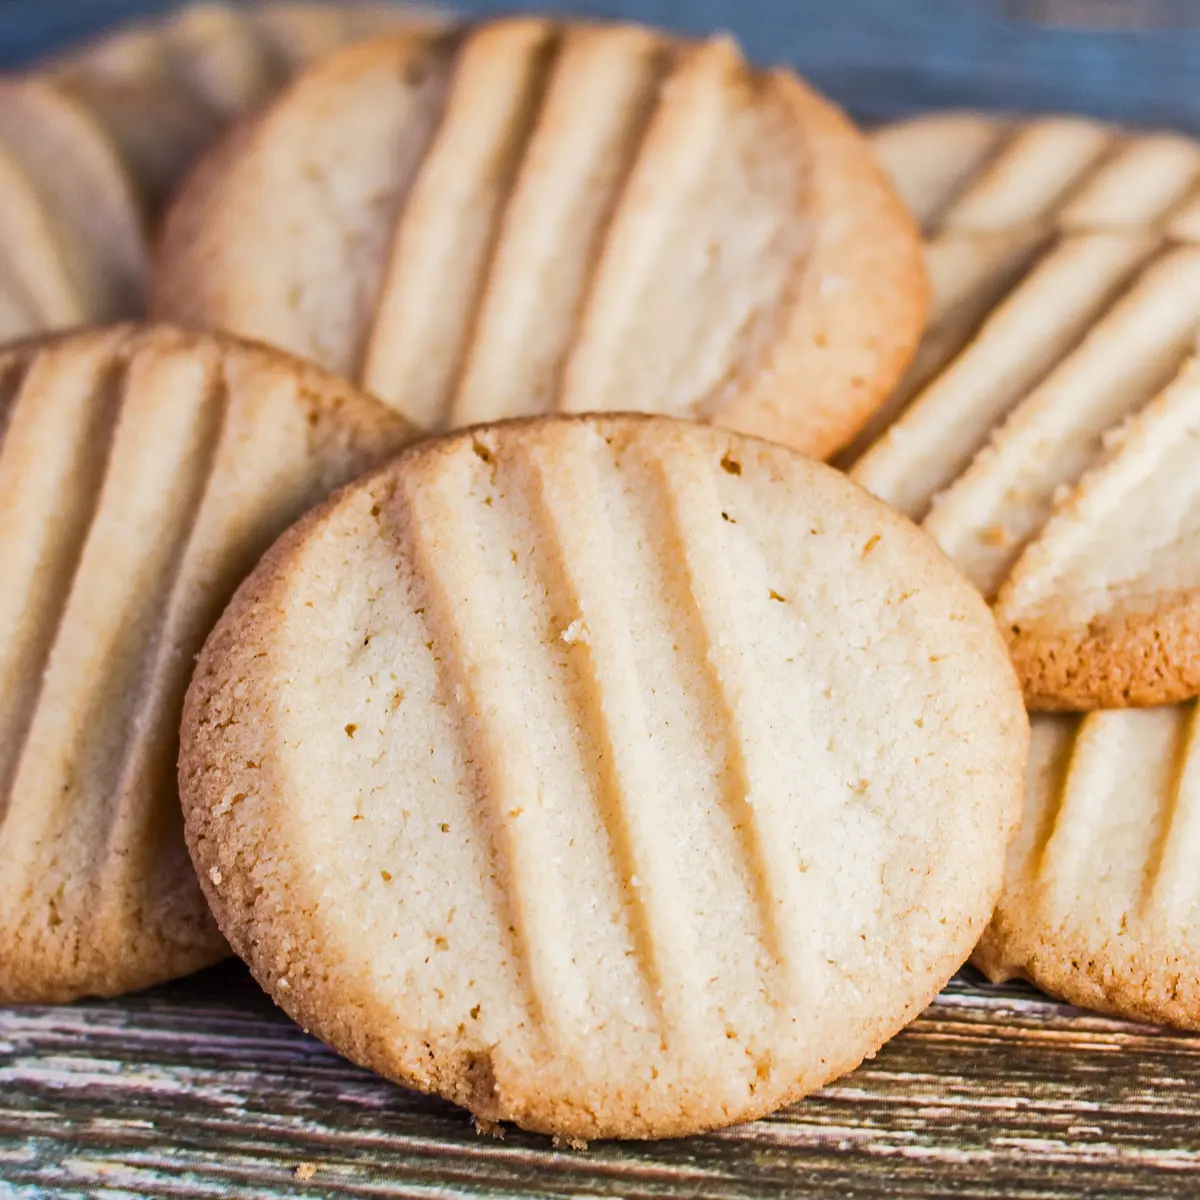
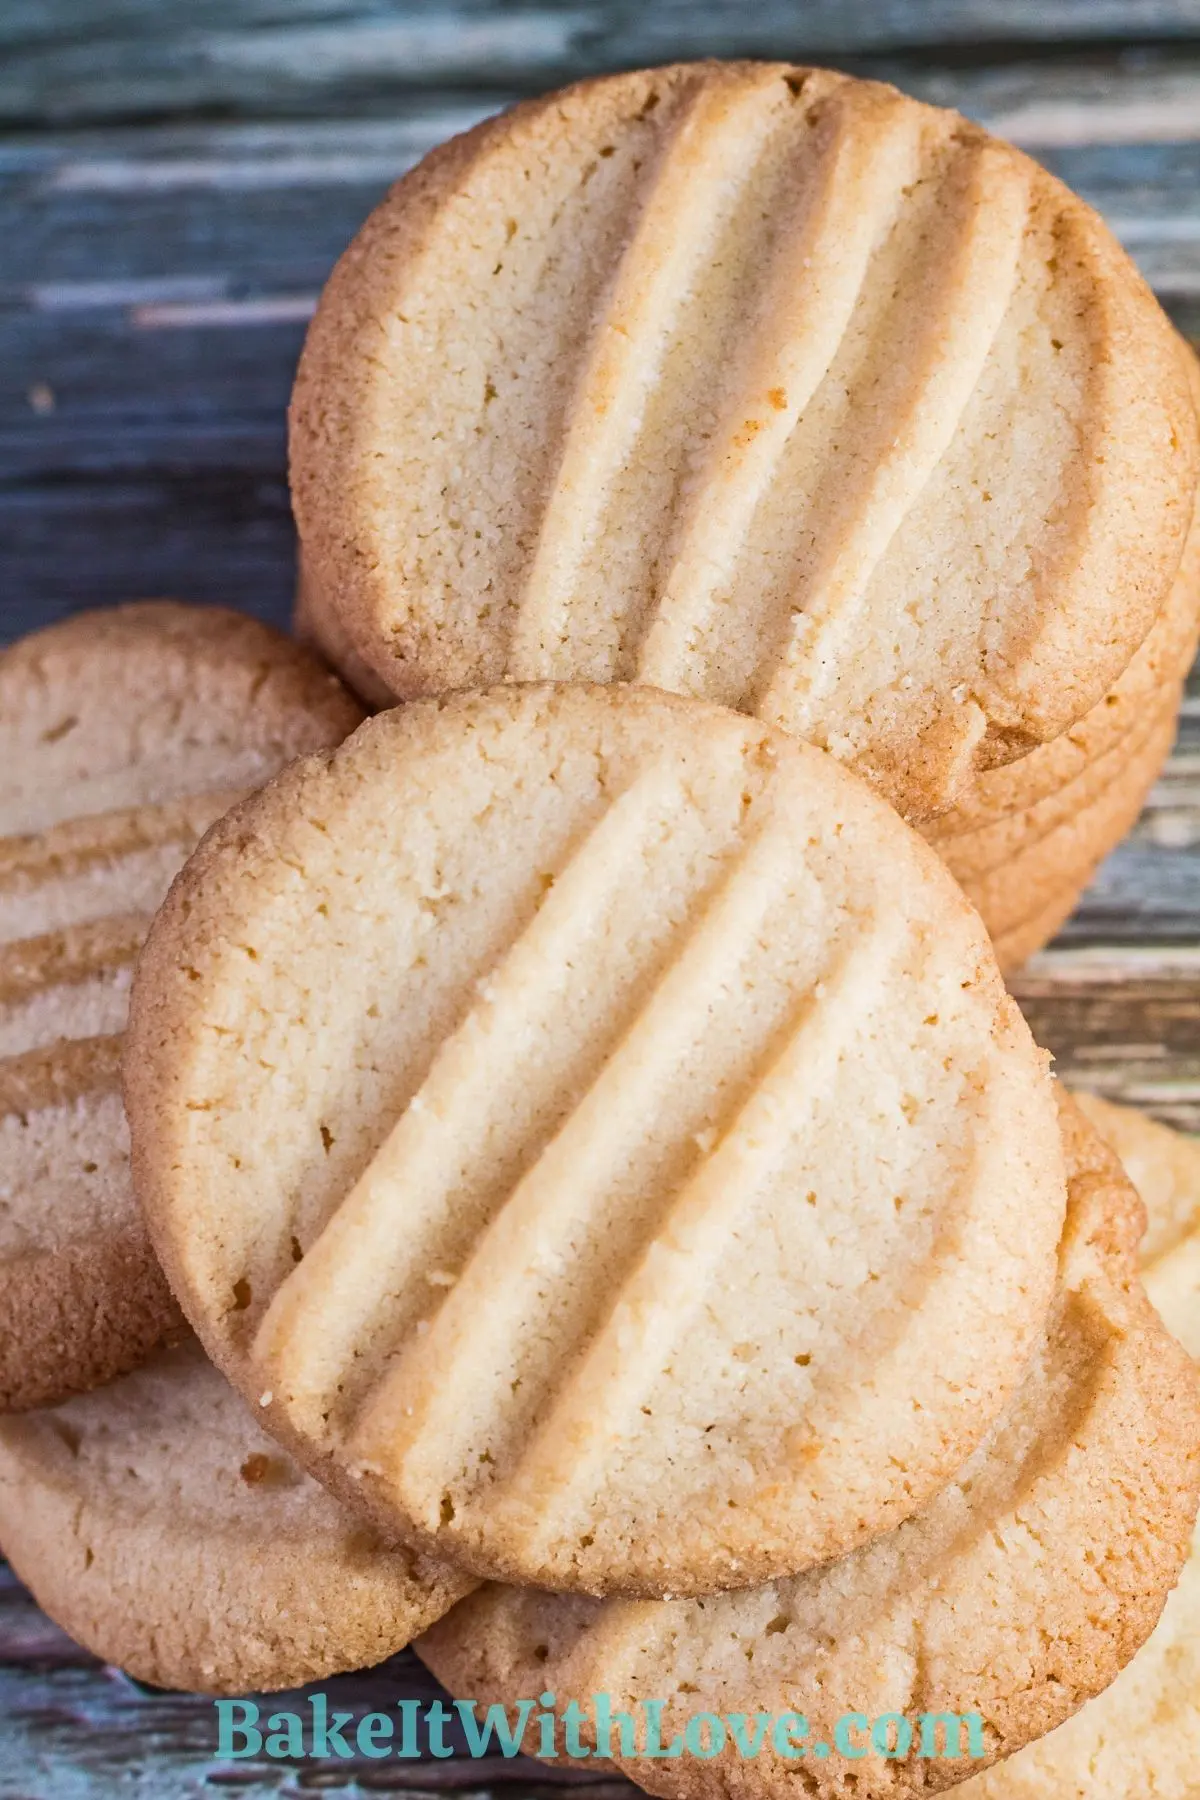
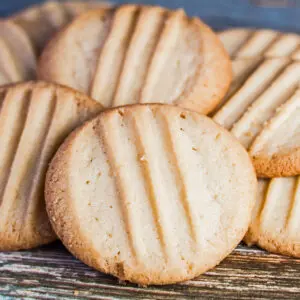
What could be simpler than homemade fork biscuits? These easy cookies are wonderfully crisp – and perfect with a cold glass of milk or a cup of hot tea.
I love to serve these as a simple dessert too, sometimes with after-dinner coffee or even with a scoop of vanilla ice cream. The not-too-sweet but rich and buttery flavor is always appealing, and the texture of these fork biscuits is spot on every time!
This recipe you will see below makes 16 biscuits, so feel free to adjust the recipe accordingly if you want to make a bigger batch. They are easy to make, so why not make extras for friends and family…or for yourself?!
🥘 Ingredients
Just three ingredients go into these mouthwatering fork biscuits, and you probably already have them at home already. If you don't keep self-rising (self-raising) flour on hand, just follow the instructions in the recipe notes for a quick conversion.
- Butter – Creamy and delicious and part of the simplicity that makes these cookies so tasty.
- Sugar – Just the right amount for perfect fork biscuits that aren't overly sweet. The original recipe calls for caster sugar (fine sugar), but either that or granulated white sugar works in this recipe.
- Self-Rising Flour (or all-purpose flour + baking powder) – Self-raising flour in the UK, but don't worry if you don't have the 'self-rising' or 'self-raising' flour on hand!
Be sure to see the free printable recipe card below for ingredients, exact amounts & instructions with tips!
🔪 How To Make Fork Biscuits
Once you prepare your ingredients, which takes about 5 minutes, you can move along to the baking stage which is just 15 minutes.
Before you know it, your fork biscuits will be hot and ready. The mild sweet scent will fill the air and your family will flock to the kitchen to see what’s cooking.
Make the Dough
- Preheat your oven to 350 degrees F (175 degrees C) and line a baking sheet or two with parchment paper or a silicone baking mat.
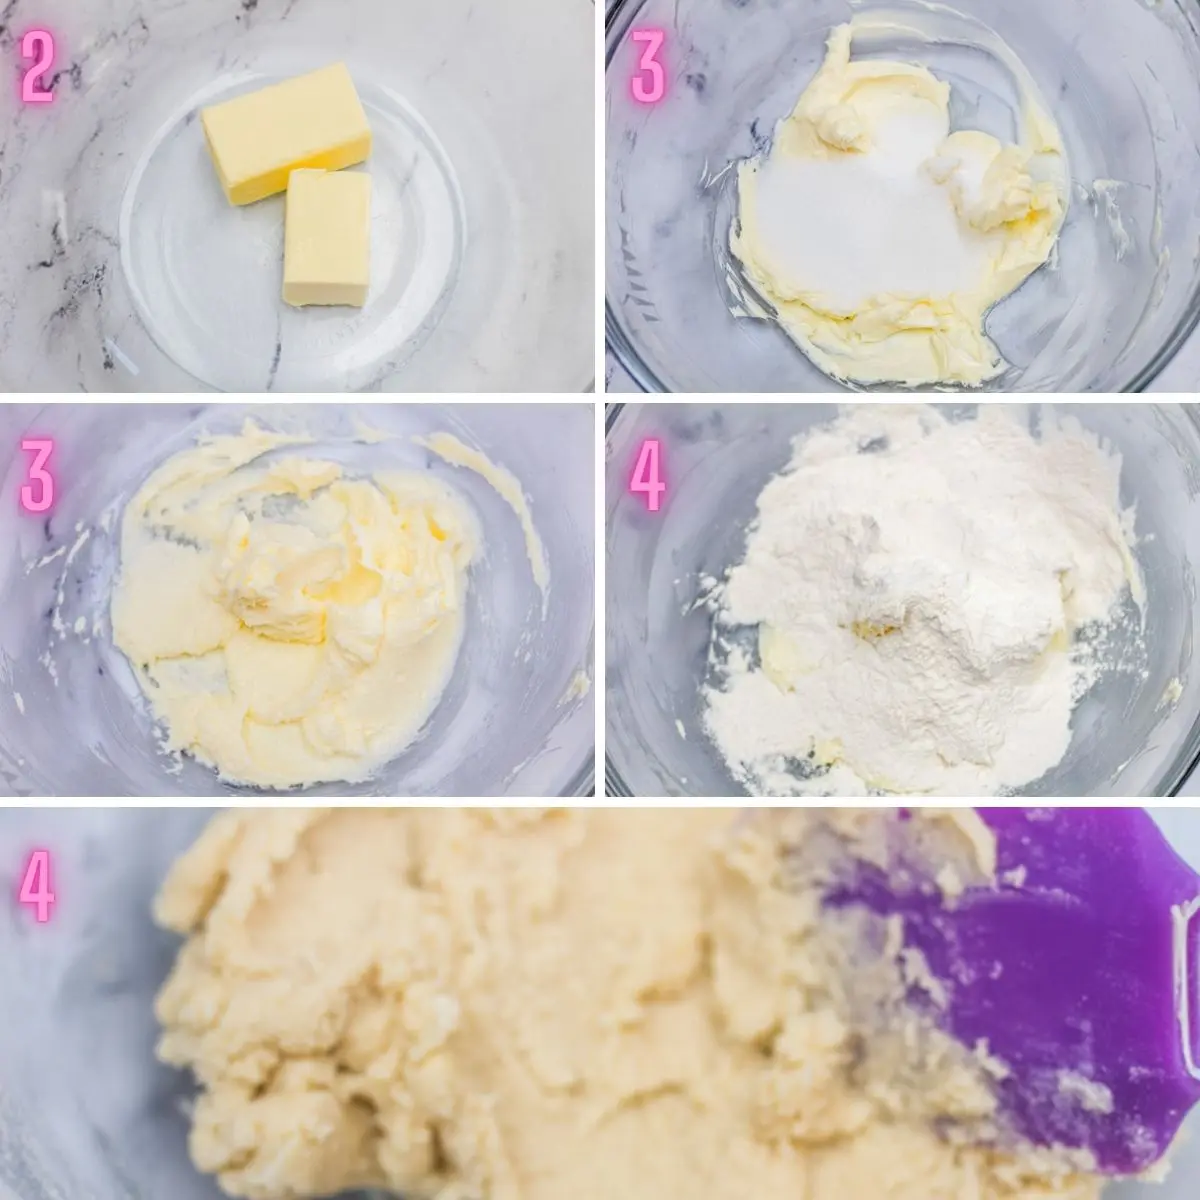
- In a medium to a large mixing bowl, beat the 7 tablespoons of room temperature softened butter until smooth and creamy.
- Add ¼ cup sugar and beat into the softened butter until completely combined (creamed).
- Add ¾ cup of self-rising flour and combine it into the sugar-butter mixture using a spatula. Your dough will be pretty firm while handling at this stage, so gradually work in the remaining flour - a bit at a time. You may not need it all, so don’t dump it all at once. When I last made these, I didn’t need a full cup of flour to get the right consistency.
Bake the Biscuits (Cookies)
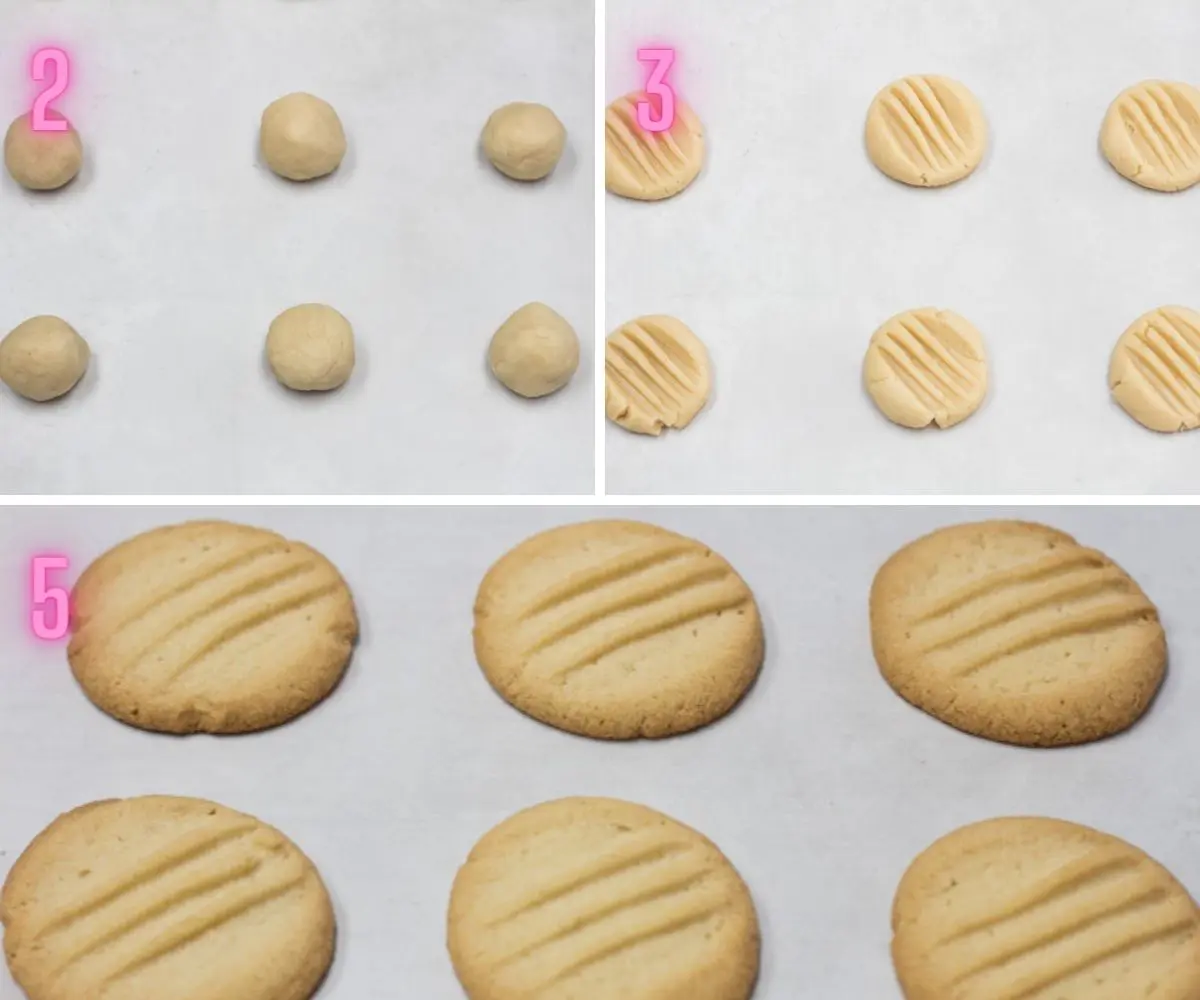
- Portion out the dough into 16 small, walnut-sized balls (approximately 1-inch round) and roll them in your hands until smooth and round.
- Place the biscuit dough balls onto your prepared, lined baking sheet with 2 inches of spacing between each ball of dough so they have room to spread and not stick together.
- Use a wet (with water) dinner fork and make an imprint across the top of each dough ball to press it down about halfway. Repeat this process with each ball of dough.
- Bake the fork biscuits at 350 degrees F (175 degrees C) for 15-18 minutes or until the cookies are a very pale golden color with just a touch of light brown color on the bottoms of the cookies.
- Remove the fork biscuits from the oven when done and allow them to cool on the baking sheet for 2-3 minutes, then transfer them to a wire cooling rack to cool completely.
This is the base recipe for fork biscuits, a truly easy beginner-level cookie enjoyed by many in the UK. Be sure to check back as I add the variations for chocolate fork biscuits and lemon fork biscuits.
If I'm really industrious some cinnamon fork biscuits will show up too!
>>>See All Of My Tasty Recipes Here!<<<

🥡 Storing & Reheating
Store at room temperature either in an airtight container or plastic storage bag for up to 1 week.
To freeze allow them to cool completely then arrange them on a baking sheet and freeze for 1 hour. Transfer the frozen cookies into a freezer storage bag, store each individually if desired, or place the frozen cookies into an airtight freezer storage container.
To thaw, simply set the biscuits out at room temperature before serving.
❓ Recipe FAQs
Easy! Just follow along with this recipe! It's based on the baking queen's recipe from her book My Kitchen Table: 100 Sweet Treats and Puds.
No, but I do include the instructions for turning your all-purpose (or plain) flour into self-raising flour. Also, note that it's called self-rising flour here in the States. 🙂
Do you love a recipe you tried? Please leave a 5-star 🌟rating in the recipe card below and/or a review in the comments section further down the page.
Stay in touch with me through social media @ Pinterest, Facebook, Instagram, or Twitter! Subscribe to the newsletter today (no spam, I promise)! Don't forget to tag me when you try one of my recipes!
📖 Recipe Card
Fork Biscuits (Mary Berry Copycat Recipe)
Ingredients
- 7 tablespoon butter (softened, at room temperature)
- ¼ cup sugar
- 1 cup self-rising flour (or use 1 cup all-purpose flour + 1 ½ teaspoons baking powder - see notes)
(Note: 2x or 3x only changes the ingredient list)
Instructions
- Preheat your oven to 350℉ (175℃) and line a baking sheet with parchment paper or a silicone baking mat.
- In a medium to a large mixing bowl, beat the softened 7 tablespoons of butter until smooth and creamy.
- Add the sugar and beat into the softened butter until well combined (creamed).
- Add ¾ cup of the self-rising flour and combine using a spatula. Your dough will be pretty firm at this point, so gradually work in the remaining flour a bit at a time. *I used an amount that was just shy of the 1 cup of flour.
- Portion out the dough into small walnut-sized balls and roll them until smooth and round. Place the dough onto your prepared baking sheet with 2 inches of spacing between each ball of dough.
- Use a wet fork and make one imprint across the top of the balls to press them down about halfway. Repeat with each ball of dough.
- Bake at 350℉ (175℃) for 15-18 minutes or until the cookies are a very pale golden color with a light brown footing.
- Remove the cookies when done and allow them to cool on the baking sheet for 2-3 minutes, then transfer them to a wire cooling rack to cool completely.
Notes
To make your own self-rising (self-raising) flour, measure out 1 ½ teaspoons of baking powder then finish filling 1 cup with all-purpose flour. Whisk the flour and baking powder together thoroughly before using the homemade self-rising flour in a recipe.
Store your baked fork biscuits in an airtight container for up to a week.
Rosario Rodrigues says
Todas as receitas são 5 estrelas
"All recipes are 5 stars"
Anonymous says
I have made these biscuits many times and they always come out brilliant. They taste amazing and although they aren't uniform in shape, they never last long enough for it to matter! I have shared the recipe with my work colleagues and they love them too.
Amy says
I try doing it and it did not work it all crumbled and it was so thick
Angela @ BakeItWithLove.com says
The instructions were to start with less (not the full amount of flour) and add more as needed. Sounds like you added the full cup of flour. Even if this happens you can add a few drops of water and squeeze the crumbled dough together. Hope that helps!
Glokee says
Perfect simple cookie. Be sure you CREAM the butter & sugar very well. I added finely chopped pecans to the dough.
Sasha says
The recipe pretty straightforward , perfect for beginners . Mine turned out great however , I'd like to know how I can incorporate vanilla essence to the cookies .
Angela @ BakeItWithLove.com says
Yes, definitely! When you cream the butter, add the vanilla and mix them at the same time. Everything else is the same from there, thanks for asking! Enjoy!!
Amy Berman says
I Don't know why but mine completely crumbled and fell apart. I followed the instructions they were very thin and did not hold together at all
Angela @ BakeItWithLove.com says
Hi Amy! These cookies are pretty simple looking, but getting the flour quantity just right is what I would suspect was your problem. Start with 3/4 cup of self-rising flour and see how thick your dough feels. Add only a tablespoon at a time from there until it 'feels' right. This is one cookie that no matter how many times I've baked it, I always test batch two cookies first before finishing. If your dough feels too dry add a teaspoon of cold water at a time to offset the flour. Hope that helps, and if you have any questions just let me know!
Amber says
Omw mine worked like an bomb l even made another after,practice makes perfect for those cookie dough didn't come out right ,and if it crumble keep on mixing it or massage 🤣 then it will become one
Anonymous says
I love these biscuits, they are perfect with a cup of tea and I totally recommend
#to die for🍪🍪🍪