

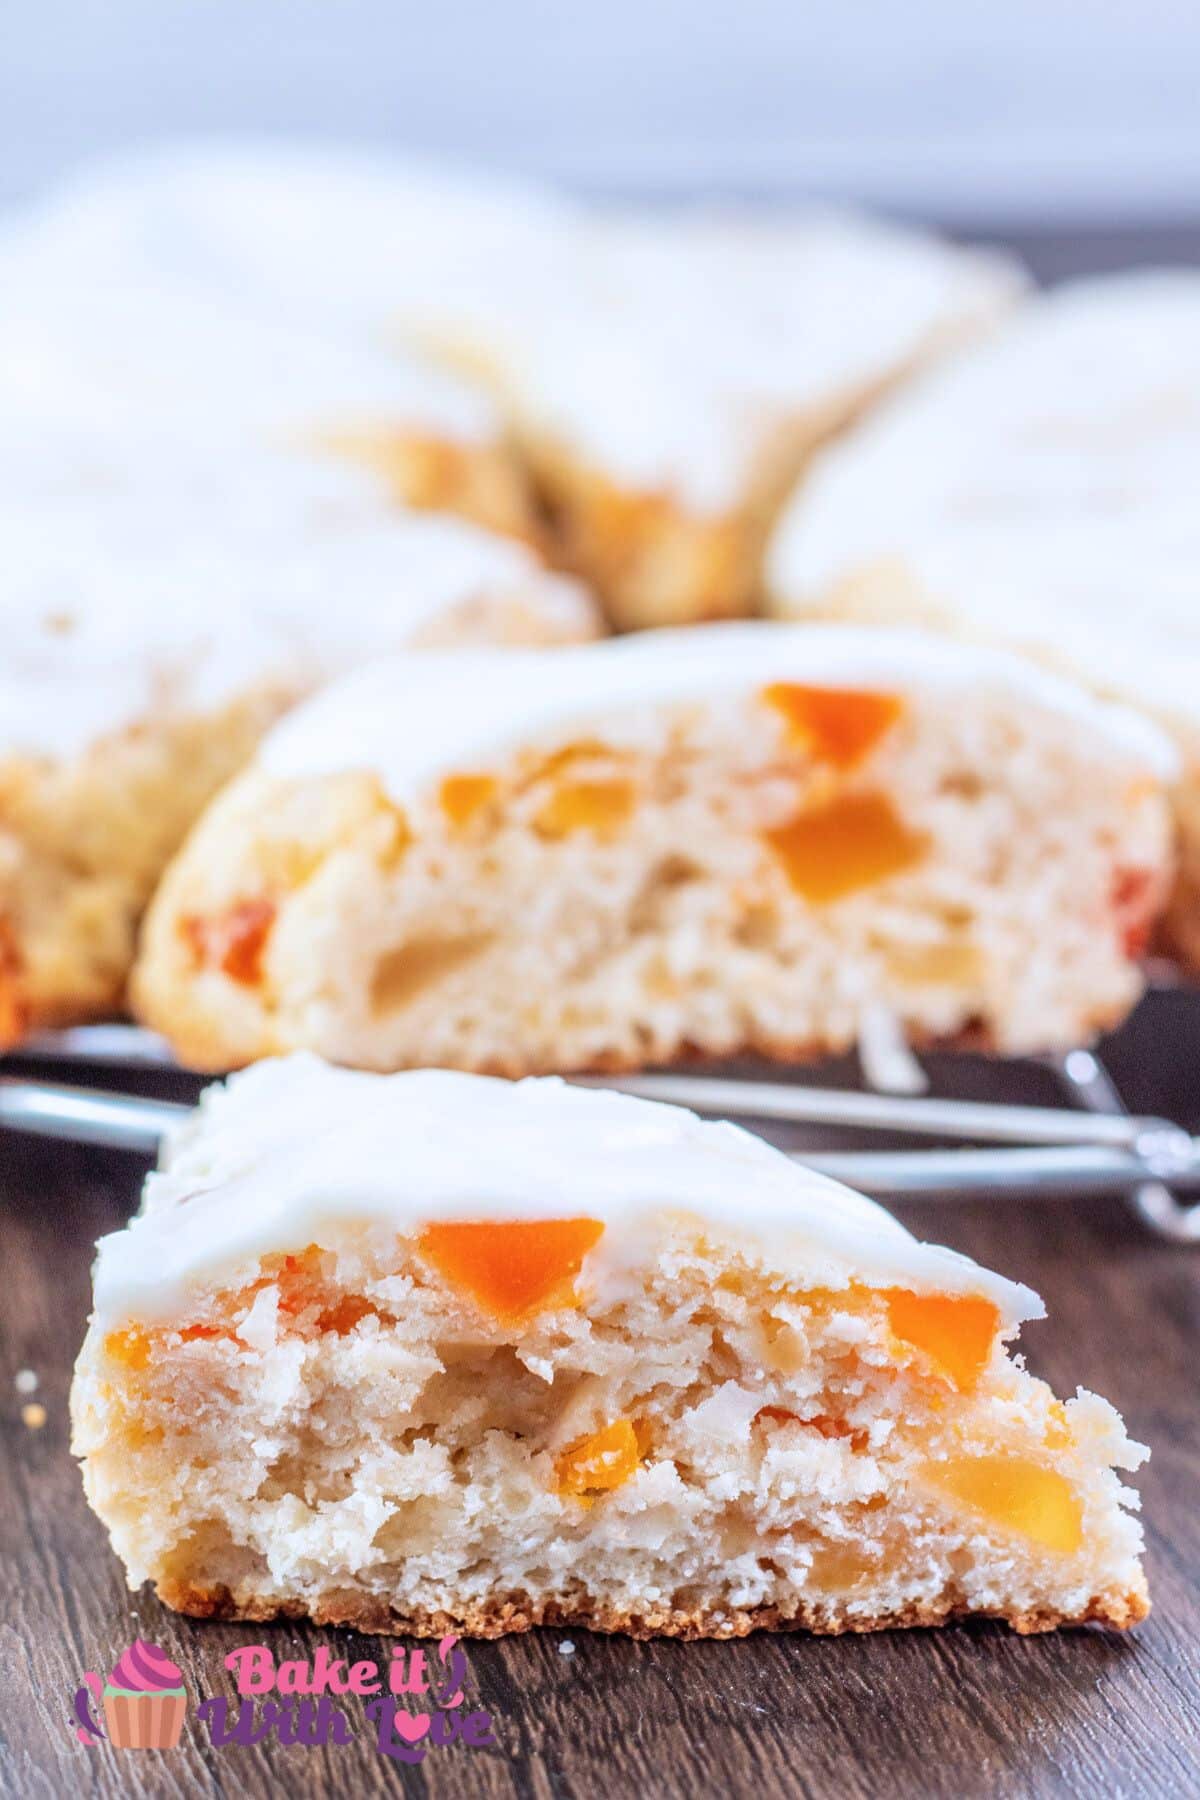
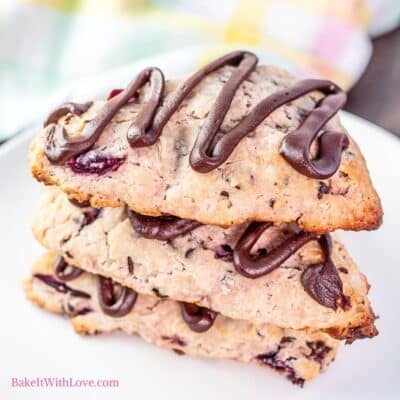
Tender tropical fruit scones are bursting with a tropical fruit blend and just the right amount of sweet shredded coconut. These scones offer a perfect balance of fruity sweetness and delicate coconut flavor, all wrapped in a flaky, buttery crumb. It's an easy breakfast recipe that adds a little slice of sunshine to your morning with every bite.
New to scone baking? See my master scones recipe for essential tips and tricks to get bakery-quality scones right at home on your first try.

If you're looking to brighten up your baking routine, these fruity scones are the perfect way to do it. Each bite is filled with buttery goodness and a taste of the tropics.
Serve them warm for a satisfying island breeze breakfast or a sweet afternoon snack.
🥘 Ingredients
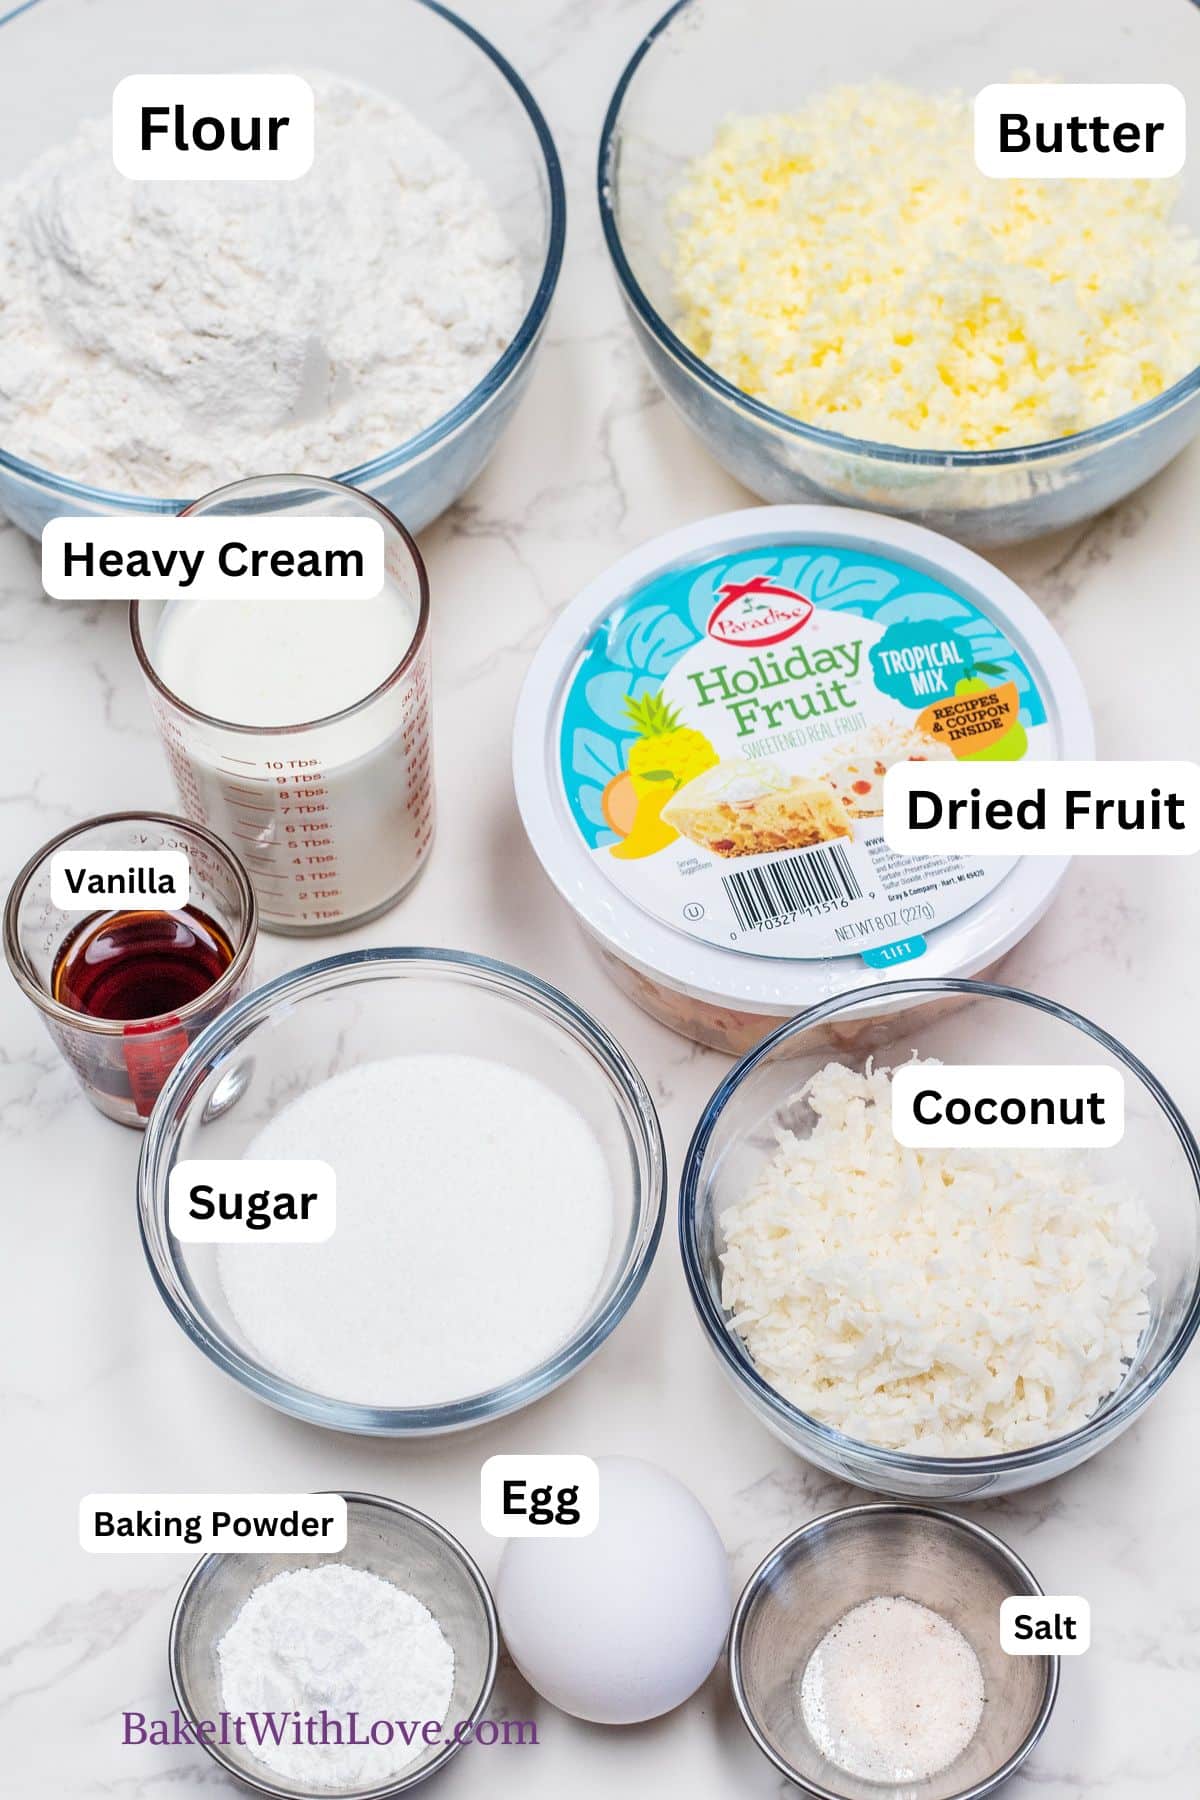
- Flour - All-purpose flour helps create the tender yet sturdy crumb you want in your homemade scones. You’ll use a little extra for dusting your work surface to keep the dough from sticking while you shape it.
- Butter - Cold, frozen butter is the key to flaky scones. As the butter melts in the oven, it releases steam that creates pockets in the dough, giving the scones their light, tender texture and crisp edges. You can use either salted or unsalted butter. Both work well.
- Sugar - Granulated white sugar adds sweetness and helps create a nice golden crust. I keep the sugar amount moderate to let the tropical fruit flavors shine without being overly sweet.
- Shredded Sweetened Coconut - Just half a cup adds a tropical aroma and a subtle sweetness without weighing down the dough or causing spreading. Too much coconut can make the dough too moist and the scones lose their height, so moderation is key.
- Dried Tropical Fruit Blend - A colorful mix from Paradise Fruit of dried candied pineapple, mango, cantaloupe, and papaya adds juicy bursts of flavor and vibrant color. They bring a sunny, island-inspired sweetness in every bite.
- Heavy Cream - Using a high-fat dairy like heavy cream adds richness and moisture, helping create that tender, flaky crumb that’s essential for classic scones. You can substitute with full-fat buttermilk or half & half if needed, but avoid low-fat milk for the best results.
- Baking Powder - This is the leavening agent that gives the scones their lift, making them fluffy and light instead of dense. Fresh baking powder ensures a good rise every time. Be sure you are using baking powder, not baking soda.
- Vanilla Extract & Salt - Just a pinch of salt balances the sweetness and enhances all the tropical flavors, making each bite taste more complex and delicious. Vanilla extract adds a subtle aromatic warmth that complements the fruit and coconut, tying all the flavors together beautifully. Almond extract would be my next choice.
- Egg (optional) - Adding an egg enriches the dough for a softer crumb, richer flavor, and a lovely golden-brown color. It’s not required, but I highly recommend it for an elevated scone experience.
- Optional Icing - You'll need confectioners' sugar, a bit more heavy cream (or use a drizzle of coconut milk, or orange juice), vanilla, coconut, pineapple, lemon, or orange extract, and a pinch of salt to reduce the sweetness as needed.
Be sure to see the free printable recipe card below for ingredients, exact amounts & instructions with tips!
👩🏻🍳 How To Bake Tropical Fruit Scones
Gather your ingredients, a mixing bowl, pastry blender, pastry mat, baking sheet, and parchment paper to get started baking these delicious scones.
This recipe makes 8 standard wedge-shaped scones cut from an 8-inch round disc about 1 to 1½ inches thick.
Chop, Grate & Measure Ingredients

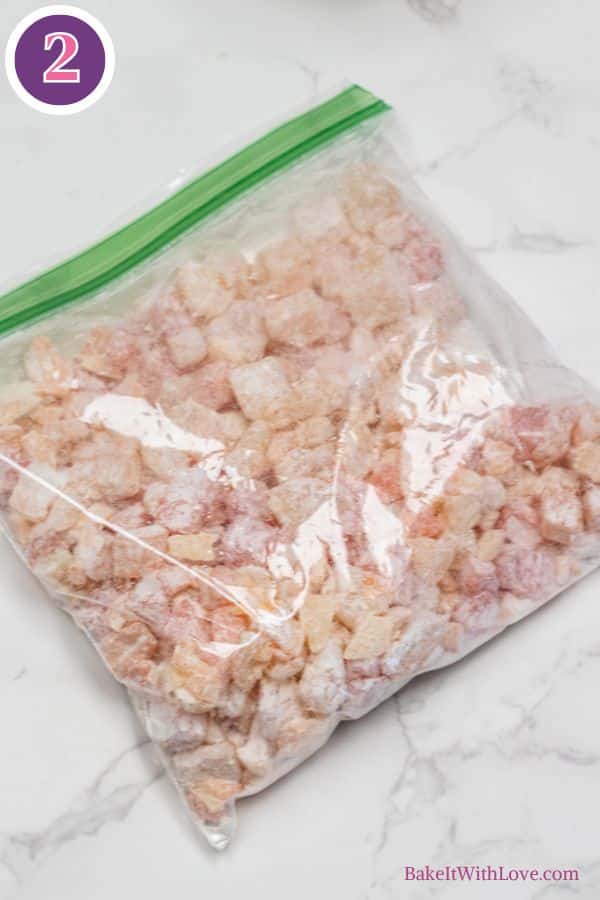
Step 1: Chop the dried fruit. I like smaller fruit pieces so they are more evenly distributed throughout the scones, and don't feel 'heavy,' however, this step is optional. The dried fruit mix that I used is already diced, so you can see that I chopped it more (photo 1).
Pop the fruit into a zip-top baggie and shake with 1-2 tablespoons of the flour (photo 2) to keep it from sticking together.
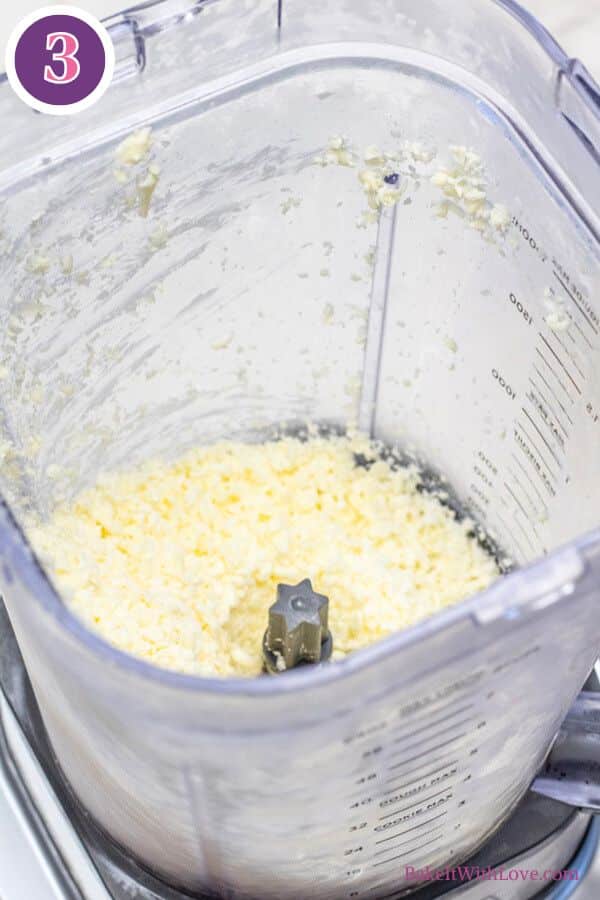
Step 2: Prep the butter. Grate ½ cup (113.5 grams) of frozen butter using a box grater or food processor (photo 3). Keep the butter cold until ready to use.
Make The Dough

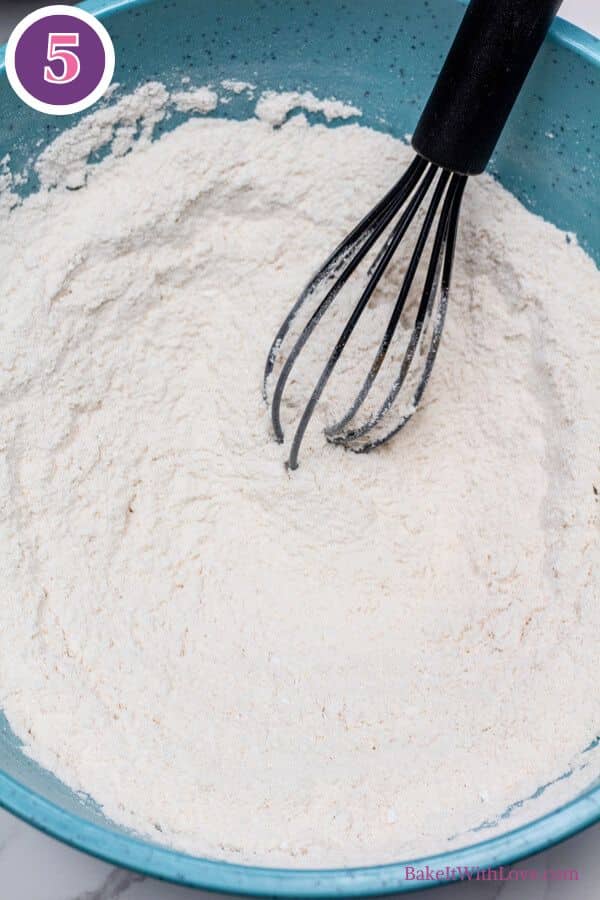
Step 3: Mix dry ingredients. Add 2 cups (250 grams) all-purpose flour, ¼ cup (50 grams) granulated sugar, 1 tablespoon baking powder, and ½ teaspoon salt to a large mixing bowl (photo 4). Whisk to combine flour with dry ingredients (photo 5).
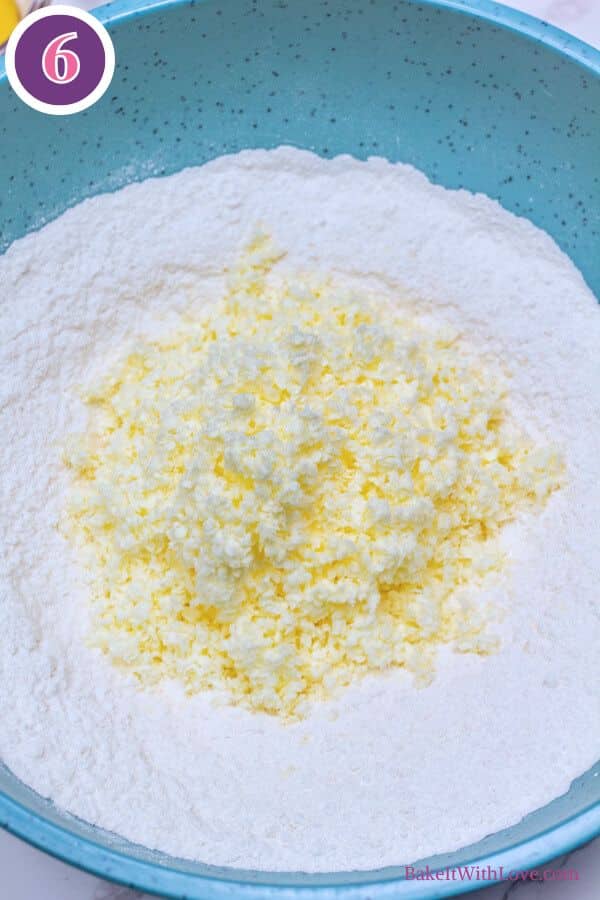
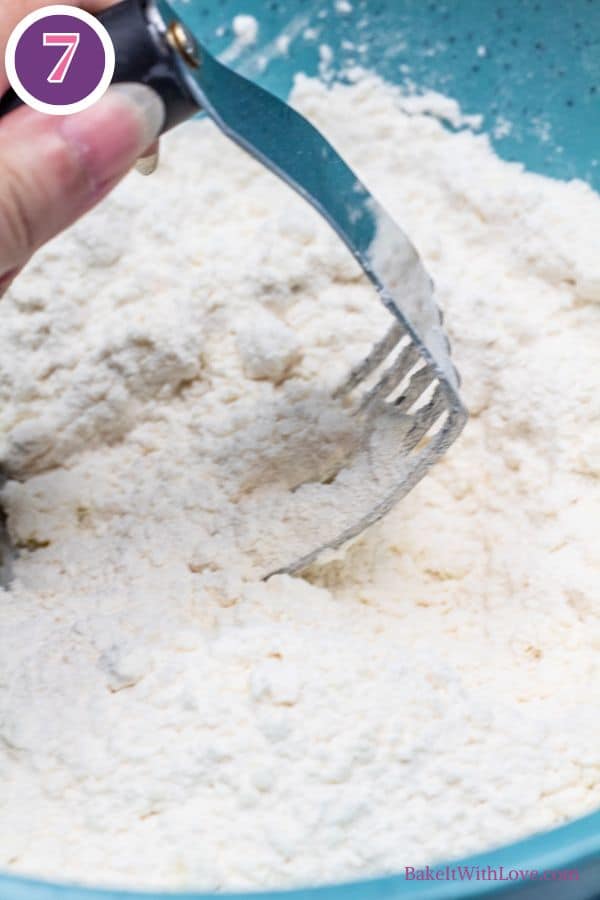
Step 4: Add butter. Add the grated butter to the dry ingredients (photo 6) and use a pastry cutter to work it in until the mixture resembles coarse crumbs with some pea-sized bits (photo 7). Form a well in the center.

Step 5: Combine the wet ingredients. In a small bowl, whisk together ½ cup (118 milliliters) heavy cream, half & half, or buttermilk, ½ cup (100 grams) granulated white sugar, 2 teaspoons vanilla extract, and the optional egg.
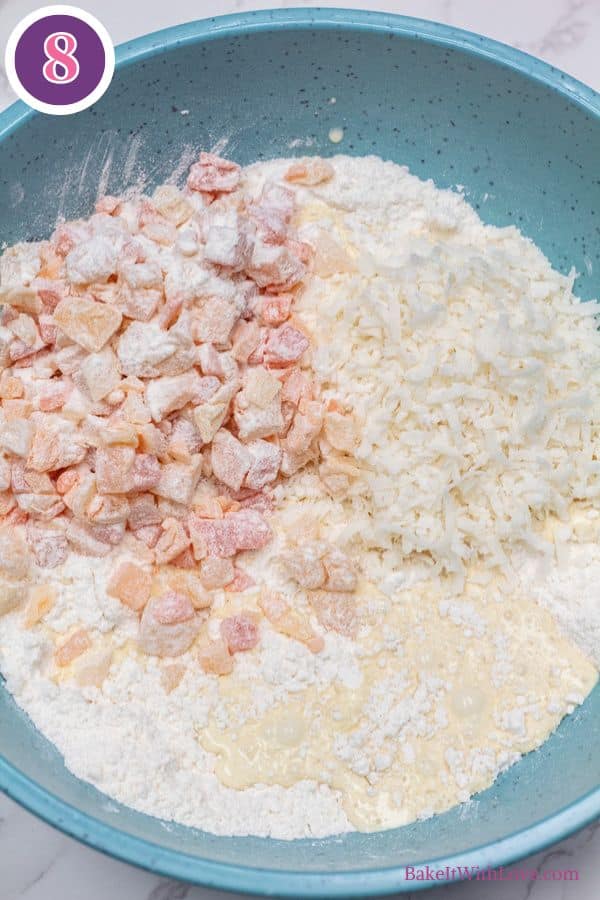
Step 6: Mix the dough. Pour the wet ingredients into the dry mixture. Add 8 ounces (227 grams) dried tropical fruit blend and ½ cup (48 grams) shredded sweetened coconut (photo 8). Fold gently until combined. Be careful not to overmix (photo 9).
Alternatively, you can use a food processor to mix the dough. Grate the butter and remove it, then pulse the dry ingredients to blend. Add the wet ingredients and dried fruit, pulsing just until the dough comes together. Turn it out onto a floured surface and follow the remaining steps.
Shape & Chill
Step 7: Shape the dough. Turn the dough out onto a lightly floured surface or pastry mat. Lightly flour your hands to prevent sticking, then gently pull the dough together. The dough should be slightly sticky but not dry. Handle it as little as possible to keep your scones tender and flaky.


For traditional wedge-shaped scones, shape the dough into an 8-inch circle about 1 to 1½ inches thick. This thickness helps create scones with a tender crumb and a perfect rise.
To make round scones, shape the dough into a rectangle roughly 8 x 6 inches and about 1 to 1½ inches thick. Use a biscuit cutter to cut out rounds (avoid twisting the cutter to keep flaky edges). Gather scraps gently and re-roll if needed, but don’t overwork the dough.
For mini scones, divide the dough into two smaller rounds about 5 inches across and 1 to 1½ inches thick. Cut each mini round into 6 to 8 wedges for bite-sized treats. Alternatively, shape the dough into a rectangle and cut into small squares or use a smaller cutter.
For drop scones, simply drop spoonfuls of dough onto a parchment-lined baking sheet spaced 2-3 inches apart, no shaping needed.
Step 8: Cut and Chill or Bake. Use a sharp knife or bench scraper to cut the dough into 8 equal wedges, or cut rounds or mini wedges as described above.
Chilling is optional but recommended. Place the whole disc, cut wedges, rounds, mini scones, or drop scones in the refrigerator for 30 minutes (or freezer for 15 minutes) before baking. Chilling firms up the butter, helps the scones hold their shape, and enhances flakiness.
If short on time, you can bake immediately after cutting, but expect a slightly less tender texture and softer shape.
Bake, Cool & Serve
Step 9: Preheat. Preheat your oven to 400°F (205°C/Gas Mark 6). Brush scones lightly with cream, melted butter, or egg wash and top with coarse sugar before baking, if desired.


Step 10: Bake. Bake scones on a parchment-lined baking sheet for 18-22 minutes or until golden brown and cooked through.
Step 11: Cool and serve. Leave the scones on the baking sheet for 5 minutes after baking and then serve them while they're warm. Or, place them on a wire cooling rack to cool completely before topping with the optional icing or storing them for later.
Optional Icing
Step 12 (optional): Add the icing. In a small bowl, add ½-1 cup powdered sugar and a pinch of salt, then add a drizzle of your preferred liquid(s). Start with ½ tablespoon of dairy or juice and mix until smooth.
Add more based on how thick you would like the icing. Flavor ideas are noted in the ingredients and recipe notes.

>>>See All Of My Tasty Recipes Here!<<<
💭 Angela's Pro Tips & Recipe Notes
- Keep all ingredients cold. For the flakiest, most tender scones, make sure your butter, cream, and even your mixing bowls are well chilled before you start. Cold butter creates those flaky layers by steaming as it bakes. If at any point the dough feels too warm or sticky, pop it back in the fridge or freezer briefly to firm up the butter again.
- Handle the dough gently and don’t overmix. To prevent tough scones, fold the tropical fruit blend and shredded coconut into the dough carefully and only until evenly distributed. Overworking the dough or aggressively mixing will melt the butter and develop too much gluten, resulting in dense, dry scones.
- Go slow when adjusting the dough. For dry dough, add a tiny bit more liquid. For wet dough, mix in flour a tablespoon at a time to avoid overcorrecting.
- Be cautious with the coconut. Adding too much shredded coconut can increase moisture in the dough, causing the scones to spread and lose their shape. Measure carefully and resist the urge to add extras beyond the recipe.
- Give your scones plenty of space on the baking sheet. Arrange cut or drop scones at least 3 inches apart to prevent them from merging as they spread in the oven. This spacing also promotes even heat circulation, leading to nicely browned, crisp edges.
- If scones spread too much while baking, reshape them quickly. If you notice your scones losing their shape, carefully remove them from the oven and use a spatula to gently press the edges back into wedges or rounds before returning them to finish baking.
- Add some zing to your icing. If you like a bit of a boozy flavor, add a splash of your favorite tropical-flavored rum to the glaze or icing. My vote is for original Malibu, pineapple Malibu, or the pre-made Malibu cocktail pina colada. Bacardi also offers a tropical flavored rum with a combination of coconut, pineapple, and guava flavors. Yum!
🔐 Secrets For Tall, Flaky Scone Perfection
There’s nothing quite like a perfectly baked scone that’s light, tender, and flaky on the inside with golden, crisp edges on the outside.
Here are my top tips to help you get that beautiful rise and bakery-style texture every time:
- Use lamination for extra lift. Gently fold the dough to create layers. This helps distribute the butter, which turns into steam as it bakes and gives your scones a taller, flakier structure. To laminate, flatten the dough, fold it over itself, and repeat 3–5 times.
- Chill your dough before baking. Cold dough helps prevent scones from spreading and losing their shape. You can chill the whole round before cutting or refrigerate or freeze the cut scones (wedges, rounds, or minis) for 15-30 minutes before baking.
- Preheat your oven. Make sure your oven is fully preheated before the scones go in. That initial blast of heat activates the baking powder for maximum rise.
- Check your leavening. If your scones still come out flat and dense despite following these tips, your baking powder might be the issue. Old or expired leavening can lose its effectiveness, so test it or swap it out for a fresh container.
🥄 Make Ahead Options
- Chill overnight. Follow the recipe through shaping the dough into a round disc. Wrap it tightly in plastic wrap and refrigerate overnight. In the morning, cut into wedges (or your preferred shape), place on a baking sheet, and bake as directed.
- Par-bake your scones. Alternatively, you can bake the scones 50–75% of the way through, then let them cool completely. Arrange in a single layer on a baking sheet to flash freeze. Once solid, transfer to an airtight container and freeze for up to 2 months. When ready to serve, bake straight from frozen until golden and warmed through.
- Freeze unbaked scones. Cut and shape the scones, then freeze them on a baking sheet in a single layer. Once frozen, wrap each scone in plastic wrap and store in a freezer-safe bag or container for up to 2 months. Bake directly from frozen with a few extra minutes added to the baking time, or thaw overnight in the fridge and bake as usual.
🥡 Storing
Store any leftover tropical scones once they’ve fully cooled. Place them in a single layer in an airtight container, or layer them with parchment paper to prevent sticking. Individual scones can also be wrapped tightly in plastic wrap to help maintain moisture.
Room Temperature
Tropical scones will stay fresh at room temperature for up to 2 days. Keep them in a cool, dry place away from direct sunlight or heat, like a pantry or cabinet.
Refrigerated
Refrigerated scones will last for up to 1 week. Let them come to room temperature or reheat gently before serving for the best texture.
Freezing Scones
To freeze, arrange cooled scones in a single layer on a baking sheet and flash freeze. Once solid, wrap in plastic wrap and transfer to an airtight container or freezer-safe bag. Store for up to 3 months. Thaw overnight in the refrigerator or on the counter for a few hours before serving.
Reheating
Tropical scones are especially delicious when warm. Microwave on 50% power for 20–30 seconds with a small glass of water to keep them moist. You can also reheat them in a toaster oven on low or in a 300°F (150°C) oven for 5–6 minutes. Cover with foil to avoid over-browning.
For frozen scones, heat in a 450°F (230°C/Gas Mark 8) oven for about 5 minutes to bring back that freshly baked texture with lightly crisp edges.


Do you love a recipe you tried? Please leave a 5-star 🌟rating in the recipe card below and/or a review in the comments section further down the page.
Stay in touch with me through social media @ Pinterest, Facebook, Instagram, or Twitter! Subscribe to the newsletter today (no spam, I promise)! Don't forget to tag me when you try one of my recipes!
📖 Recipe Card

Tropical Fruit Scones
Ingredients
- ½ cup butter (frozen or chilled)
- 2 cups all-purpose flour (spooned & leveled - more for flouring your working surface)
- ½ cup sugar
- 1 tablespoon baking powder
- ½ teaspoon salt
- ½ cup heavy cream (or half & half, or buttermilk, see notes - and to brush on scones)
- 2 teaspoon vanilla extract
- 1 large egg (optional)
- 8 oz tropical fruit mix (dried blend from Paradise Fruit)
- ½ cup shredded sweetened coconut
Icing for Scones
- ½-1 cup confectioners sugar (use more for thick icing, less for a drizzled icing)
- 1 tablespoon milk or heavy cream (or juice, coconut milk, or a tropical-flavored liquor)
- 1 teaspoon vanilla extract (or fruity, or coconut flavored)
(Note: 2x or 3x only changes the ingredient list)
Instructions
Chop, Grate & Measure Ingredients
- Grate or shred the frozen ½ cup butter. Return it to the freezer while you measure the remaining ingredients.
- Chop 8 oz tropical fruit mix if desired. If it's sticky, use some of your flour to coat the fruit.
Mix Scone Dough
- Whisk together 2 cups all-purpose flour, ½ cup sugar, 1 tablespoon baking powder, and ½ teaspoon salt in a large bowl. Add the grated butter and work it into the dry ingredients using a pastry cutter, knives, fork, or your hands until the mixture resembles coarse crumbs with some pea-sized bits. Make a well in the center.
- In a separate bowl, whisk together ½ cup heavy cream, 2 teaspoon vanilla extract, and the optional 1 large egg until well combined.
- Pour the wet ingredients into the dry mixture. Add 8 oz tropical fruit mix and ½ cup shredded sweetened coconut. Gently fold with a spatula until the dough comes together; do not over-mix.
Shape & Chill
- Turn the dough onto a lightly floured surface. Shape as desired:For wedges, pat into an 8-inch round disc about 1 to 1½ inches thick and slice into 8 equal wedges.For rounds, shape into a rectangle and cut with a biscuit cutter.For mini scones, form two smaller discs and cut into wedges.For drop scones, drop spoonfuls onto a parchment-lined sheet with 3" of space between them.
- Arrange the scones on a baking sheet lined with parchment paper. Chill in the refrigerator for at least 30 minutes (or 15 minutes in the freezer) to firm up the butter and improve texture. You can bake immediately if short on time but chilling is recommended.
Bake & Serve
- While chilling, preheat your oven to 400°F (205°C/Gas Mark 6).
- Just before baking, brush the tops with cream, butter, or egg wash and sprinkle with coarse sugar if desired (if skipping the icing).
- Bake for 18–22 minutes or until golden and cooked through.
- Remove from oven and let cool on the baking sheet for 5 minutes, and serve warm. Transfer to a wire rack to cool completely before icing or storing.
Optional Icing
- In a small bowl, add ½-1 cup confectioners sugar and a pinch of salt, then add a drizzle of your preferred liquid(s). Start with 1 tablespoon milk or heavy cream and 1 teaspoon vanilla extract. Mix until smooth. See ingredients and recipe notes for flavor ideas.
Notes
- Keep ingredients and tools cold throughout mixing to prevent the butter from melting.
- Handle the dough gently and as little as possible to maintain flakiness.
- Space scones about 3 inches apart on a parchment-lined baking sheet for even baking.
- If scones spread while baking, gently reshape edges with a spatula.
- Make ahead: Shape the dough, covering it tightly, and chilling overnight. Slice and bake the next day.
- To Store: Wrap in plastic cling wrap and place in an airtight container. Keep at room temperature for 2 days, refrigerate up to 1 week.
- To Freeze: Flash freeze scones in a single layer for 1 hour, then wrap and store in a freezer-safe container or bag for up to 3 months.
Angela Latimer says
One of my favorite scone flavors and a super easy flavor to mix up and bake to perfection for new scone bakers. It's simply delicious and sure to be a new favorite for you too. ~ Angela