

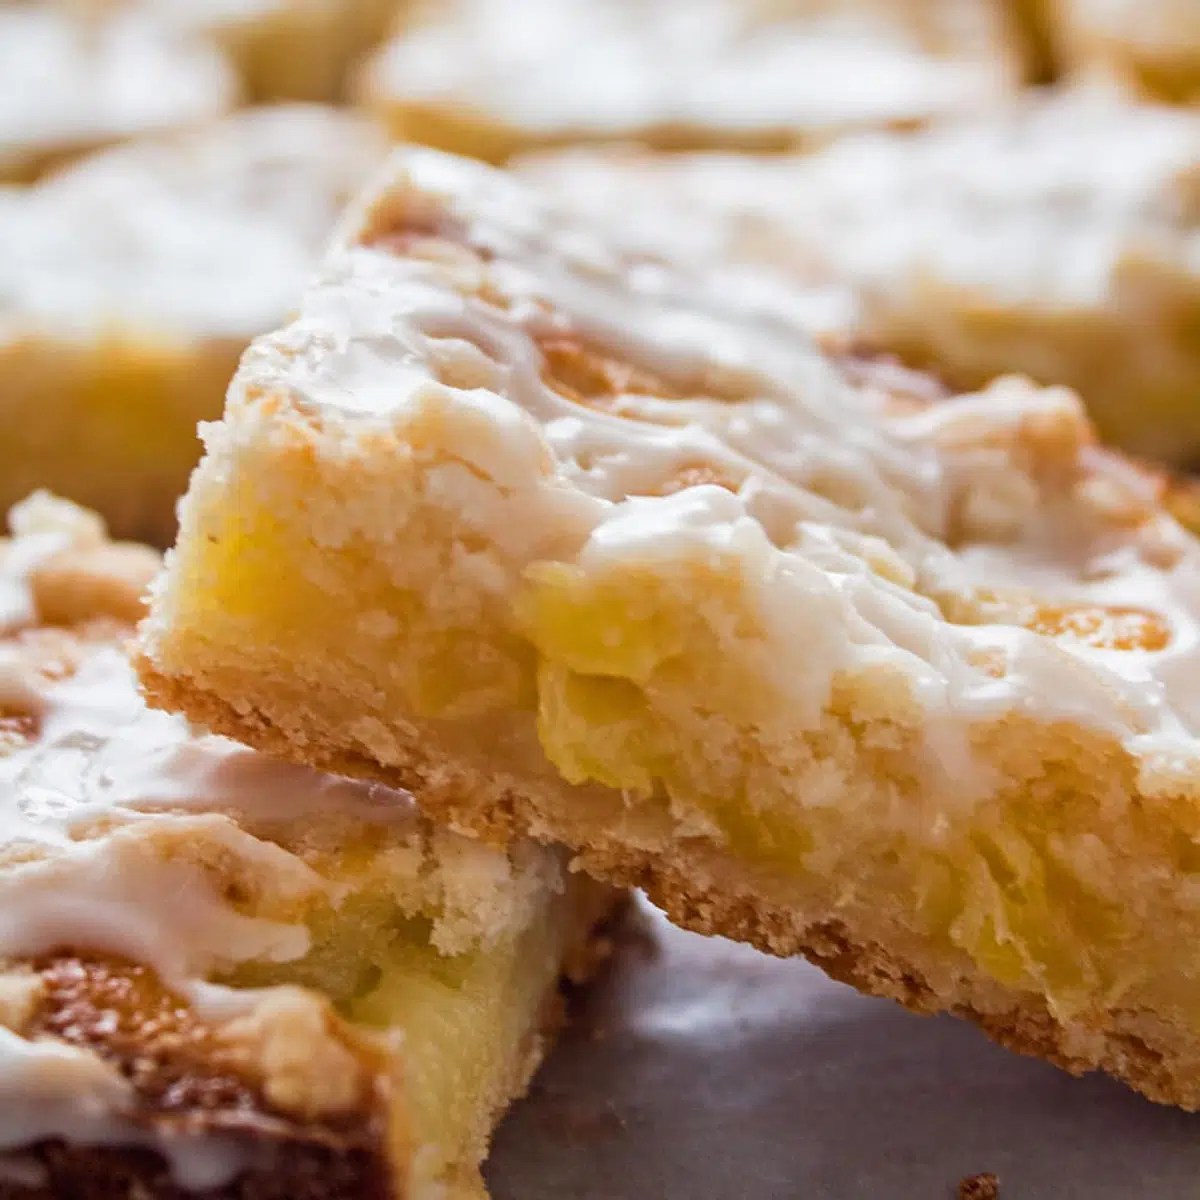
My pineapple bars recipe is sure to be your new any day favorite dessert if you love fresh or canned pineapple and tender shortbread! Canned pineapple works in a pinch, but cut up half of a whole fresh pineapple and get ready to be hooked for life on this sweet and tangy treat!! The layered crust, filling, and topping are divine as-is but amazing with a little bit of a sweet drizzled icing!
Best Pineapple Bars Recipe
OK, this is one of those desserts that I would totally be able to fill up the entire blog page with nothing but me gushing about how wonderful my pineapple bars are!!
This amazing pineapple dessert is not only quick (prep-wise, it takes some time in the oven) and incredibly easy but the recipe is also requested frequently. Bring these luscious pineapple bars to a party at work or a potluck and you will be barred from leaving until everyone knows how to make them!
How To Make Pineapple Bars
To start on the pineapple bars you will need flour, sugar, salt, butter, eggs, sour cream, and pineapple. The confectioners' sugar, half-and-half, and coconut extract are for the optional but highly recommended, drizzled icing.
Preheat your oven to 350ºF (175ºC/Gas Mark 4) and butter or spray your 9x13 baking pan or dish with non-stick cooking spray. Lining the baking dish with parchment paper is also an option, as you can then lift the entire batch of pineapple bars out for slicing and serving.
Make the Pastry Crust & Crumble Topping
You can make the crust layer using a food processor, stand mixer, or pastry cutter to blend in the cold, cubed butter. Grab what you have and mix the first portion of flour with the sugar, salt, and butter until crumbly in texture.
Withhold one cup of the crust mixture and reserve it for topping the filling layer.
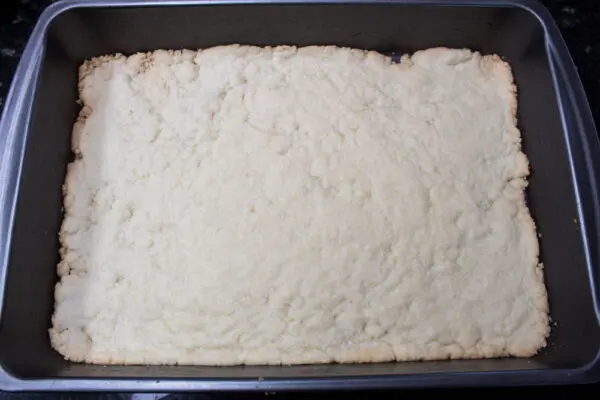
Transfer the remaining pastry crust mixture to your buttered baking dish and spread it evenly across the bottom of the pan. Press down on the crust layer until the bottom of the pan is covered evenly, and until it reaches the corners of the pan.
Bake the crust layer in your preheated oven for 15 minutes while mixing up the filling layer.
Make The Pineapple Filling
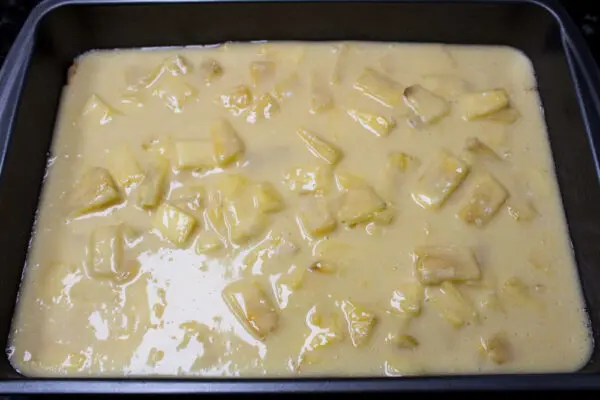
For the filling, use a large mixing bowl or your stand mixer bowl. Combine the beaten eggs with sugar, sour cream, salt, flour, and either freshly cut pineapple, canned pineapple chunks, or crushed pineapple. Be sure to drain canned pineapple before combining the filling. *You can reserve the pineapple juice for the liquid in your icing if desired.
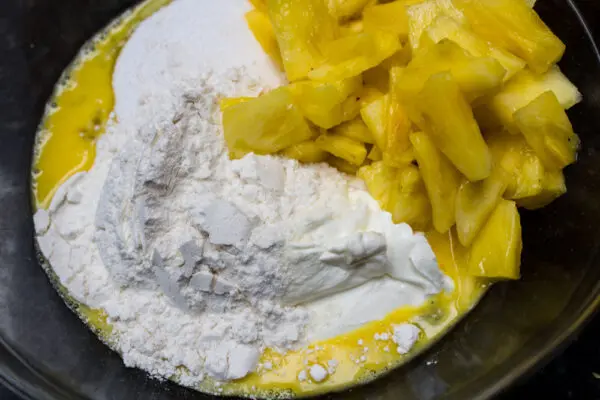
Gently stir the filling mixture until well combined.
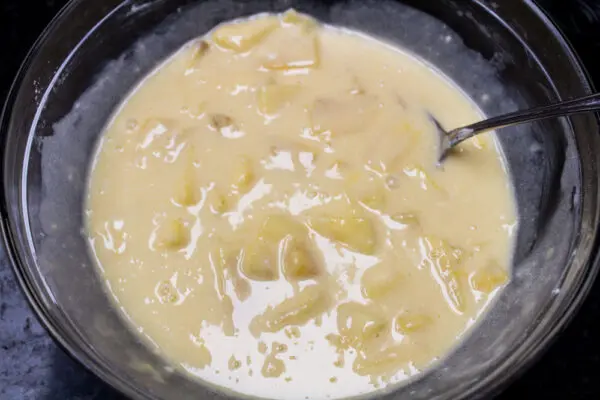
After your crust has baked, allow it to cool for a few minutes. Spoon the pineapple filling over the cooled crust layer.
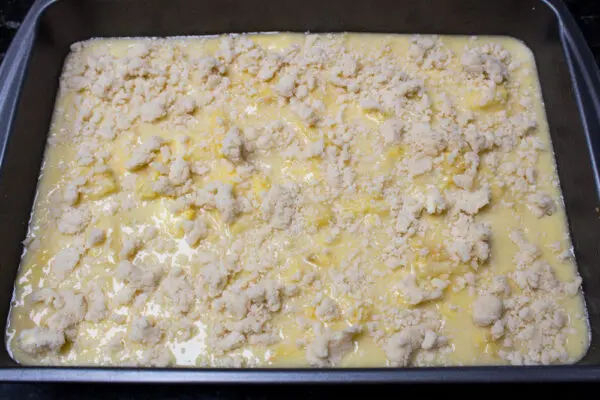
Crumble the reserved cup of the crust mixture over the filling and then bake for approximately one hour or until golden on top.
The filling will be soft and gooey but it should not be runny. An inserted knife should come out with some moist crumb on it, but not anything like a doughy texture.
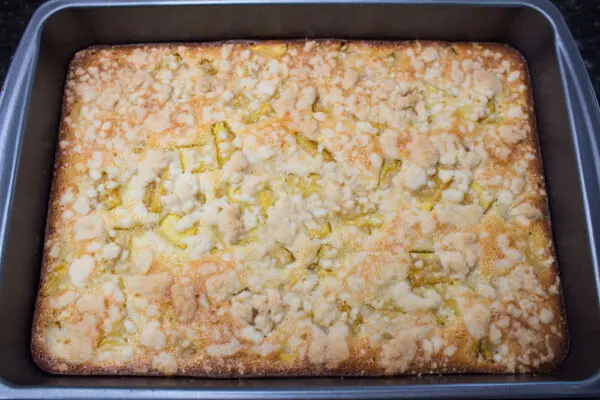
When you remove the baked pineapple bars out of the oven, place the pan on a wire cooling rack and allow it to cool for 15 minutes.
Make The Coconut Icing
While the pineapple bars are cooling, mix up your coconut icing. Use a small bowl and combine the confectioners' sugar, half-and-half, and coconut extract until smooth.
The icing should be thick enough to drizzle slowly over the pineapple bars, but should not be runny either. Add more confectioners sugar if needed, to thicken - conversely, add more half-and-half if the icing is too thick.
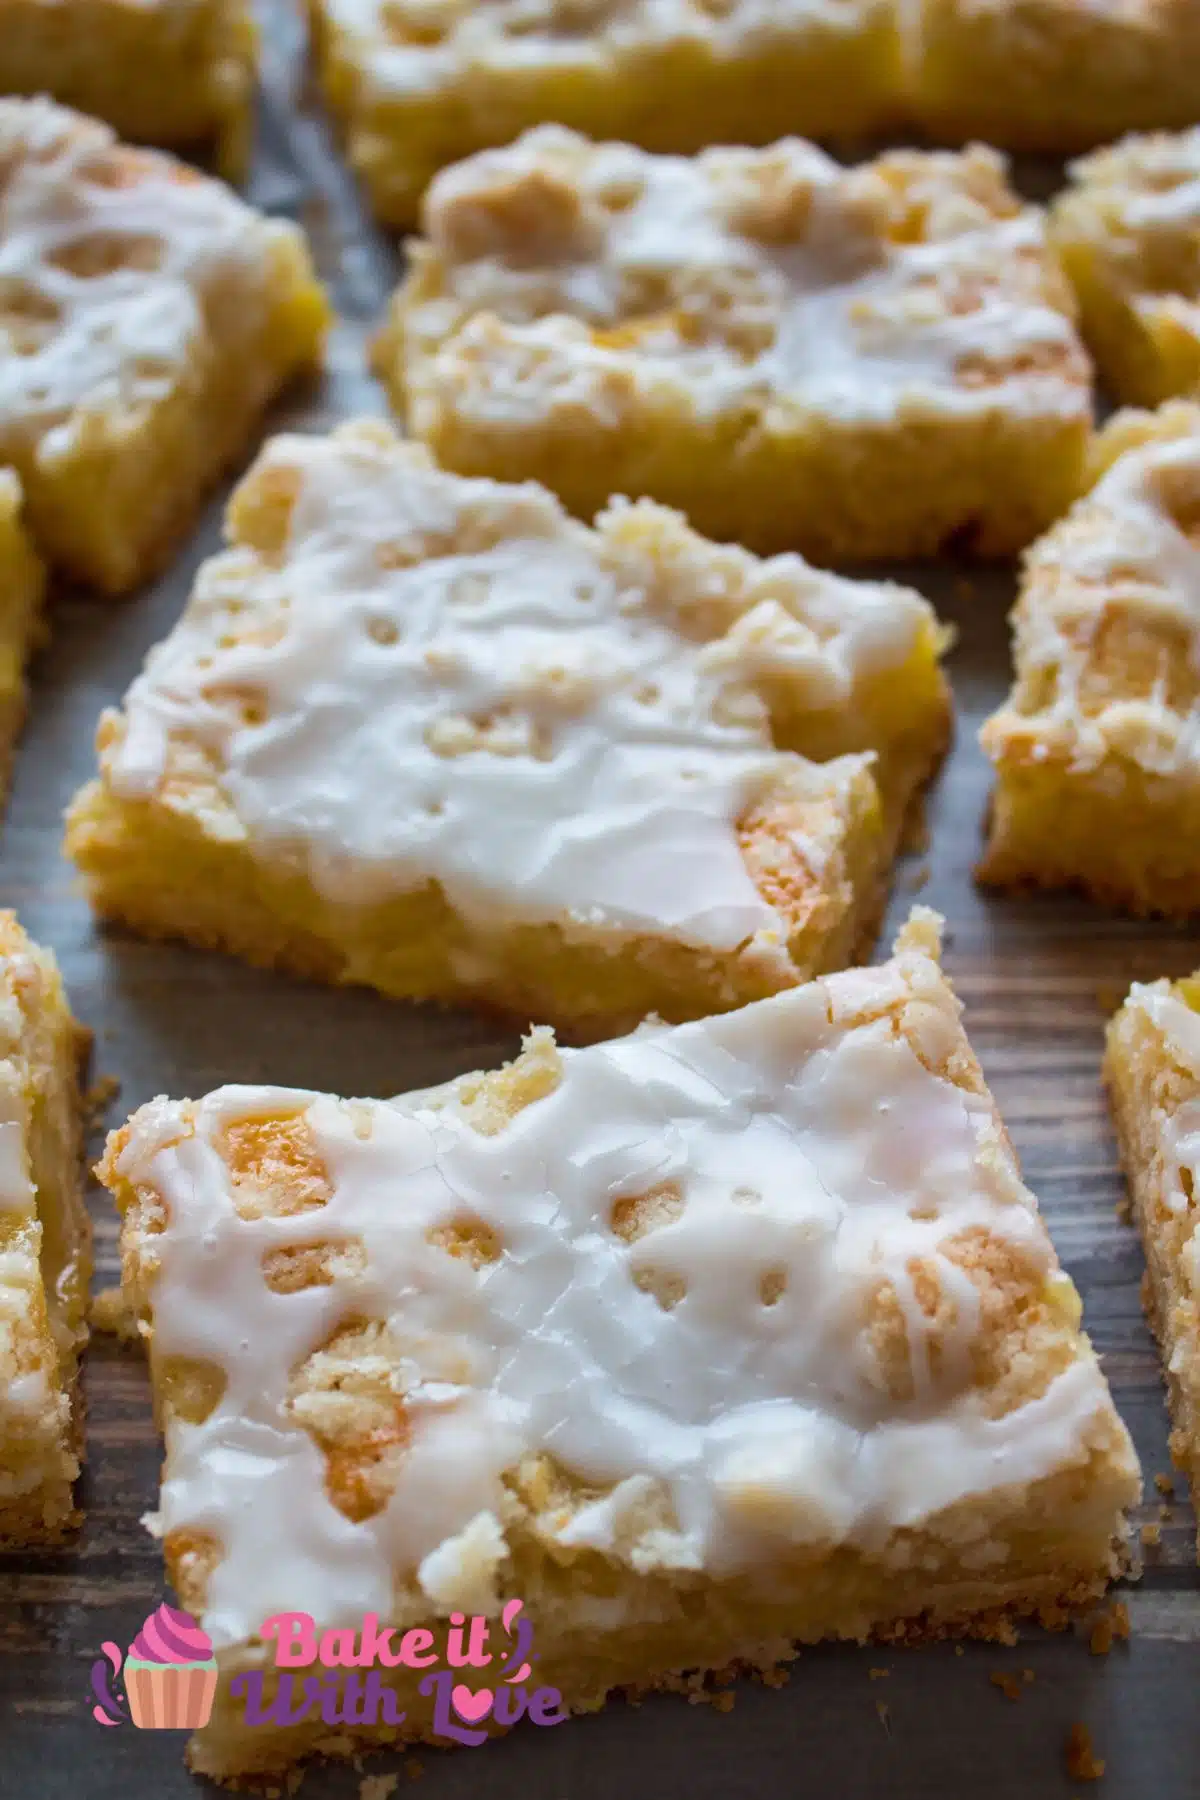
Drizzle the icing over the pineapple bars randomly, cut the bars into squares, serve, and enjoy!
>>>>See all of my recipes here<<<<
Do you love a recipe you tried? Please leave a 5-star 🌟rating in the recipe card below and/or a review in the comments section further down the page.
Stay in touch with me through social media @ Pinterest, Facebook, Instagram, or Twitter! Subscribe to the newsletter today (no spam, I promise)! Don't forget to tag me when you try one of my recipes!
📖 Recipe Card

Pineapple Bars
Ingredients
Crust & Topping
- 1½ cups all-purpose flour
- ½ cup sugar
- 1 pinch salt
- ¾ cup butter (cold, cubed butter)
Filling Mix
- 2 large eggs (beaten)
- 1 cup sugar
- ½ cup sour cream
- 1 pinch salt
- ½ cup all-purpose flour
- ½ whole pineapple (fresh, finely sliced or 1 16 ounce can of crushed pineapple, drained)
Coconut Icing
- 1 cup confectioners sugar
- 2 tablespoon half-and-half (use more as needed)
- 1 teaspoon coconut extract
Instructions
- Preheat oven to 350°F (175°C/Gas Mark 4). Grease your 9x13 baking pan with butter or use non-stick cooking spray.
Pastry Crust & Crumble Topping
- For the crust/topping: in a large mixing bowl or stand mixer bowl add flour, sugar, salt and cubed butter. Use a pastry cutter if using a mixing bowl, or using your stand mixer, combine until crumbly.
- Reserve 1 cup of the crust/topping crumbles to use as the topping later. Transfer the rest of the crust mixture to your 9x13 pan and cover the bottom of the pan completely, pressing the crust mixture down to make an even base layer.
- Bake the crust for 15 minutes in your preheated oven. While the crust is baking, start mixing the pineapple filling.
Pineapple Filling
- In a large bowl or your stand mixer bowl, combine beaten eggs, sugar, sour cream, salt, flour, and pineapple. Stir gently to combine.
- After the crust has baked for 15 minutes, allow to cool for a few minutes then spoon the filling over the crust layer. Crumble the reserved 1 cup of the crust mixture over the filling layer and bake for 1 hour or until golden (lightly).
- Allow baked pineapple bars to cool for 15 minutes on a cooling rack.
Coconut Icing
- While cooling, mix up the coconut icing: in a small bowl, combine confectioners sugar, half-and-half, and coconut extract.
- Stir until the icing is smooth and thick enough to slowly drizzle over the pineapple bars (add more confectioners sugar if needed, to thicken - conversely, add more half-and-half if the icing is too thick).
- Drizzle the icing over your pan of cooled pineapple bars, cut into squares and serve.
Video
Notes
- Use 1 stick butter for each ½ cup (8 tablespoons).
- For even more coconut and tropical flavor, add coconut shavings (toasted or not) to the top before or after the icing is drizzled on the pineapple bars.
Nutrition

Angela is an at home chef that developed a passion for all things cooking and baking at a young age in her Grandma's kitchen. After many years in the food service industry, she now enjoys sharing all of her family favorite recipes and creating tasty dinner and amazing dessert recipes here at Bake It With Love!


Olga says
All ready to go this weekend, but isn't 1 hr for second baking a little much?
Sounds like a winner!
.
Angela @ BakeItWithLove.com says
This is one of my favorite desserts to make, and I've made it so many times! You can check it earlier but the hour bake time is really spot on. Enjoy!
Kathy D. says
I have a half sheet pan should I double the recipe?
Angela @ BakeItWithLove.com says
Yes, that should work wonderfully!
Doris Kochergen says
Isn’t it important to know if the crushed pineapple is drained or not?
Angela @ BakeItWithLove.com says
It is! I'm updating the recipe right now, thanks for asking! 🙂
Sylvia Henderson says
Crust -flour amt not enough to cover the bottom of 13x9 pan and save 1cup.
?Should be 21/2 c flour and save 1 cup for topping
Angela @ BakeItWithLove.com says
You can certainly increase the crust amount if desired. It does work in a 9x13 as-is, the photos and videos are exactly as instructed here (it's a personal favorite and I've made it 100's of times).
Thyme in My Kitchen says
Was in a hurry while making this so misread ingredients. No coconut extract. I used fresh pineapple adding about 1/4 c extra. Added sweetened coconut to the filling and rum extract to the glaze. Was yummy!
Angela @ BakeItWithLove.com says
I love those additions, sounds delicious!!
Dianna says
When using fresh pineapple, do you need to prep it in anyway before cooking in the oven? I know it doesn't play well with some ingredients because of the enzyme it contains, and I thought you had to precook it or something before using it in a recipe. I've got fresh pineapple in the fridge and can't wait to make this recipe! I don't have coconut extract...would a little rum work in the frosting?
Angela @ BakeItWithLove.com says
I use my fresh pineapple right off the cutting board, it will be just fantastic! And the rum sounds amazing, I'd use it in a heartbeat. 🙂
MissLyn says
Rum in the icing would rock. Great idea - Pina Colada Icing.
Chandra says
These turned out so well. The streusel kind of base worked perfectly. I used a defrosted quart bag of pineapple chunks I had frozen and ended up doubling the filling due to volume. I also added some rum and vanilla so I used a total of 5 eggs. I didn't make the icing but I'm sure that is also wonderful.
Angela @ BakeItWithLove.com says
Rum would be so delicious in these! Glad you enjoyed them!!
Holly says
Oh my goodness!! These area 15 out of 10!! My family is freaking out over these bars. Seriously, the best thing you will eat in months!
Angela @ BakeItWithLove.com says
I'm a pineapple fan, so I couldn't agree more! Thank you for stopping in to share!
Kathryn Thieben says
I made these and did your suggestion to add a little coconut before the drizzle. My husband is trying to tell me they aren't good so he can take the whole batch to work. Do they need to be refrigerated?
Anonymous says
Do they need to be in refrigerator after baking she didn't answer
Angela @ BakeItWithLove.com says
I did miss that question but answered it here in the comments now. Yes, please refrigerate the pineapple bars if you need to store them for up to 3-4 days. My experience is that they won't last very long at all! 🙂
Angela @ BakeItWithLove.com says
Depending on how long these tasty pineapple bars last, you may want to store them in the fridge. If you're taking them to a potluck or party they will be just fine at room temperature for the day. Any longer than that and you should go ahead and refrigerate them so that you can enjoy them during the week. I would freeze them to hold them over longer than 3-4 days. Sorry for the delayed response!
Joyce says
Can these be frozen? Definitely making for Christmas!
Angela @ BakeItWithLove.com says
The pineapple bars freeze exceptionally well! You can freeze them for up to 3 months, just hold off on adding the icing until you're ready to serve them. Thaw in the fridge overnight, then top with the icing and serve. Thanks for asking!
Shilpa Nair says
Hi, what can I use instead of sour cream?
Angela @ BakeItWithLove.com says
Depending on where you are, and what is available to you, there are a couple of things that I would pick as the first and best options for sour cream substitution. 1) Creme fraiche, 2) Greek yogurt, or 3) plain yogurt. Hope that helps!
Bunny says
These would be very yummy with coconut in the filling too.
Angela @ BakeItWithLove.com says
They would be fabulous with coconut! I have a different version that does include coconut, I just haven't added it to the blog...yet 🙂
S.-P. says
Do you need to drain the crush pineapple first? Thank you!
Angela @ BakeItWithLove.com says
Yes, drain off the excessive pineapple juice (but you don't need to get every bit of juice) as when I make this with fresh or canned I like to add some of the juice to the filling mixture. It won't hurt anything if some is missed. Thanks for asking! Enjoy!!
Dolores says
Used your recipe but combined some sweet cherries with the pineapple. I did not want to waste any of the fruit. Smells very yummy, and looks delicious.
Angela @ Bake It With Love says
Adding the cherries sounds fantastic! I have some on hand too, but they're reserved for a cherry tart 🙂 However, I am on my way to go make a new batch of these pineapple bars and can't wait to enjoy some more myself! How did yours turn out? Did you use the glaze/drizzle?