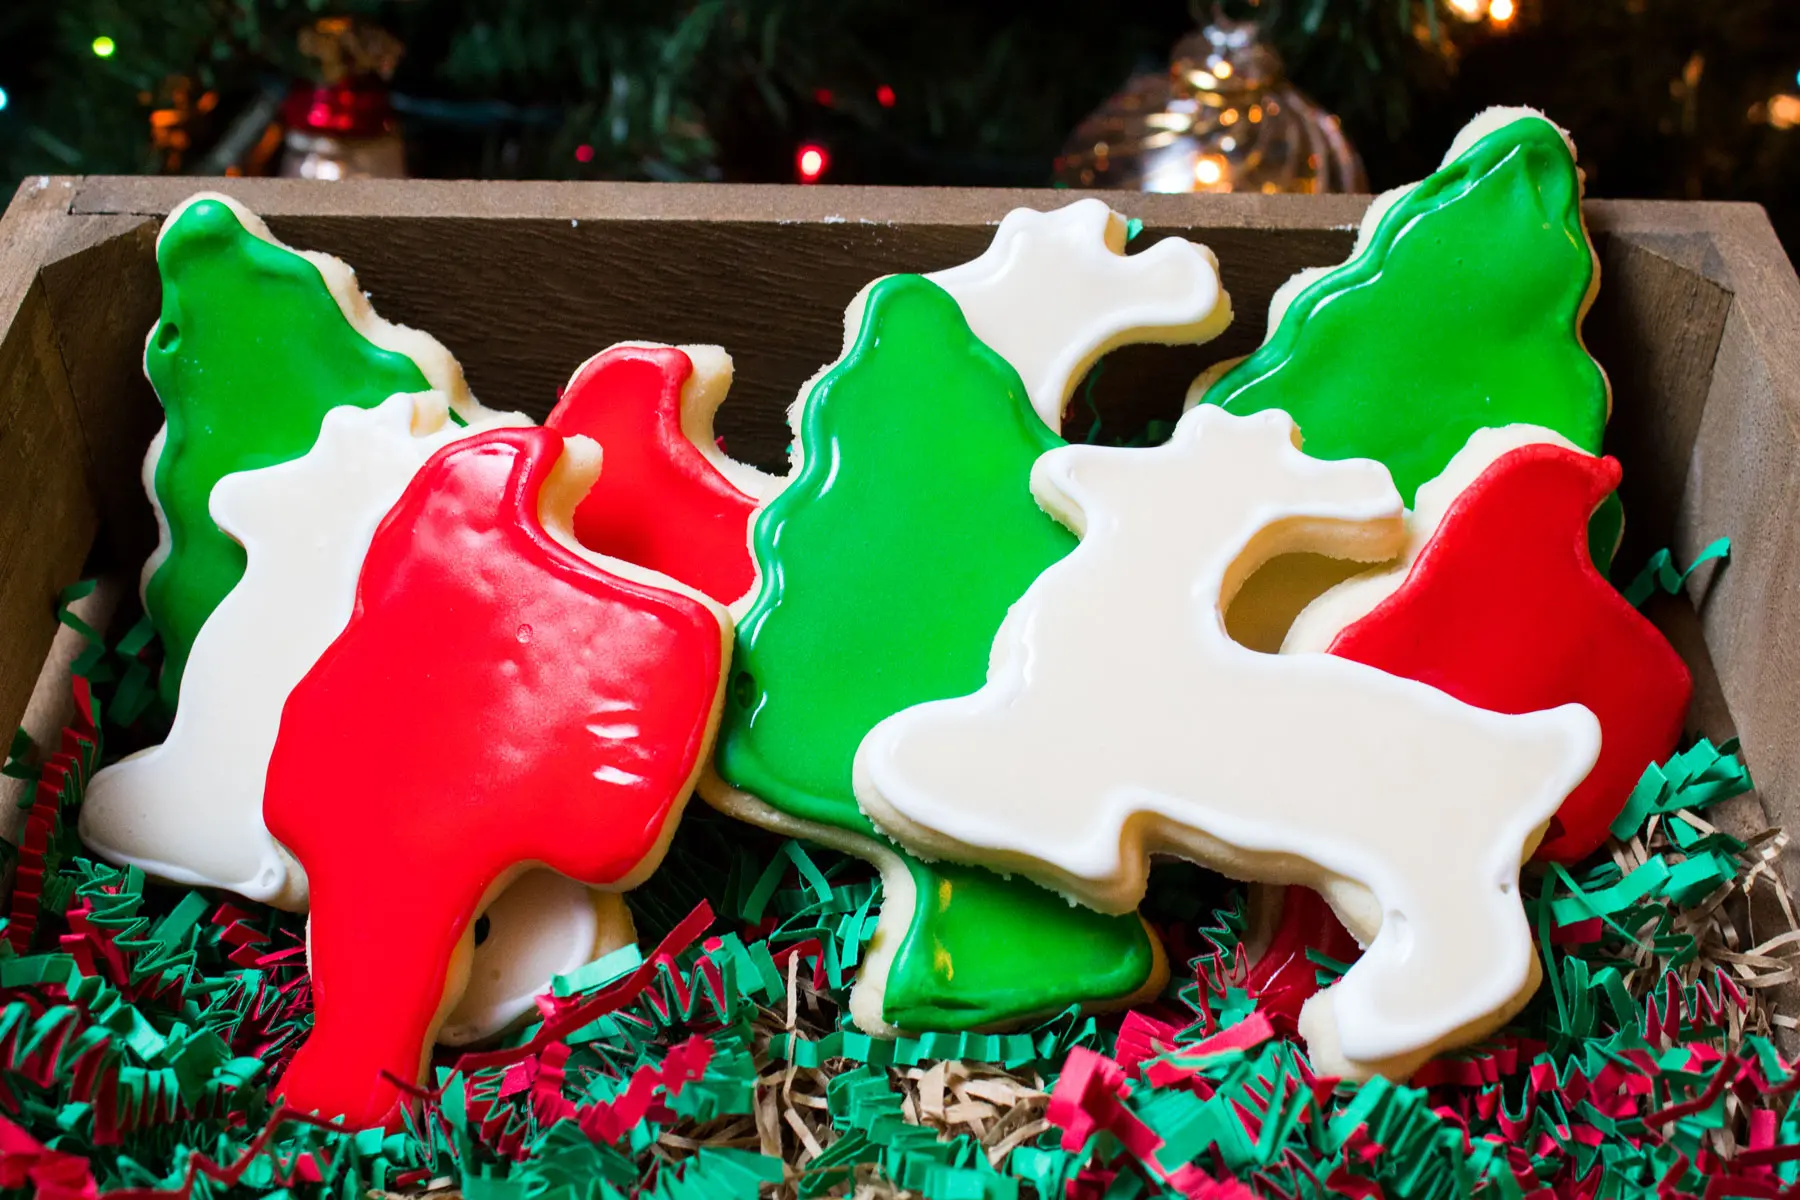
This guide on how to make cut out cookies will teach you to make the ideal sugar cookie dough for cutting into beautiful shapes! These tips and tricks include everything from rolling the dough to frosting the cookies, there are even some easy recipes to try! With this guide, you will be making cookies like a pro in no time!
How To Make The Best Cut-Out Cookies
When it comes to cookies, cut-out cookies are a favorite for many around the holidays. These cookies can be made from a simple sugar cookie dough and turned into something fun and festive.
Whatever holiday or special occasion you want to make cut-out sugar cookies for, there are some secrets to getting the best cookie. This guide to cut-out cookies will give you all the details you need to make the best cut-out cookies any time of year.

Jump to:
- How To Make The Best Cut-Out Cookies
- Butter is Best
- Other Types of Fat
- Fats to Avoid
- Mix, But Not Too Much
- What Type of Flour is Best?
- Take Time to Chill
- Roll the Dough
- How Thick Do You Roll the Dough?
- Cut Your Cookies
- Don’t Re-roll Too Much
- Bake Your Cookies
- Let Baked Cookies Cool
- Frosting Cut Out Cookies
- Storing Cut Out Cookies
- 🍪 More Baking Guides
- 📖 Recipe Card
- 💬 Reviews
Butter is Best
The perfect cut-out cookie is not just about getting the right shape, but the right flavor. Therefore, butter is best when making cut-out sugar cookies.
Butter provides the perfect rich buttery flavor that makes a cookie. Moreover, it is the perfect type of fat for cut-out cookies. The high fat content that naturally includes about 20% water will yield a lovely moist cookie.
Other Types of Fat
While I love butter because of its flavor it is not the only choice of fat for sugar cookies. In addition to butter, shortening, margarine, or lard would also work.
Both shortening and lard have a high fat content. In fact, they are 100% fat and do not contain any water. Therefore, the final texture will be slightly different than it would be made with butter.
Cookies made with shortening or lard do not spread as much as butter cookies. The result will be thicker cookies that are denser and that hold their cut out shape very well.
One distinct difference between these two choices and butter is the lack of flavor. Shortening (unless you're using butter flavored shortening) and lard have neutral flavors. Therefore, they will not add a rich buttery flavor to your cookies.
Fats to Avoid
Whether you choose butter, shortening, or lard the most important thing is to choose a high-fat option. Avoid low-fat butter, such as whipped butter. These will result in flat cookies that lack flavor and texture.
Tips
If you choose to use butter, make sure to remove it from the fridge to soften at room temperature. You will want it to be soft to the touch to make it easy to cream with the sugar. However, you do not want it to melt.
Melted butter will result in flat and crunchy cookies. Since shortening and lard are typically kept in the pantry, they should already be at room temperature.
Mix, But Not Too Much
Once you have creamed the sugar and butter and added the eggs, the next step is to add the dry ingredients. While it requires thoroughly mixing the dry ingredients into the wet ingredients, you don’t want to over-mix it.
One of the things that help cookies get their shape and texture is the gluten in the flour. Gluten is finicky though. It needs to be activated by mixing it with wet ingredients but if it is overly activated it gets tough.
Therefore, once the flour is incorporated turn your mixer off to avoid over-activating the gluten.
While this may seem like a small thing, it will make a big impact. Too much mixing of the flour will result in tough cookies, rather than tender chewy cut out sugar cookies.
What Type of Flour is Best?
Since we are talking about flour, just a quick note on the best flour to use. Your recipe will most likely specify using all-purpose flour. This is the best choice since it will give you the desired texture of a cookie that is soft and chewy.
If you don’t have access to all-purpose flour, you can substitute all-purpose flour with other wheat flour or pastry flour. However, it will alter the texture of the cookie slightly.
To make a gluten-free cut-out cookie it is best to search for a cookie recipe that is specifically formulated with gluten-free flour.
Using bread flour (high in gluten protein) or cake flour (high in starch) will yield cookies that don't spread while baking.
Some bakers like the chewiness achieved with bread flour, so in a pinch it can be used. Or use in combination with AP flour.
For an ultimately soft and tender cut out cookie, you can use cake flour. Cookies made using cake flour are delightfully delicate and this is my favorite swap for all-purpose flour in cookie baking.
Take Time to Chill
A key to good cut-out cookies is chilled dough. I know, it is not the most fun thing to wait for cookie dough to chill. However, it will be worth it.
Want to skip the wait? Check out my no chill sugar cookie recipe!
The best way to chill dough is to form it into a ball and wrap it tightly with plastic wrap. Make sure that all sides are covered so that the dough does not dry out. Place the dough in the refrigerator to chill for at least 1-2 hours.
Do NOT freeze the dough! Putting the dough in the freezer to chill will most likely freeze the dough and make your process longer.
However, if you are making dough several days or weeks ahead of the holidays, you can freeze it and then move it to the fridge to thaw a day or two before using.
Roll the Dough
Once your dough has properly chilled it is time to roll it out. The key to perfectly cut-out cookies is to use a rolling pin and flour when rolling out the dough.
Sprinkle your countertop (that you have previously cleaned) with a bit of flour. Then, rub a bit of flour on the rolling pin. Using flour on the counter and a rolling pin will prevent the dough from sticking and allow you to get smooth cookie dough to cut.
How Thick Do You Roll the Dough?
Most recipes will specify how thick to roll the dough. However, if the recipe doesn’t state a specific thickness aim for about a ¼ inch. This will create cookies that are not too thin and not too thick.
Rather, you will get cookies that are wonderfully soft and chewy, with a light golden outside.
While you can choose to roll your cookies thinner or thicker, the most important thing is to roll them out evenly. The best way to get an even cookie is to begin by placing the rolling pin in the center of the dough.
Gently press the ball of dough down so it is easier to begin rolling. Then, firmly press the rolling pin into the center and begin to roll outwards towards the sides.
To keep things even, begin from the middle of the dough every time and then alternate which side you roll out towards.
Continue rolling the dough until you have reached an even thickness across. If the dough begins to stick to the rolling pin, rub more flour on it as needed.
Additionally, you may need to sprinkle some flour on top of the dough the more it warms up during the rolling process.
Cut Your Cookies
Once your dough is rolled you are ready for the fun part, cutting your cookies! Just because this is the fun part, it can sometimes be frustrating as well if the cookie shapes begin to break.
To keep it fun, prepare for cutting your cookies with a few helpful tips:
- Dip the cookie cutter in flour each time before you cut.
- Use a flat metal spatula to help scoop up the newly cut shape off the counter in one piece.
- Have the cookie sheet close by to quickly transfer the shape to the cookie sheet.
To get the most from your cookie dough, start at the center of your rolled dough with your cut out shapes. Place the edge of each new cookie cutout as close as possible to the other previously cut-out cookies.
This will help you avoid wasting dough or over-rolling your dough to reuse later.
Cut out all of your shapes then peel away the cut dough from the outer edges in. This way you can easily lift and transfer your cut out shapes to your baking sheet.
Don’t Re-roll Too Much
Re-rolling your dough is the same as over-mixing it. It will lead to overly tough cookies. Therefore, avoid re-rolling the dough more than once.
I suggest rolling out all your dough first and getting as many cookies as you can from the first roll. Then, roll it back into a ball and do one more batch of cutouts.
After the first re-roll, you will still have a little bit of dough left over. Rather than re-rolling it, have fun making silly-shaped cookies or easy sugar cookie rounds and bake them up simply to enjoy eating.
Bake Your Cookies
To get the most from your cookies and the best outcome, follow these tips.
- Line your cookie sheet with parchment paper to make things easy to clean up. While this is not required it will be helpful.
- If your recipe calls for a greased cookie sheet, grease it with cooking spray, oil, or shortening before placing parchment paper on top.
- Bake cookies that are similar in size together on one cookie sheet.
When making cut-out cookies most of us have several cookie cutters we like to use. If there is a wide variety of sizes in the cookie cutters, then bake the cookie shapes in batches.
Baking cookies in batches with cookies that are a similar size will help every cookie bake evenly. Moreover, it will help you avoid overcooking smaller cookies.
- Remove cookies from the oven when the edges have just become a light golden brown.
- Let them rest on the cookie sheet for 5 minutes to finish cooking.
This will result in a delightfully tender, chewy cookie that is not overcooked!
Let Baked Cookies Cool
Most cut-out cookies are made with the intention of frosting them. Therefore, it is important to let them fully cool before you can frost them or decorate with icing.
As mentioned above, let your cookies finish cooking and begin to cool on the cookie sheet when it is removed from the oven. When the cookies are slightly warm you can transfer them from the cookie sheet to a wire cooling rack (if you don’t have a cooling rack you can move them to a plate).
Let each batch of cookies continue to cool away from the oven while you continue baking additional batches. Once all the cookies are baked, you can continue to let them cool while you prepare the frosting.
For cookies that you intend to decorate with icing, allowing the cookies to set out overnight will make a better surface to apply the icing to. You will have less icing that seeps into the cookie if it has had a chance to dry out.
Frosting Cut Out Cookies
The only real rule for frosting cut-out cookies is to make sure they are completely cool before adding frosting. The cookies should be cool to the touch. If you feel any warmth, let them continue cooling.
After the cookies are fully cooled then have fun! Whip up your favorite batch of buttercream frosting or try a tasty cream cheese frosting. If you want to add color, then slowly add a drop or two of food coloring.
Here are a few of my favorite sugar cookie frosting & icing recipes:
- Glossy Sugar Cookie Icing (that hardens)
- Vanilla Bean Buttercream Frosting
- Peanut Butter Buttercream Frosting
- Chocolate Buttercream Frosting
- Peanut Butter Cream Cheese Frosting
- Sugar Cookie Frosting (that hardens)

If you're decorating with icing and want to layer your colors, allow plenty of time for the cookies to dry out overnight.
Plus, you will need approximately 4 hours of letting the base layer of icing set before layering designs for more intricate cookie decorating.
Food Coloring Tip
A little food coloring goes a long way. Therefore, play it safe and always start slow. You can add more, but you can’t remove it.
If you want to make several colors of frosting begin by making one big batch of white frosting. Then, split it into smaller bowls and mix in the different food colors by hand.
Whether you choose an assortment of colored frostings and other decorative additions like sprinkles or keep it simple with circle cookies and white frosting, follow the tips in this guide for a perfect cut-out cookie every time.
Always make enough frosting or icing with your desired color to get the job done. If you need to mix more, it's hard to match your colors exactly!
Storing Cut Out Cookies
Unfrosted sugar cookies can be kept in an airtight container or storage bag for up to 7 days. If you have frosted the cookies, you may want to layer wax or parchment paper between them so they do not stick together.
For more on getting the most out of your sugar cookies, take a look at my informative posts on how long sugar cookies last and how to freeze sugar cookies!
🍪 More Baking Guides
- How To Make No Bake Cookies - Tips, tricks, and recipes for making the best no-bake cookies!
- How To Make Dump Cakes - Everything you need to know about these easy and delicious cakes!
- How To Freeze Pumpkin Pie - These tips will definitely come in handy around the holidays!
- How To Make Custard Powder - Just think of all the delicious custard desserts you can make!
- How To Make Bread Flour - Learn to make your own bread flour from scratch.
- How To Activate Yeast - This is especially important if you love baking homemade bread!
Are you now confident you know how to make cut out cookies? If you have any questions, please let me know by commenting down below!
Do you love a recipe you tried? Please leave a 5-star 🌟rating in the recipe card below and/or a review in the comments section further down the page.
Stay in touch with me through social media @ Pinterest, Facebook, Instagram, or Twitter! Subscribe to the newsletter today (no spam, I promise)! Don't forget to tag me when you try one of my recipes!
📖 Recipe Card
How To Make Cut Out Cookies: Classic Sugar Cookies (The Ultimate Guide!)
Ingredients
- ¾ cup butter (1 ½ sticks, softened at room temperature)
- 1 cup sugar
- 2 large eggs
- 1 teaspoon vanilla extract (or extract of your choice)
- 1 teaspoon baking powder
- ½ teaspoon salt (use 1 teaspoon salt with unsalted butter)
- 2 ½ cups all-purpose flour
Instructions
- In a large mixing bowl (or the bowl of your stand mixer), cream together the butter and sugar. Add the eggs, vanilla extract, baking powder, and salt and combine thoroughly.
- Add the flour and stir until all of the flour has been incorporated into your sugar cookie dough. If you are going to roll your cookies out soon, you can place the bowl in the refrigerator to chill for at least one hour.
- If it is going to be a while (up to 3 days) before you will be rolling out your dough, wrap the dough in cling film to refrigerate and chill.
- Preheat your oven to 375°F (190°C) and line your baking sheet(s) with parchment paper.
- After your dough has chilled, work with small portions of the dough on a floured surface. Roll out until ¼ inch thickness and cut into desired shapes. Transfer to a parchment paper lined baking sheet and bake for 6-9 minutes at 375°F (190°C).
- Remove your cookies from the oven before getting golden around the bottom edges. Allow them to remain on the baking sheet for 5-6 minutes before transferring to a wire cooling rack to cool completely.
Notes
Nutrition

Angela is an at home chef that developed a passion for all things cooking and baking at a young age in her Grandma's kitchen. After many years in the food service industry, she now enjoys sharing all of her family favorite recipes and creating tasty dinner and amazing dessert recipes here at Bake It With Love!


Comments
No Comments